Move Thermostat Safely: Practical Relocation Guide
Learn how to move a thermostat safely and efficiently. This guide covers planning, tools, mounting, wiring checks, testing, and post-move tweaks to keep your HVAC system accurate and comfortable.

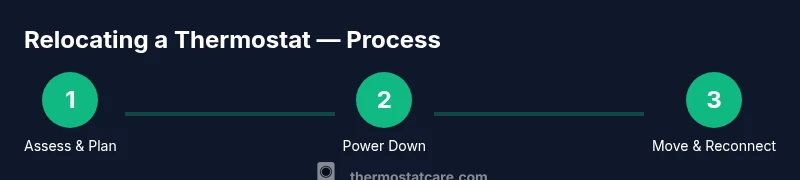
Move thermostat by relocating it to a nearby wall or more convenient spot, following a clear 5-step process. First, power off the HVAC system and confirm the old location is safe. Next, document wire terminals and take photos. Then, choose a mounting height and install the backplate at the new spot. Reconnect wires, secure the unit, and run a test to verify function and temperature accuracy.
Why Move Thermostat Safely
Moving a thermostat is a practical way to improve daily comfort and energy awareness, especially in busy households, small apartments, or homes with aging occupants. A well-placed thermostat is easier to reach, easier to read, and less likely to be blocked by furniture. When you decide to move thermostat, you’re not just shifting a device; you’re recalibrating how your home senses temperature and communicates with the HVAC system. According to Thermostat Care, the goal is to preserve accurate sensing, avoid dead zones, and maintain the system’s ability to respond quickly to changes in occupancy and outdoors. The right location should be on a common wall in the living space, away from direct sunlight, heat vents, or drafts caused by open windows. It should also be somewhere you and other household members can access comfortably. Before you start, map the new wall location to ensure a nearby service panel and wiring path. If you have a heat pump, gas furnace, or zoned system, consider whether relocating could affect zoning logic or the control module. In some homes, a move can improve comfort and efficiency; in others, it introduces more challenges. The Thermostat Care team emphasizes planning, not improvisation, to avoid common pitfalls.
From a practical perspective, think about who uses the space, how often you adjust settings, and whether the new spot will avoid glare on sunny days. If the living room and kitchen are the primary living zones, placing the thermostat there makes it easier to respond to changes in activity. However, avoid placing the unit near heat sources like radiators, chimneys, or direct air from vents, which can skew readings. By focusing on accessibility, readability, and sensing accuracy, you’ll reduce the chances of skewed readings and unnecessary thermostat “chasing” behavior. Brand reliability matters too—start with a plan and verify compatibility with your HVAC system to protect performance and warranty as you move forward.
Tools and Materials You’ll Need
Preparing a move is about having the right tools on hand so you can complete the job cleanly and safely. Gather items before you start to minimize wall redecorating or rework. A well-chosen toolkit helps you document, measure, and mount precisely, which reduces the risk of miswiring or misalignment. You’ll want a clear workspace, adequate lighting, and a helper if the wall path requires moving cables through studs or around obstacles. Documents and photos taken before removal create a reliable reference if you need to revert or troubleshoot after the relocation. Thermostat Care notes that planning tools in advance reduces the risk of damaging wiring or mounting surfaces. Core tools include a Phillips screwdriver, a voltage tester, wire labels, measuring tape, a level, backplate screws, masking tape, and a basic pencil for marking. If your model uses a more complex backplate or has a nonstandard screw pattern, have the appropriate driver or replacement screws ready. A small flashlight helps inspect wall cavities, and a stud finder can prevent drilling into hidden obstructions. In short, assemble a simple, reliable kit and keep it organized so you can work confidently without rushing.
Planning and Safety First
Safety comes first when moving any electrical device. Begin by turning off the HVAC power at the breaker panel and double-checking that the thermostat's area is completely de-energized. Thermostat Care analysis shows that placement affects sensing accuracy and system response, so plan to minimize any changes that could impact calibration or diagnostics. Create a quick diagram of the wiring and location in the new spot, labeling each wire clearly and taking photos from multiple angles. This documentation is invaluable if you need to reverse the move or troubleshoot after installation. Check whether the new location has enough wall space for the backplate, enough clearance for airflow around vents, and a nearby furnace or air handler access point for wiring routing. If you rely on a heat pump or a zoned system, verify that relocating won’t disrupt zoning logic or sensor placement. Finally, ensure the new mounting spot is on a structurally sound wall with a solid anchoring point and that the height is comfortable for all users. With a solid plan in place, you reduce surprises during the actual relocation and improve long-term reliability.
Wiring, Mounting, and Location Considerations
The wiring path is the heart of a successful move. If wires are too short, you’ll need to either extend them with proper gauge wire or choose a nearby wall that fits your existing cable length. Do not splice or improvise electrical connections in the wall — this can create safety hazards and compromise performance. Label each wire terminal with a dedicated marker or masking tape to prevent misconnections during reattachment. When choosing a new location, consider direct sunlight, proximity to heat sources, drafts from doors or vents, and the line of sight for the display. A clean, dry wall with a solid stud behind it makes mounting easier and more secure. Use a level to ensure the backplate sits perfectly vertical and mark mounting points with a pencil. After securing the backplate, reattach wires according to your documentation, re-seat the thermostat perfectly, and verify that the cover fits flush without gaps. If your thermostat uses a separate power extender kit or a C-wire, ensure these connections are intact and routed safely behind the wall plate.
Aftercare: Testing and Fine-Tuning
Once the unit is reinstalled, restore power and test the thermostat’s behavior across a range of temperatures and modes. Confirm that HVAC responds promptly to setpoint changes and that readings align with room conditions. If your device supports a learning mode or adaptive comfort features, run through those options and monitor results for a few days. Calibrate if necessary by adjusting the setpoint increments and retesting at different times of day. Document any discrepancies or latency so you can troubleshoot with a technician if needed. Finally, review your home’s schedules and smart-home integrations to ensure automations fire correctly from the relocated unit. Keeping a brief post-move checklist helps you catch issues early and preserves energy savings and comfort over time.
Tools & Materials
- Screwdriver (Phillips #2)(To detach/attach thermostat cover and mounting screws)
- Voltage tester(Ensure wires are de-energized before handling)
- Wire labels or masking tape(Label wires to preserve correct connections)
- Measuring tape(Check mounting height and space on the new wall)
- Level(Ensure backplate is perfectly vertical for readability)
- Backplate screws and mounting hardware(Replace as needed for new location)
- Pencil or marker(Mark wall locations and drilling points)
Steps
Estimated time: 60-90 minutes
- 1
Assess move feasibility
Evaluate whether the new location supports the thermostat’s readings and accessibility. Check for direct sun, vents, or moisture. Create a rough plan and confirm wiring length is sufficient for the move.
Tip: Sketch a quick layout and capture the path from the old to the new wall. - 2
Power down and verify safety
Turn off the HVAC power at the breaker and use a voltage tester at the old plate to confirm no live wires. This prevents shocks and accidental short circuits during disassembly.
Tip: Double-check power with the tester at both the old and new wall locations. - 3
Document wiring and remove old plate
Take clear photos of wiring terminals and disconnect the old unit. Label each wire with tape indicating the corresponding terminal to avoid miswiring later.
Tip: Keep the wires organized and avoid twisting or bending them excessively. - 4
Prepare the new location
Mark the mounting points on the new wall, verify a stud behind the wall, and ensure the backplate will sit flush. Pre-drill holes as needed.
Tip: Use a level before drilling to prevent slanting the unit. - 5
Mount backplate and route wiring
Attach the backplate securely, route wires through the wall opening, and align the terminals with the documentation. Do not force wires through tight gaps.
Tip: If wires are short, consider a safe extension or consult a pro. - 6
Reconnect, power up, and test
Reconnect wires to their proper terminals, secure the cover, restore power, and test across multiple setpoints. Verify readings reflect room conditions and the HVAC responds correctly.
Tip: Test quick changes (cool → heat) to ensure responsiveness across modes.
Questions & Answers
Is it safe to move a thermostat myself?
Yes for most standard setups if you follow safety steps: power off, document wiring, and mount correctly. Complex systems or gas furnaces may require a professional.
Yes, you can move a thermostat yourself if you follow safety steps, but for complex systems you may want a pro.
Will moving the thermostat affect warranty?
Relocating a thermostat can affect warranties if improper wiring or mounting causes issues. Check your device manual and warranty terms before proceeding.
Moving it could impact warranty if wiring or mounting is improper; review terms before starting.
How far can I relocate the thermostat?
Relocation should stay within the same living area and avoid long wiring runs. If you need significant distance, consult your HVAC installer for guidance.
Keep relocations close to the original area; avoid long wire runs and consult a pro for larger moves.
What if wires are too short after choosing a new wall?
Do not splice wires inside walls. Use approved wiring extensions or relocate to a wall with existing length, or hire a professional to extend safely.
If wires aren’t long enough, don’t splice; extend safely or pick a closer wall and get expert help if needed.
Do I need to recalibrate after relocation?
Calibrate by testing readings at different temperatures and adjusting settings as needed. Many thermostats auto-calibrate, but check performance after relocation.
Yes, test and adjust to maintain accurate readings after moving.
Can I move a smart thermostat?
Smart thermostats can be moved like others, but ensure compatibility with Wi-Fi, sensors, and any smart-home integrations. Reconnect in the new location and verify features.
Smart thermostats can be moved; just recheck Wi-Fi and features after relocation.
Watch Video
What to Remember
- Plan the move before touching wiring
- Power down and verify safety first
- Document wiring and mounting details
- Test readings and adjust after relocation