How to Move a Thermostat Safely: A DIY Relocation Guide
Learn how to move a thermostat safely with clear, step-by-step instructions, wiring checks, wall patching, and safety precautions to protect your HVAC system. Thermostat Care provides expert guidance for homeowners and DIY enthusiasts.

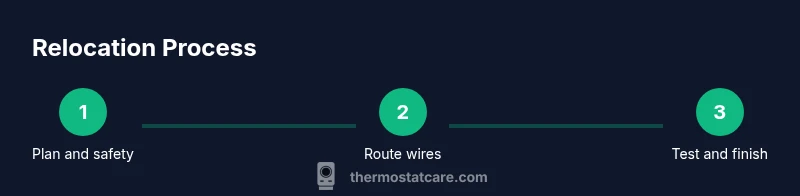
Moving a thermostat safely requires powering down the circuit, removing the device, choosing a new wall location, routing wires correctly, and reinstalling with proper terminals and a secure mounting plate. See the full step-by-step guide for detailed instructions.
Feasibility and Safety Considerations
Relocating a thermostat is feasible in many homes, but not all. The most important factor is whether the thermostat can be safely wired at a new location without creating a code violation or jeopardizing the HVAC system. Start by reviewing the thermostat's wiring type (two-wire, three-wire, or common C-wire). An old or damaged wiring harness can complicate relocation and introduce reading errors or intermittent operation. Before proceeding, confirm you have an accessible power source for the HVAC control circuit and that the new wall can accommodate a standard low-voltage backbox.
From Thermostat Care's perspective, a careful assessment reduces the risk of post-relocation failures. If you encounter a missing C-wire or a furnace control board with unusual terminals, consider hiring a pro. Absolute safety should guide every step: turn off the power at the breaker, verify absence of voltage with a tester, and avoid working on live circuits. When in doubt, postpone the project, or relocate the thermostat only to an area where accessibility and wire routing are straightforward. Also consider whether the existing wiring run is long enough to reach the new location without excessive bending, and if you will need to pull new wires through walls. If your home uses older wiring insulation or a gas furnace with a sealed system, extra caution and possibly permits may apply.
Planning the Relocation: Location, Wiring, and Compliance
Choosing the right spot for your thermostat is about balance: visibility, accessibility, and proper environmental conditions. Avoid direct sun, drafts, or heat sources like lighting fixtures or vents. Plan for a straight, short wire run to the HVAC control board, and ensure the new backbox will be fully supported by studs. Local codes typically require a dedicated low-voltage backbox and proper securing of all wiring; make sure you can meet these requirements without compromising wall integrity. Thermostat Care recommends mapping out the route with a stud finder and tape measure, then verifying that the new location has clear line-of-sight to the error-prone components of the HVAC system. If you rent, obtain landlord approval before any wall modifications.
Tools, Materials, and Prep
Before you begin, gather the essential tools and materials to avoid mid-project trips. You will need a voltage tester, a screwdriver (Phillips and flat-head), wire strippers, fish tape, a stud finder, a drywall saw, a backbox, new mounting screws, wire nuts, electrical tape, and a fresh wall plate. Have camera or phone handy to document the original wiring. Prepare the new wall area with dust protection and a clean workspace.
Drywall, Wall Box Installation, and Patchwork
Relocating a thermostat often involves cutting a new wall opening and installing a backbox flush with the wall surface. Trace the backbox outline carefully, cut the opening, and install the box flush with the wall. Secure the box to studs and test fit the mounting plate before wiring. If patching is required, use drywall compound, sand smooth, and repaint to blend with the surrounding wall. Proper patching prevents drafts and maintains wall aesthetics.
Wiring Layout and Power Considerations
A successful relocation relies on understanding low voltage wiring and how the thermostat interacts with the HVAC system. Confirm that you have a complete wiring bundle at the new location and whether a C-wire is available if your model requires it. If your old run used nonstandard wire or a shared power source, you may need to modify the circuit to ensure a stable 24 VAC supply. Keep the wire gauge consistent with your existing cable, and avoid undersized conductors that can overheat or degrade signal quality. Always verify that the furnace and air handler will respond correctly to the new connections before final installation.
Testing, Calibration, and Final Adjustments
With power restored, verify the thermostat powers on and communicates with the HVAC system. Run several heating and cooling cycles to confirm responses are accurate and consistent across modes. Watch for delayed calls to call for heat or cool, strange error codes, or erratic fan operation. If readings seem off, recheck wiring, especially C-wire connectivity, and ensure the thermostat is level and properly mounted. Finally, adjust the temperature calibration and display settings to your preference and house environment.
Tools & Materials
- Voltage tester or multimeter(Verify power is off before touching wires)
- Screwdriver set (Phillips and flathead)(For mounting plate and thermostat screws)
- Wire strippers and cutters(Remove insulation cleanly without nicking wires)
- Fish tape or wire puller(Pull wires through walls without damage)
- Stud finder(Locate studs to support backbox)
- Low-voltage backbox (single-gang)(Accepts thermostat wiring and mount)
- Drywall saw or rotary cutter(Create new wall opening)
- Wall plate and mounting screws(Secure mount in new location)
- Electrical tape(Seal and insulate connections)
- Camera or smartphone(Document original wiring (optional))
Steps
Estimated time: 2-6 hours
- 1
Power down and safety check
Switch off the circuit at the breaker. Use a non-contact tester to confirm there is no voltage on the thermostat wires. If you detect voltage, wait until power is off and recheck.
Tip: Always confirm power before touching wires. - 2
Remove thermostat cover and identify wires
Gently pry off the faceplate and note wire colors and terminal labels. If your thermostat uses terminal strips, label each wire with its function. Take a photo for reference.
Tip: Label wires and plan the reattachment map. - 3
Record existing wiring configuration
Document the wiring setup with a diagram or labeled photo. Typically you will see R, W, Y, G, and possibly C. Keep this reference handy for the new location.
Tip: Double-check terminal labels to avoid cross-wiring. - 4
Remove mounting screws and detach old base
Loosen the mounting screws and gently pull the thermostat base away from the wall. If wires are long enough, you can position the base outside the box to access terminals. Do not yank the wires.
Tip: Support the base to prevent it from snapping wires. - 5
Choose a new location and verify clearance
Mark the new wall location and ensure it is at a comfortable height (around eye level) and away from direct sunlight, vents, or moisture. Use a stud finder to confirm studs for backbox mounting.
Tip: A 3-5 ft arc from heat sources helps avoid false readings. - 6
Prepare the new wall box and opening
Trace the backbox outline, cut the opening, and install the box flush with the wall. Secure it to studs and test fit the mounting plate before wiring.
Tip: Leave room for wire slack and strain relief. - 7
Route wires safely to the new location
Carefully fish wires through walls using fish tape. Avoid sharp bends and protect wires with the wall cavity. Ensure there is extra slack at the origin for reattachment.
Tip: Keep conductors untwisted and straight for clean connections. - 8
Reconnect wiring to the new thermostat base
Connect wires to matching terminals (R to R, W to W, Y to Y, G to G, C to C). Tighten screws and test insulation. Recheck that no bare copper is exposed.
Tip: Refer to your photograph to ensure correct mapping. - 9
Mount the thermostat and reattach the faceplate
Attach the base to the new backbox, level it, and mount the thermostat face. Reconnect the cover and ensure the display powers on.
Tip: Verify level and clearance around the device. - 10
Power up and test system operation
Turn the circuit back on at the breaker. Run through heat, cool, and fan modes to confirm responses match user inputs. Look for error codes or unresponsive behavior.
Tip: If something doesn’t respond, recheck wiring and restart the test.
Questions & Answers
Is relocating a thermostat risky without professional help?
Yes. Relocating involves low-voltage wiring and control circuits. If you’re not comfortable with electrical work, hazards include shock, short circuits, or damaging the furnace control board. When in doubt, hire a professional.
Relocating a thermostat involves wiring and electrical safety; if you are unsure, consider hiring a professional for safety.
Can I move a thermostat without running new wires?
You can move if the existing cable reaches the new location and includes a C-wire if your thermostat requires it. If not, you'll need to pull new conductors.
If the current wires reach the new spot and include a C-wire if needed, you can relocate; otherwise, pull new wires.
Will relocation affect thermostat accuracy?
As long as wiring is correct and the thermostat is mounted at the right height away from heat sources, readings should remain accurate.
Accuracy stays good when you wire correctly and place the thermostat away from heat or direct sun.
How long does relocation take?
Typical projects take 2-6 hours depending on wall material, patching needs, and wiring challenges.
You’re looking at a few hours, usually between two and six, depending on walls and wiring.
What about smart thermostats?
Smart thermostats may require additional wiring considerations, power draw checks, and mounting considerations. Always check the manual.
Smart thermostats can need extra wiring checks and mounting care; consult the manual.
Watch Video
What to Remember
- Plan relocation carefully and verify viability
- Power down and test circuits before handling wiring
- Follow manufacturer guidance and local codes
- Test HVAC function after installation
- If in doubt, hire a professional