Can You Safely Remove a Thermostat? A Practical DIY Guide
Learn how to safely remove a thermostat with a clear, step-by-step approach for homeowners. Discover when removal is safe, the necessary tools, and how to store or replace the unit.

Yes, you can remove a thermostat in many cases, but only with proper shut-off, power disconnection, and caution around wiring. This quick guide helps homeowners decide when removal is safe and outlines the steps to prepare, disconnect, and label wires, then store or replace the device. Always consult your HVAC manual and local safety rules. If you smell burning, moisture, or the unit is connected to live AC, stop and call a professional.
Why removing a thermostat is sometimes necessary
There are several situations where removing a thermostat is appropriate: upgrading to a smarter model, relocating the control to a more convenient spot, troubleshooting a nonresponsive unit, or preparing for wall repairs. The Thermostat Care team emphasizes that removal should be deliberate and limited to safe cases. Before you begin, understand your system type (heat pump, conventional furnace, or zone control) and whether the thermostat is simply a cover over an older sensor. When executed correctly, removal can be a straightforward DIY task that minimizes downtime and keeps your HVAC system intact for future use. This article uses practical guidelines suitable for homeowners and DIY enthusiasts troubleshooting thermostats, with safety as the top priority.
Safety first: when removal is risky
Working with live electrical components presents real hazards. If your system uses high voltage, if you smell burning plastic, or you notice water intrusion near the wall box, stop immediately. Do not attempt removal in these conditions. Always power down and verify with a non-contact tester before touching any wires. If you have a smart thermostat with a powered base that remains energized via a wall supply, you may still have residual energy; treat all wiring as live until verified safe by the tester. For homes with older or unfamiliar wiring setups, consider calling a licensed professional rather than risking a shock or fire.
Wiring basics you should know
Thermostats use low-voltage wiring in most residential setups, typically a 24-volt circuit. Wires are connected to labeled terminals on the thermostat base. Colors aren’t standardized, so rely on the labeling rather than color alone. Take a deep breath and plan: labeling wires with the terminal name (R, C, W, Y, G) before you touch anything helps prevent miswiring during reinstallation. If you don’t see a terminal strip, you may be dealing with a simple inline wire harness. Understanding these basics helps you navigate the removal with confidence and reduces the risk of accidental damage to your HVAC system.
Preparing your workspace and checklist
Clear the area around the thermostat base. Have good lighting, a camera or notebook, and a clean workspace. Gather the essential tools: a screwdriver, a non-contact voltage tester, labeling supplies, wire nuts, and a blank wall plate. Remove items that could be damaged by dust or static and consider removing the thermostat’s faceplate separately if it’s snapped on. Planning ahead reduces the chance of mistakes and makes reinstallation faster. A tidy setup also helps you stay organized if you decide to upgrade to a new thermostat.
What you should expect during the removal process
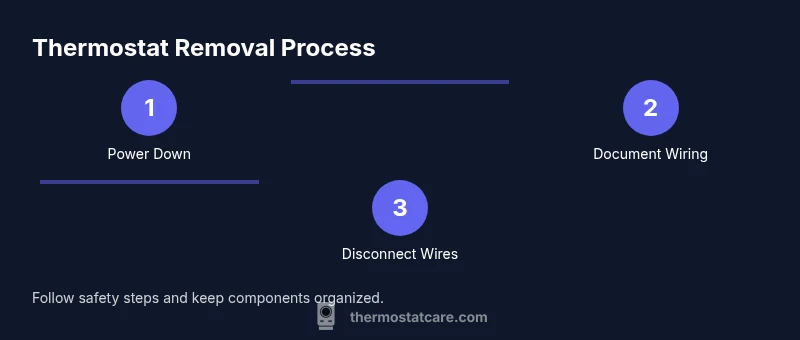
The removal process unfolds in a repeatable sequence, especially if you’re replacing the thermostat rather than simply removing it. You’ll power down, document the wiring, disconnect wires from terminals, unmount the unit, and secure any exposed conductors. Throughout, keep screws and small parts organized and use labels for each wire’s position. If you intend to reinstall later, labeling and photos are your best insurance against miswiring. Expect a small mess of dust and stray wires; taking your time ensures a clean, safe outcome.
Aftercare and next steps
Once the thermostat is removed, you’ve effectively paused control of the HVAC system. If you plan to replace it promptly, keep the existing wires intact and ready for the new base. If you’re shelving the project, cap the wires with wire nuts and install a blank wall plate to cover the opening. This protects you from accidental contact and drafts. According to Thermostat Care, documenting your setup in photos and labeling terminals reduces hassle during any future upgrade or reinstallation, and helps maintain system safety.
Tools & Materials
- Non-contact voltage tester(Verify no voltage at wires before touching.)
- Screwdrivers (Phillips and flat-head)(Have the correct size to avoid stripping screws.)
- Labeling supplies (masking tape and marker)(Label wires with terminal names.)
- Camera or smartphone(Document wiring from multiple angles.)
- Wire nuts and electrical tape(Cap and secure wires after removal.)
- Blank wall plate or replacement cover(Cover the wall box if not reinstalling immediately.)
- Multimeter (optional)(Helpful for checking continuity if needed.)
- Insulated gloves (optional)(Added protection when handling components.)
Steps
Estimated time: 20-45 minutes
- 1
Power down and verify
Turn off the circuit breaker that powers the thermostat circuit and set the thermostat to off. Use a non-contact voltage tester to confirm there is no voltage present at the wires. Wait 60 seconds to allow any residual energy to dissipate, then proceed.
Tip: Always test both the supply line and the thermostat terminals before touching wires. - 2
Document wiring with photos and labels
Take clear photos from multiple angles showing how wires connect to the terminals. Label each wire with its terminal name using masking tape, and note any unusual connectors. This record will guide reinstallation or replacement later.
Tip: Label color and terminal name—don’t rely on color alone. - 3
Disconnect wires from terminals
Loosen and remove each wire from its terminal screw or clamp. Gently pull the wire straight out to avoid damaging the terminal. If a wire is stubborn, use insulated pliers and proceed slowly.
Tip: Support the wires to prevent them from slipping back into the wall. - 4
Remove mounting screws and base
Detach the thermostat base from the wall by removing the mounting screws. Hold the base with one hand to prevent it from snapping back, and keep wires intact as you pull the unit away. If the wall plate is damaged, replace it.
Tip: Keep track of screws; they are often small and easy to lose. - 5
Cap and secure exposed wires
If the wires remain in the wall box, cap each end with a wire nut and wrap with electrical tape. Tuck the wires neatly into the box and place a blank wall plate to cover the opening. This prevents accidental contact and reduces draft risk.
Tip: Use a blank plate on unoccupied wires for safety and aesthetics. - 6
Inspect and plan next steps
Inspect the wall box for damage and debris. Decide whether you’ll install a new thermostat right away or store the wiring for future use. If you’re re-installing later, keep your photos handy and verify the new unit’s wiring diagram before connecting.
Tip: Keep your photos and notes accessible for quick reference during re-installation.
Questions & Answers
Can I remove a thermostat myself?
Yes, you can remove a thermostat yourself if you follow safety steps, power down, label wiring, and document connections. If you’re unsure about wiring or the system layout, consult a professional. This reduces the risk of electrical shock or HVAC issues.
Yes, you can remove it yourself if you shut off power and follow the steps carefully.
Do I need to shut off power to the circuit?
Absolutely. Always shut off power to the thermostat circuit at the breaker and verify with a tester before touching any wires. This prevents shocks and damage.
Yes—power off the circuit and verify with a tester before starting.
Will removing affect HVAC operation?
Removal disables thermostat control. The HVAC system may continue running in some configurations, but you won’t be able to command temperatures until a replacement or reinstallation is complete.
Removal disables thermostat control until you reinstall or replace the unit.
What should I do with exposed wires?
Cap each wire with a wire nut and secure with electrical tape. Use a blank wall plate to cover the opening and prevent contact.
Cap and secure exposed wires and cover the wall plate.
Can I reuse the old mounting plate?
If the mounting plate is undamaged and securely mounts the base, you can reuse it. If it shows wear or cracks, replace it to ensure a solid fit.
You can reuse it if it’s in good shape; otherwise replace it.
Is it safe to leave wires behind the wall?
Leaving wires behind the wall is not ideal. Use a blank plate and proper wire management. If you plan to reinstall later, label wires and store components safely.
Not ideal; cover with a blank plate and label for future use.
Watch Video
What to Remember
- Power down before touching any wires
- Label and photograph all connections
- Cap exposed conductors and cover the wall box
- Plan for replacement or storage and reinstall carefully