How to Take Off a Thermostat: A Step-by-Step Guide
Learn how to safely take off a thermostat for maintenance or replacement with a clear, step-by-step guide from Thermostat Care. Includes safety tips, required tools, and post-removal checks for DIY homeowners.

By following these steps, you can safely take off a thermostat for troubleshooting or replacement. You’ll power down the system, remove the front cover, label wires, and disconnect the thermostat from the wall plate. This quick guide, according to Thermostat Care, pairs safety with practical tips to avoid wire mix-ups and accidental damage. Remember: if you’re unsure, pause and consult the Thermostat Care troubleshooting resources. how to take off thermostat
Safety and Preparation
Before you start removing a thermostat, understand that the wall-mounted device controls your HVAC system. The safest approach starts with a clear plan and the right precautions. According to Thermostat Care, most thermostat removals are straightforward, but mistakes can lead to short circuits or accidental HVAC shutdowns. Begin by locating your main power source and verifying that you can safely work without energizing the thermostat wires. If your system is wired to a dedicated circuit or if you see a furnace control board, proceed with extra caution. Gather your tools, prepare a dry, organized workspace, and choose a well-lit area to work in. Confirm that you have a surface to lay the thermostat and a small tray or bowl to hold screws and connectors. Finally, ensure you understand whether you will simply remove the thermostat for maintenance or replace it with a new model. This clarity saves time and reduces risk. This guide explains how to take off thermostat safely and methodically.
Essential Tools and Materials
A successful thermostat removal relies on the right tools. The essential items below keep you organized and reduce the chance of wire mislabeling or damage.
- Screwdriver set (Phillips and flathead), because thermostat mounting screws vary by model.
- Non-contact voltage tester to verify that no live current is present before you touch wires.
- Wire labels or masking tape with a marker to label each wire by terminal.
- Small parts container or magnetic tray to keep screws and tiny connectors from getting lost.
- Camera or smartphone to photograph wire positions for reference during reinstallation.
- Flashlight or headlamp to illuminate tight spaces. Optional, but helpful: insulated gloves for safety and spare wire nuts if you need to cap exposed conductors.
Power Down and System Awareness
Powering down is the most critical step in this process. Turn off the circuit breaker that feeds the thermostat and, if available, switch off the HVAC blower at the furnace control. Wait at least 60 seconds to allow any residual voltage to dissipate. Use the non-contact voltage tester on the thermostat wires to confirm there is no live current before you proceed. If you see a bright light on the control board or hear the furnace ignite unexpectedly, pause and double-check your breaker. Understanding the exact type of system you’re dealing with (conventional, heat pump, or dual-fuel) helps you anticipate what you’ll encounter during removal and what replacement steps you’ll need later. Thermostat Care analysis shows that following a deliberate power-down routine reduces the risk of accidental electrical shocks and wiring mistakes.
Removing the Faceplate and Marking Wires
Remove the faceplate carefully by locating the mounting screws and removing them with the appropriate screwdriver. Gently pry the cover away from the wall, exposing the terminal strip. As you expose the wiring, label each wire with its terminal color or label using tape. Take a photo from multiple angles to build a reference for reinstallation. Keep the wires as they appear initially—don’t loosen any terminals yet. If a wire is stubborn, support the terminal and wiggle gently to avoid damaging the connector. This step is crucial to prevent wire mix-ups when you reconnect the thermostat or install a new unit. This preparation makes the rest of the removal smoother and reduces the risk of miswiring later.
Detaching the Thermostat from the Wall Plate
With the front now exposed, disconnect the thermostat from the wall plate following the manufacturer’s instructions. Some models detach by lifting the thermostat straight off the plate; others slide or twist to disengage locking tabs. If there is a terminal strip, unscrew or unplug each wire gently and keep them organized. Do not pull on wires; this can damage conductors or the wall. Once the thermostat is free, you can either tuck the wires back into the wall opening or move to a safe surface while you decide on replacement options. Labeling and documenting at this stage makes reinstallation quicker.
Handling Common Wire Configurations
Most thermostats use a handful of standard wires: R (power), C (common), W (heat), Y (cool), G (fan). If you’re removing a non-programmable unit, you may see a jumpered wire between terminals. Do not disturb such jumpers unless you’re replacing the control with a compatible model. For heat pumps, there may be O or B wires for reversing valve control. Take note of each wire’s color and terminal, as mismatches can prevent the new thermostat from functioning properly. If your wires are bound with a wire nut, cap them and tuck them neatly behind the wall using low-profile electrical tape.
What to Do After Removal
Decide whether you’ll cap and leave the wires in place behind a blank wall plate or completely remove them. If preserving the circuit, cover exposed conductors with wire nuts and secure with electrical tape. Restore the wall with a blank wall plate to keep dust out and maintain a clean appearance. If you’re replacing with a new thermostat, confirm that you have the new unit’s compatibility, wire map, and installation instructions. Store screws and mounting hardware in a labeled container so you can reuse them later.
Reinstallation or Replacement Options
When you’re ready to reinstall or replace, follow the new thermostat’s instructions step-by-step. Start by turning power back on and verifying that the system is responding as intended. Reconnect wires to the correct terminals, attach the thermostat to the wall plate, and reattach the cover. If you’re upgrading to a smart thermostat, you may need to configure Wi-Fi, download an app, and complete a pairing process. Keep your initial photos handy to confirm wiring matches the original setup.
Troubleshooting After Removal
If the thermostat won’t power back on after you reattach it, double-check the wire placement against your labels or photos. Ensure no wires are loose or misconnected, particularly the C wire, which can prevent power in some systems. If you replaced a base with a similar model, confirm the terminals align with the new unit’s wiring diagram. For smart thermostats, ensure the hub or bridge is correctly powered and connected. If issues persist, consult the installation guide or contact Thermostat Care for troubleshooting resources.
Final Checks and Next Steps
Before finishing, re-inspect all connections, verify that the faceplate is secure, and confirm the thermostat can be powered on without diagnostic errors. Keep a record of any wire changes for future reference and ensure you have a clear plan for reinstallation or upgrade. If you encountered unusual wiring or a non-standard setup, stop and seek professional help to avoid damage to your HVAC system. This cautious approach aligns with Thermostat Care’s guidance for DIY maintenance and safe removal.
Tools & Materials
- Screwdriver set (Phillips and flathead)(Have both sizes on hand; model screws vary)
- Non-contact voltage tester(Use to confirm no live current before touching wires)
- Wire labels or masking tape(Label wires by terminal to prevent confusion)
- Small parts container or magnetic tray(Keep screws and tiny connectors organized)
- Camera or smartphone(Photograph wiring layout for reference)
- Flashlight or headlamp(Ensure good visibility in tight spaces)
- Insulated gloves (optional)(Extra protection when handling wires)
- Wire nuts and electrical tape(For safely capping exposed conductors if wires are left behind)
- Blank wall plate (for post-removal)(Cover the opening if not reusing the unit immediately)
Steps
Estimated time: 60-90 minutes
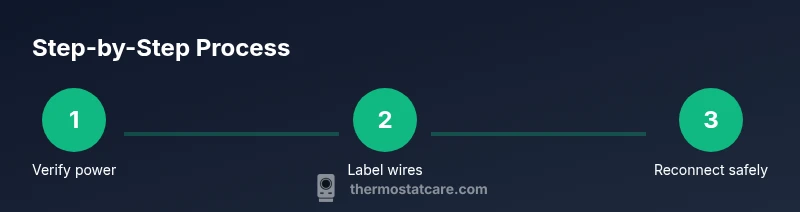
- 1
Verify power at breaker
Locate the thermostat’s circuit breaker and switch it to OFF. Use the voltage tester to verify that the thermostat wires are not live. This prevents electric shock and protects system electronics.
Tip: Double-check both the main and any sub-panels if you have a multi-stage setup. - 2
Remove the faceplate screws
Unscrew the mounting screws holding the faceplate with the appropriate screwdriver. Set the plate aside in a safe place while you work on the wiring.
Tip: Keep screws in a labeled container to avoid loss. - 3
Label and document wires
Label each wire with its terminal and take a clear photo from several angles. This will guide you when reattaching or installing a new thermostat.
Tip: If wires look identical, note their position relative to the terminal strip. - 4
Disconnect wires from the thermostat
Gently loosen terminal screws and remove each wire from its terminal. Do not pull on the wires themselves.
Tip: Support the wire from behind to avoid stress on connectors. - 5
Remove the thermostat from the wall plate
Lift the thermostat off the wall plate or disengage locking tabs as designed by your model. Keep the wall plate intact if you plan to reuse it.
Tip: If the wall plate is damaged, consider replacing it to ensure a clean reinstall. - 6
Secure and insulate exposed conductors
If you’re not reinstalling immediately, cap exposed wires with wire nuts and wrap with electrical tape. This reduces the risk of shorts.
Tip: Do not cut wires unless you are replacing the entire run. - 7
Inspect the wall area and hardware
Check the wall opening for damage. Clean dust and debris from the area to ensure a snug fit for reinstallation.
Tip: Take note of any wall damage that may require repair before reinstall. - 8
Plan your next step
Decide whether you’ll reinstall the same model, upgrade to a smart thermostat, or postpone installation. Gather the new unit’s wiring diagram before starting.
Tip: Review compatibility and required wiring for the new model.
Questions & Answers
Is it safe to remove a thermostat by myself?
Yes, if you follow proper safety steps: power down, label wires, and handle terminals gently. If you’re unsure at any point, stop and consult a professional. This approach minimizes risk to you and your HVAC system.
Yes, you can do it yourself if you power down, label wires, and handle terminals carefully. If unsure, seek professional help.
Do I need to turn off the power at the breaker first?
Absolutely. Cutting power at the breaker ensures no voltage reaches the thermostat wiring. This is essential for your safety and for avoiding damage to control boards.
Yes—turn off the breaker first to stay safe and protect your equipment.
What if wires won’t detach from the terminal block?
Gently loosen the terminal screws and support the conductor with your finger. Don’t yank or pull the wire. If a wire refuses to budge, stop and reassess the labeling; forcing it can bend or break the connector.
If wires won’t detach, loosen screws gently and check the labeling. Don’t force them.
Will removing the thermostat affect HVAC operation?
Removing the thermostat stops temperature control from the wall unit, but the HVAC system itself remains intact. You’ll need a replacement thermostat or a temporary wall plate to keep the system ready for use.
Removing the thermostat stops wall control, but the HVAC unit stays ready for a replacement.
Can I replace with a smart thermostat directly?
Yes, many smart thermostats pair with existing wiring, but compatibility matters. Check C-wire availability, power needs, and the thermostat’s wiring diagram before buying.
Yes, but verify compatibility and wiring requirements before buying a smart thermostat.
What if I forget which wire goes where?
Rely on the photos you captured and the labels you applied. If you’re unsure, pause and consult the installation guide or a professional to prevent miswiring.
If you forget wiring, use your photos and labels, and ask for help if unsure.
Watch Video
What to Remember
- Power down fully before touching any wires.
- Label and photograph wires to ensure accurate reinstallation.
- Keep screws organized and avoid disturbing jumpers.
- Use a blank wall plate if you’re not reinstalling immediately.