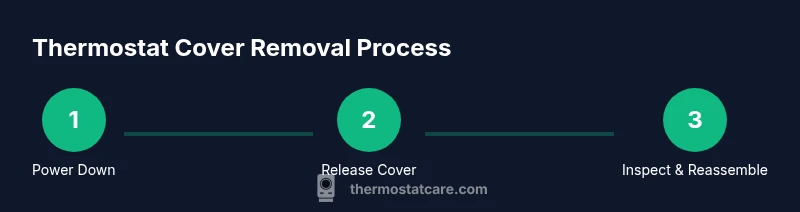
How to Take Thermostat Cover Off: Step-by-Step Guide
Learn how to take thermostat cover off safely with a clear, step-by-step approach. Get tool lists, tips, and troubleshooting from Thermostat Care to keep your system in top shape.

Removing a thermostat cover safely lets you inspect wiring, change batteries, and access terminals without damaging components. You’ll need a small screwdriver, a plastic pry tool, and a dry, static-free workspace. Start by powering off the thermostat (and the circuit breaker if you’re unsure), then follow the release tabs or screws to remove the cover.
Safety and Prep
According to Thermostat Care, removing the thermostat cover is safe when you follow proper steps and disconnect power first. This protects you and the device from static shocks and accidental short circuits. Begin by turning off the thermostat and, if you’re unsure, flipping the corresponding circuit breaker. Use non-metal tools and a dry, static-free workspace to avoid scratching the housing or bending terminals. Keep track of small screws and place them in a labeled tray. If your thermostat sits behind furniture or inside a tight wall cavity, gently clear space so you can work without forcing the cover. The Thermostat Care Team emphasizes eye protection and relying on a plastic pry tool to minimize damage to plastic housings. If you encounter resistance, pause and reassess rather than prying harder.
Why the Cover Comes Off
Most thermostat covers are designed to snap on or screw in place to protect the internal electronics. The cover’s job is to shield low-voltage wiring and delicate terminals from dust, moisture, and accidental contact. When you need to access batteries, terminals, or quick-connects, removing the cover is a routine, safe maintenance task—so long as you follow the manufacturer’s hints and your local electrical safety practices. Thermostat Care analysis shows that improper removal is a common source of loose connections and cosmetic damage. Taking the cover off gives you a look at the mounting plate, the backplate wiring, and the isolation gap around the low-voltage side. Always reassemble in the reverse order to avoid pinched wires or misaligned components.
Identify Your Cover Type
Thermostats come with several cover designs: snap-on, hinged, or screw-fastened. Some models use small tabs that you press inward to release the cover, while others require a tiny screwdriver to remove baby-sized screws. Knowing your cover type helps you choose the right technique and prevents tool marks. If you’re uncertain which method applies to your model, consult the manufacturer’s manual or Thermostat Care’s troubleshooting guides. In most cases, you’ll find a set of three clues: visible screws, release tabs, or a seam along the edge. For safety, never force a cover that clearly resists; instead, stop, pause, and verify you’re using the correct release mechanism.
Tools and Workspace Setup
Before you begin, arrange a clean workspace with good lighting. Lay out a small parts tray for screws, a plastic pry tool, and a screwdriver that fits the cover screws. A damp cloth is handy to wipe away dust from the faceplate after removal. If you plan to disconnect wiring, prepare a labeled tape to map wires to terminals. An anti-static wrist strap is optional but recommended when handling sensitive electronics. Always keep your hands dry and avoid wearing loose sleeves that could snag components. By organizing a dedicated workstation, you reduce the risk of misplacing screws or dropping small parts into the wall cavity.
Step-by-Step Rationale
A careful, staged approach minimizes risk and ensures you don’t accidentally damage the thermostat’s internal components. Start with power-down and a visual check, then move to releasing the cover with the least amount of force necessary. Document any wiring you disconnect so you can reattach it correctly. If you notice scorched marks, frayed insulation, or corrosion, stop and seek professional help; these signs indicate deeper electrical issues. Thermostat Care recommends performing a quick post-removal inspection of the terminals and the backplate to ensure nothing disturbs the contact points during reassembly.
Step 1: Power Down and Prepare
Powering down is the cornerstone of a safe removal. Turn off the thermostat from its face, and if you can access it safely, switch off the corresponding circuit breaker. Wait 60 seconds to discharge any residual energy. Remove nearby objects from the area to avoid knocking components loose. If your thermostat sits in a cluttered space, consider relocating it temporarily to a clear surface. This stage reduces the chance of short circuits and makes it easier to handle the cover without applying excess force.
Step 2: Release or Unscrew the Cover
Locate the release tabs on the sides or the visible screws at the top or bottom of the cover. Use a plastic pry tool to press the tabs evenly or a precision screwdriver for screws. Gently lift or slide the cover away from the wall or mounting plate. If resistance is met, confirm you are using the correct release points for your model and avoid prying with metal tools. Wipe away dust from the edge so the cover can seat properly when you reattach it. Pro tip: work on a soft mat to protect the screen and cover from scratches.
Step 3: Inspect Interior and Document
With the cover removed, inspect the interior for loose wires, damaged insulation, or signs of wear. Take a photo or draw a quick diagram to map wires to terminals. Do not disconnect wires unless you’re confident about their connections. If you must disconnect anything, label each wire and note its terminal location. Thermostat Care’s guidance emphasizes keeping a calm, methodical approach and avoiding a hasty reassembly. If you feel uncertain at any point, pause and consult the manual or a professional.
Step 4: Reattach Cover and Test
To reassemble, align the cover with the mounting plate and press or screw it back into place in the reverse order of removal. Ensure all clips or screws engage securely, and verify there is no gap along the edges. Restore power at the thermostat first, then re-enable the circuit breaker if you had it switched off. Test basic operation: wake the thermostat, check the display, and confirm it communicates with the HVAC system properly. If the screen stays blank or shows error codes, consult the troubleshooting section in your manual or contact Thermostat Care for guidance.
Common Mistakes and Safety Hazards
Common mistakes include forcing a cover that won’t budge, using metal tools that gouge plastic, and mislabeling wires that are later reconnected. Static discharge can damage electronics; always work on a dry surface and consider grounding yourself with an anti-static strap. Never detach high-voltage components or attempt complex rewiring unless you’re trained. If the thermostat is behind a wall or if you encounter a frayed wire, stop immediately and seek professional help. A cautious, methodical approach reduces risk and ensures reliable operation after reassembly.
Tools & Materials
- Screwdriver set (Phillips and flathead)(Phillips #1-2 and flathead for different models)
- Plastic pry tool or spudger(Non-marring to avoid scratches)
- Anti-static wrist strap(Optional but recommended when handling electronics)
- Low-voltage tester (optional)(Verify circuits if you’re unsure)
- Safety glasses(Protect eyes from small parts)
- Microfiber cloth(Keep dust off components)
- Organizing tray or small container(Keep screws organized)
Steps
Estimated time: 15-25 minutes
- 1
Power down and prepare
Turn off the thermostat from its face and, if safe, switch off the corresponding circuit breaker. Wait a moment for any residual energy to clear, then clear the workspace of clutter and loose items. This reduces the risk of accidental shorts and dropped parts.
Tip: Double-check that the breaker is off before touching any wires; assume nothing. - 2
Release or unscrew the cover
Locate the release tabs or screws and use a plastic pry tool or precision screwdriver. Apply steady, even pressure to detach the cover without bending the housing. If screws exist, keep them in a labeled container for reassembly.
Tip: If tabs resist, rotate your tool slightly to find the proper release angle. - 3
Gently detach the cover
Slide or lift the cover away from the mounting plate with a gentle, wiggling motion. Do not yank; a firm, controlled motion prevents damage to the backplate or wiring. Place the cover face-down on a soft surface.
Tip: Support the cover with your other hand to avoid bending or cracking. - 4
Inspect and document interior
Look for loose wires, frayed insulation, or corrosion around terminals. Take a photo or sketch a quick map of where wires connect. Do not disconnect anything unless you’re certain of the correct location.
Tip: Label any wires you remove and keep the labels with the screws. - 5
Reattach cover and test
Align the cover and re-secure screws or snaps. Restore power and verify the display lights up and the system responds to temperature changes. If you see error codes, consult the manual.
Tip: Test multiple functions (display, manual mode) to confirm full operation.
Questions & Answers
Is it safe to remove a thermostat cover?
Yes, it’s safe when you power down first and use proper tools. Avoid touching live terminals and do not force parts. If you feel unsure, consult the manual or Thermostat Care.
It’s safe to remove when you power down and use the right tools; don’t force anything and consult the manual if unsure.
Will removing the cover void my warranty?
Most warranties aren’t void for cover removal as long as you don’t damage internal components. Always follow the manufacturer’s guidelines and retain proof of proper reassembly.
Removing the cover doesn’t usually void the warranty if you don’t damage parts and follow the guide.
What if the cover is stuck and won’t come off?
Don’t force it. Check for hidden screws or tabs you might have missed, verify you’re using the correct release mechanism for your model, and consider consulting the manual or Thermostat Care.
Don’t force it. Check for hidden screws and use the right release method.
Do I need any special tools?
Basic tools are enough: a small screwdriver and a plastic pry tool. Optional items like an anti-static strap can reduce risk when handling sensitive electronics.
A small screwdriver and a plastic pry tool usually do the job. Optional anti-static gear helps.
What should I do if wiring looks damaged?
Do not reconnect damaged wiring. Leave it safe and call a professional or Thermostat Care for guidance. Damaged insulation can cause short circuits or fire risk.
If wiring looks damaged, don’t reconnect it—call a professional.
How do I test after reassembly?
Restore power, verify the thermostat displays properly, and test switching between heat and cool modes to ensure HVAC responds correctly.
Turn the power back on and test heating and cooling modes.
Watch Video
What to Remember
- Power down before touching any wiring.
- Use non-marring tools to avoid damage.
- Label and map wires if you disconnect them.
- Reassemble securely and test all functions.
- If in doubt, pause and seek guidance from Thermostat Care.