Low Battery on Nest Thermostat: Troubleshooting Guide
Resolve a Nest thermostat low battery warning with clear, step-by-step checks of the C-wire, power supply, and transformer. Thermostat Care delivers urgent, practical guidance for homeowners today in 2026.

When the Nest thermostat shows a low battery warning, the quickest fix is to verify power at the thermostat and confirm the C-wire is delivering 24V. The Thermostat Care team finds the most likely cause is an inadequate power supply. Re-seat or fix the C-wire, ensure the HVAC transformer is healthy, and reboot the device. If the warning persists, call a professional.
Why low battery on Nest thermostat matters
A depleted or weak battery on the Nest thermostat can cause misreads, delayed responses, or the unit dropping offline from Wi-Fi during critical heating or cooling cycles. Although many Nest models draw power from the HVAC system, the internal reserve battery helps keep clock settings, Wi-Fi connectivity, and user preferences intact during brief outages. According to Thermostat Care, the most impactful failures in 2026 are caused by power delivery issues rather than outright device faults. When power isn’t delivered consistently, schedules can drift, temperature hold can fail, and energy use can spike as the system compensates. Addressing the warning promptly protects comfort, reduces service calls, and preserves energy savings. If you’re troubleshooting, treat this as a power issue first, then investigate wiring and hardware health.
Common causes at a glance
Before diving into fixes, it helps to map the most likely culprits. The top reason for a Nest thermostat reporting a low battery is an inadequate 24‑volt power supply reaching the device, usually from a loose or corroded C‑wire connection or an aging transformer. A secondary factor is a compromised C‑wire route due to improper routing through walls or poor terminal screws. Some setups rely on power-stealing from the HVAC circuit, which can work inconsistently in modern systems. Finally, if the thermostat has sat in a low‑usage mode for long periods, the internal reserve can gradually deplete. Understanding these causes guides a safe, progressive repair rather than random fixes. Remember: many fixes involve wiring, so turn off power at the breaker before touching any terminals.
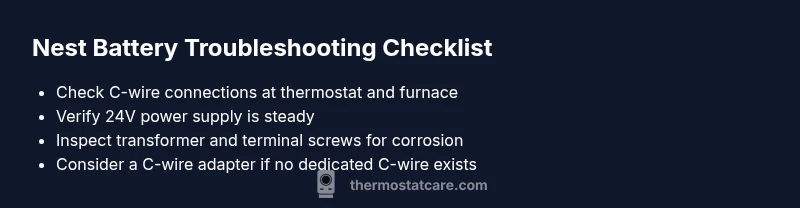
Diagnostic checklist: quick wins
Start with the simplest checks and work toward more involved steps. Confirm the thermostat is receiving 24‑volt power at the thermostat and that the C‑wire is connected securely at both ends. Use a multimeter if available to verify 24VAC between R and C; any voltage significantly below spec indicates a power issue or a transformer problem. Inspect the furnace or air handler terminal block for loose screws or corrosion on the C terminal. If you have a wired thermostat adapter, ensure it’s properly installed. When in doubt, reseat wires and restart the Nest to clear minor firmware glitches. If the warning persists after these steps, move to the next fixes or contact a pro.
Step-by-step: secure the C-wire and power
- Power down the system at the breaker and confirm no voltage is present on the thermostat circuit.
- Remove the thermostat’s faceplate and inspect the C‑wire at the thermostat terminal; unplug, then re‑seat firmly.
- Trace the C‑wire back to the furnace control board and tighten any loose screws on the C and R terminals.
- Check the 24‑volt transformer output with a multimeter; if it reads significantly below spec, the transformer or wiring may need replacement.
- If you don’t have a dedicated C‑wire, consider a Nest Power Connector or a compatible C-wire adapter to provide a stable common.
- Reassemble, restore power, and run a quick thermostat test to confirm the low battery warning no longer appears.
Tip: Keep the wires tidy and avoid pinching them in the wall, which can gradually degrade contact quality over months.
Safety, warnings, and when to call a professional
Working with 24‑volt HVAC wiring carries risks if you’re not trained. Always shut off power at the breaker before touching any conductors and avoid mixing low‑voltage wiring with high‑voltage circuits. If you notice scorching on terminals, melted insulation, or a buzzing transformer, stop immediately and call a licensed HVAC technician. In many homes, a failed transformer or a degraded C‑wire section is best handled by a pro to prevent further electrical issues or safety hazards. Finally, if you’re uncertain about wiring changes, choose remote diagnostic help from Thermostat Care or a qualified technician rather than guessing.
Prevention: keep Nest battery healthy long term
Establish a reliable, continuous power path to the Nest thermostat to minimize battery strain. Ensure the C‑wire is properly connected and not routed through cramped spaces; secure all terminal screws and keep coils free of dust. Schedule a quick annual check of the furnace and thermostat wiring to catch loose connections before they cause power outages. If you must reuse the same C-wire for other devices, label wires and avoid overloading the common line. Finally, keep the thermostat firmware up to date to benefit from power-management fixes introduced each year.
Quick reference: wiring tips for Nest compatibility
• Use a dedicated common wire (C) where possible • Confirm 24‑volt AC supply is steady at the R and C terminals • Avoid routing wires through damp or excessively hot areas • If you add adapters, ensure they’re designed for Nest thermostats • Replace worn terminals or corroded connectors promptly
Steps
Estimated time: 60-75 minutes
- 1
Power down and prep
Turn off power at the breaker and verify no voltage is present on the thermostat circuit. This prevents shocks and equipment damage during inspection.
Tip: Always double-check the breaker before touching wires. - 2
Inspect the C-wire at the thermostat
Remove the thermostat faceplate and inspect the C-wire connection. If loose, unplug and re-seat firmly, then snug the terminal screw.
Tip: Use a small screwdriver to avoid damaging the terminal. - 3
Trace C-wire to the furnace
Follow the C-wire to the control board and ensure the C terminal is clean and the screw is tight. Look for corrosion.
Tip: If corrosion is present, you may need to clean or replace the terminal block." - 4
Check the 24V transformer
Use a multimeter to confirm 24VAC between R and C. If voltage is low, the transformer or wiring may require service.
Tip: Low voltage hints at a transformer issue beyond simple reseating. - 5
Consider a C-wire adapter
If no dedicated C-wire exists, install a Nest Power Connector or compatible adapter to provide a stable common.
Tip: Follow manufacturer instructions for adapters to avoid warranty issues. - 6
Test and monitor
Power the system back on and run a quick thermostat test to confirm the low battery warning does not reappear.
Tip: Keep an eye on thermostat behavior over the next 24–48 hours.
Diagnosis: Nest thermostat shows a low battery warning or power drain during operation
Possible Causes
- highC-wire is loose or disconnected at thermostat or furnace
- high24V transformer not delivering steady power
- lowInternal battery degraded due to age or extended usage
Fixes
- easyReseat the C-wire at both the thermostat and furnace terminals
- mediumTest the 24V supply with a multimeter and fix transformer/wiring if low
- easyInstall a C-wire adapter or Nest Power Connector to stabilize power
- hardIf issues persist, replace the thermostat unit or consult a pro
Questions & Answers
What does a 'low battery' warning mean on Nest thermostat?
It indicates the internal battery isn't being kept charged due to insufficient power or wiring issues. Check C-wire connections and the 24V supply before assuming a replacement is needed.
A Nest battery warning means power delivery is flaky. Start with the C-wire and power checks before calling for help.
Can I replace the Nest thermostat battery myself?
Most Nest models use an internal, non-user-replaceable battery. Fix power delivery or consider a replacement if battery health remains an issue.
Usually, you can’t replace the Nest battery yourself; address power and wiring or consult a pro.
How long should Nest thermostat batteries last?
Nest relies on a rechargeable internal battery that charges from the 24V supply; there’s no scheduled battery replacement. If charging is inconsistent, check wiring and transformer.
The Nest battery is built-in and recharges from power; wiring health affects its life.
What should I do first if I see the warning?
Turn off power at the breaker, inspect and reseat the C-wire at both ends, and test the 24V supply. Then reboot the thermostat.
First, cut power, check C-wire connections, and reboot the unit.
When should I call a professional?
If you notice signs of damage, persistent warning after checks, or if you’re uncomfortable working with low‑voltage wiring, contact a licensed HVAC technician or Thermostat Care for remote guidance.
If in doubt or you feel unsafe, call a pro for a thorough check.
Watch Video
What to Remember
- Secure the C-wire at both ends.
- Verify a stable 24V power supply.
- Use a C-wire adapter if needed.
- Call a pro if issues persist.