How to Turn Nest Thermostat On: Step-by-Step Guide
Turn on your Nest thermostat with a clear, step-by-step approach. Verify power, troubleshoot common issues, and keep your Nest heating and cooling running smoothly using on-device controls and the Nest app.

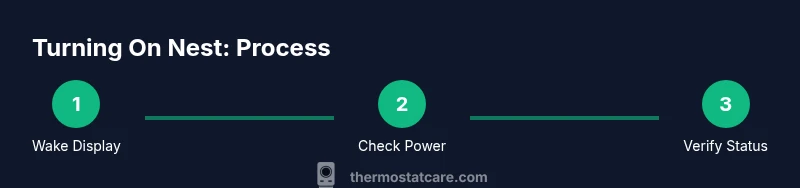
To turn on a Nest thermostat, wake the display by pressing the outer ring and rotate to wake. If the screen stays dark, verify the thermostat has power: confirm the circuit breaker is on, the furnace is powered, and the C-wire is properly connected. If still off, perform a soft reset by holding the ring and tapping the display until it restarts.
Why the Nest Might Not Turn On
According to Thermostat Care, a Nest thermostat can appear “off” for several practical reasons beyond simply being unused. The most common cause is a power issue—either the HVAC circuit breaker has tripped, the furnace is not powered, or the C-wire (the common power wire) is loose or unplugged at the thermostat base. Environmental factors like high humidity or dust can also impact sensor contacts and the display’s ability to wake. When you see a dark screen, start with power verification rather than chasing software quirks. Thermostat Care’s field experience shows that most power-related no-turn-on problems resolve quickly after confirming power at both ends of the circuit.
Core Concepts: How Nest Receives Power
Nest thermostats rely on a 24V power supply from the HVAC system. If the C-wire isn’t properly connected, the thermostat may struggle to stay awake, especially in energy-saving modes. The Nest ring acts as both a button and a dial, but without sufficient power, the display won’t light or respond. Understanding this helps homeowners avoid over-twisting wires or attempting risky shortcuts. A stable power source ensures the Nest can wake reliably and deliver temperature commands through the app or voice assistants when needed.
Pre-Check: Quick Power and Wiring Review
Before you dive into a step-by-step reset, do a quick audit of power availability. Check that the furnace and air handler are powered on and that there are no obvious loose connections at the thermostat base. If you recently rewired or replaced a thermostat, ensure the wire terminals are correctly landed on the correct color-coded screws. Keep a flashlight handy to inspect the backplate for dust buildup, which can impede contact. By following a careful checklist, you minimize the risk of skipping an essential power component.
Step-by-Step: Turning On and Verifying Power
The following sequence mirrors practical field practice. Start with the simplest action (wake the display) and move through the power path from the breaker to the C-wire. Don’t rush; power stabilization can take several seconds to reconnect after a reset. If the thermostat still doesn’t turn on, move to the advanced checks in the next section. Thermostat Care emphasizes patience and methodical verification—skipping steps often leaves you with an unresolved screen.
If It Still Won’t Power On: Advanced Checks
If the Nest remains dark after the basic checks, verify the 24-volt supply at the furnace or air handler. Ensure any protective covers are reattached and that there are no tripped fuses or breakers in the HVAC panel. If you’re uncomfortable with wiring or you notice signs of burning or buzzing, stop and contact a licensed technician. Never force-fit wires or bypass safety components. For many users, a soft reset and re-seating connections resolve stubborn power issues.
Maintenance and Prevention for Reliable Power
To reduce future outages, keep the thermostat area clean and dry, free of dust and moisture, and inspect connections at least twice a year. If you upgrade or replace wiring, use proper terminal labels and avoid mixing wire gauges. Thermostat Care recommends keeping a simple maintenance routine: check the C-wire connection, confirm the furnace is powered during heating seasons, and verify that the Nest app shows current device status. Small, regular checks go a long way toward consistent operation.
Tools & Materials
- Nest thermostat (1st gen or newer)(The thermostat you’re trying to power on.)
- Access to HVAC circuit breaker(Identify the breaker that controls your furnace/air handler.)
- Non-contact voltage tester (optional)(Useful for safely verifying live contacts at the furnace base.)
- Screwdriver set (Phillips/flat-head, optional)(For removing the faceplate or terminal screws if needed.)
- Nest app on smartphone(Can help verify status remotely and wake the device.)
Steps
Estimated time: 15-30 minutes
- 1
Wake the display
Press the outer ring to wake the screen. If it responds, you’ll see the home screen or status indicators. This confirms basic power to the display, which is the first hurdle in turning the Nest on.
Tip: If the display is unresponsive, skip to Step 2 and verify power at the HVAC panel. - 2
Verify thermostat power
Check that the thermostat is receiving power from the 24V supply. Confirm the HVAC circuit breaker is ON and the furnace is powered. A lack of power at the source is a common cause of a dark or frozen screen.
Tip: If you hear a humming or buzzing from the furnace, turn power off before inspecting wiring further. - 3
Inspect C-wire and terminals
Ensure the C-wire is securely connected to both the furnace control board and the Nest base. A loose C-wire can cause the display to fade out or fail to wake.
Tip: Take a photo of terminal wiring before reseating to ensure correct reattachment. - 4
Use the Nest app to verify status
Open the Nest app and check the device status. If the app shows the thermostat as online but the display is dark, this points to a power issue rather than a connectivity problem.
Tip: Try waking the device from the app if the physical button is unresponsive. - 5
Perform a soft reset
If the display still won’t light, perform a soft reset by holding the ring and tapping the display until it restarts. This can clear minor software hiccups without loss of settings.
Tip: Allow the device to complete the restart cycle—avoid powering off during this process. - 6
Re-seat or replace the base
If reseating the thermostat base doesn’t help, remove and reattach it more firmly to ensure solid contacts. A degraded base connection can mimic a power issue.
Tip: Only perform this step if you feel confident; if not, skip to Step 7 and call support. - 7
Check for signs of damage
Look for scorching, melted insulation, or tripped breakers in the HVAC panel. Damage requires professional service before continuing.
Tip: Never bypass safety devices; damaged components should be serviced by a licensed technician. - 8
Test heating/cooling output
Once the Nest powers on, test a heating and cooling cycle to confirm full control. If any mode fails to respond, revisit the C-wire and power path along with app status.
Tip: Document any non-responsive modes for reference when seeking help.
Questions & Answers
Why won't my Nest thermostat turn on?
Power issues are the most common reason a Nest won’t turn on. Start by confirming the HVAC circuit breaker is on, the furnace is powered, and the C-wire is connected. If the display remains off, try a soft reset.
Power issues are usually the culprit, so start with the breaker and C-wire checks, then reset if needed.
Can I turn on Nest thermostat from the app?
Yes. The Nest app lets you wake the thermostat, adjust settings, and verify status remotely. Ensure your phone is connected to Wi-Fi and the thermostat is linked to your account.
Absolutely, you can wake and control Nest from the app if it’s connected.
What if the screen is dim or unresponsive?
A dim screen usually indicates power instability or a weak 24V supply. Check the power source, confirm the C-wire is secure, and perform a soft reset. If unresolved, seek professional help.
If the screen is dim, check power and try a soft reset first.
Is it safe to touch the wiring behind the Nest thermostat?
Only handle wiring if power is off and you’re confident. Avoid touching live wires. If you need to adjust, turn off power at the breaker and consider calling a licensed technician.
Don’t touch live wires; switch off power before handling wiring.
How long should the Nest last before replacement?
Most Nest units last many years with proper care. Regular checks and proper installation help extend lifespan and reliability.
A Nest typically lasts several years with good maintenance.
Watch Video
What to Remember
- Wake the display to confirm power is present
- Verify furnace power and C-wire continuity
- Perform a soft reset if the screen remains dark
- Use the Nest app to double-check device status
- If in doubt, contact a licensed technician