How to Connect a Thermostat: Step-by-Step Wiring Guide for 2026
Learn how to safely connect a thermostat to your HVAC system with a practical, step-by-step guide. This article covers tools, wiring basics, testing, and common troubleshooting tips for DIY homeowners.

Learn how to safely connect a thermostat to your HVAC system, including identifying wires, turning off power, and using the manufacturer diagrams. This quick guide covers common wire configurations, safety precautions, and clear step-by-step actions so DIY homeowners can confidently complete a correct thermostat connection without damaging equipment in five to seven minutes at home.
Understanding thermostat connections
According to Thermostat Care, a proper thermostat connection is the bridge between your home’s control system and the HVAC equipment that keeps you comfortable. The goal is a reliable, repeatable wiring setup that matches the diagram on the thermostat and the furnace control board. When you understand which wires correspond to which functions—power, cooling, heating, fan, and common—you reduce the risk of miswiring and limit the chance of triggering safety faults. This section explains how a typical thermostat communicates with your HVAC system and why accurate labeling and documentation matter for future upgrades. Thermostat connections vary by model and system type, so always refer to the wiring chart in the user manual and the equipment’s service panel.
This guidance also considers common modern configurations, including systems powered by a dedicated C-wire for continuous power and compatibility with smart thermostats that support edge cases like heat-pump setups. By grounding your work in the correct wiring logic, you’ll improve energy efficiency and system reliability over time. Thermostat Care’s analysis shows that careful labeling and planful deconstruction of the old wiring layout dramatically lowers the risk of miswiring when you install a new thermostat.
note2”:null},
Tools & Materials
- Screwdriver set (Phillips and flathead)(Phillips #2 is most common for thermostat screws; flathead may be needed for terminal plates)
- Non-contact voltage tester(Use to verify that power is off before touching wires)
- Wire labels or masking tape(Label each wire with its current function before removing it)
- Multimeter (optional but recommended)(Useful for confirming voltage and continuity if you’re uncertain about wiring)
- Thermostat wiring diagram/manual(Have the device’s diagram and the furnace/air handler diagram handy)
- Replacement thermostat with compatible terminals(Only if you’re upgrading or replacing the unit during the same project)
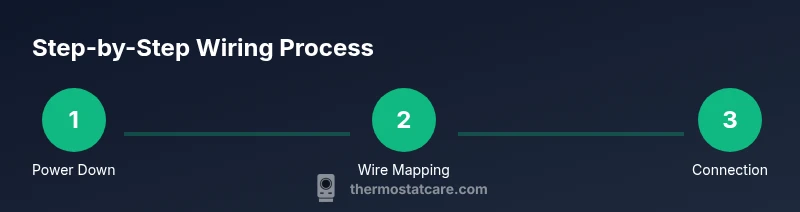
Steps
Estimated time: Total time: 30-60 minutes
- 1
Power down the HVAC system
Locate the main service panel and switch off the circuit breaker that feeds the furnace/air handler and thermostat. Verify the circuits are off with a non-contact tester before touching any wires.
Tip: If you’re unsure which breaker feeds the HVAC, switch off the main breaker and test multiple circuits to confirm power is down. - 2
Remove the thermostat cover and inspect wiring
Carefully remove the thermostat cover and take a photo of the current wiring layout. Identify each wire by color and terminal label, avoiding any forceful pulling that could loosen connections.
Tip: Label wires as you disconnect them to preserve the original mapping for easy reassembly. - 3
Label wires and prepare the wiring diagram
Create a simple mapping sheet: wire color → terminal label on the existing thermostat. Compare this mapping to the new thermostat’s terminal chart to determine where each wire should go.
Tip: If a wire lacks a color standard, use masking tape with a descriptive label to avoid confusion. - 4
Connect wires to the new thermostat terminals
Attach each wire to the corresponding terminal on the new thermostat (R to R, W to W, Y to Y, G to G, C to C, etc.). Ensure each connection is snug but not over-tightened and that no stray strands are shorting adjacent terminals.
Tip: Double-check the labeling against the wiring diagram before tightening screws. - 5
Mount the thermostat and restore power
Secure the thermostat to the wall, reattach the faceplate, and switch the power back on at the breaker. Listen for the indicator lights and watch for any fault codes on the display.
Tip: If the display stays dark, recheck power at the breaker and confirm that the wires aren’t touching each other. - 6
Configure settings and test HVAC
Set the thermostat to heat, cool, and fan modes, then run a test cycle to confirm airflow and temperature control. If the system doesn’t respond, recheck wire mappings and consult the user manual for error codes.
Tip: Document any unexpected codes and compare them with the manual’s troubleshooting section.
Questions & Answers
Do I need a professional if I’m unsure about wiring?
If you’re uncertain about wire colors or system compatibility, it’s safer to hire a licensed HVAC technician. Mistakes can damage equipment or create safety hazards. A pro can verify your setup and ensure compatibility with your thermostat.
If you’re unsure about wiring, it’s best to hire a licensed HVAC technician to verify your setup and ensure compatibility.
Can I install the thermostat without turning off power?
No. Always switch off power at the breaker and confirm with a non-contact tester before touching any wires. Working with live power can cause shocks or equipment damage.
Always turn off the power and verify it’s off before touching wires.
What if my wires aren’t labeled or colors don’t match the diagram?
Label each wire as you disconnect it and refer to the old thermostat’s diagram. If you can’t determine function, contact the thermostat manufacturer or a pro before proceeding.
Label the wires and consult the diagram or a pro if you can’t determine their function.
How do I test the system after wiring?
Power the system, set the thermostat to heat and cool, and observe airflow and temperature changes. If anything seems off, recheck wiring and refer to the manual’s troubleshooting section.
Power up, test both heat and cool, and watch for proper airflow and temperature response.
What tools do I need for a basic thermostat connection?
A screwdriver, a non-contact tester, and wire labels are essential. A multimeter is helpful but not always required for a basic installation.
You’ll need a screwdriver, a voltage tester, and wire labels; a multimeter can help if you’re uncertain.
Watch Video
What to Remember
- Power down before handling wires.
- Label every wire and map it to the new thermostat.
- Match wire colors to their correct terminals exactly.
- Test each mode (heat, cool, fan) after installation.
- Consult a professional if you encounter damaged insulation or unfamiliar wire colors.