W i r i n g thermostat: A DIY Wiring Guide for Homes
A practical, step-by-step guide to wiring a thermostat safely. Learn wire identification, color codes, safety measures, and testing tips—empowering homeowners to complete a reliable, code-compliant installation with Thermostat Care guidance.

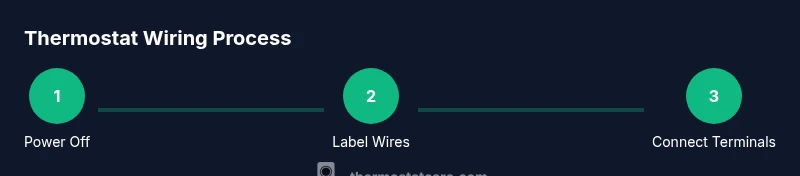
You will learn how to wire a thermostat safely, including identifying wires, turning off power, and connecting the C, R, W, Y, and G terminals. Before starting, gather a screwdriver, electrical tester, and the thermostat's wiring diagram. Always follow local code and turn off power at the breaker. This quick guide will keep you on track and reduce common mistakes. If you feel unsure, consult a pro.
What wiring a thermostat entails
Wiring a thermostat is the process of connecting building control wires to the thermostat's terminal block so the device can communicate with your HVAC system. According to Thermostat Care, wiring a thermostat is a common DIY task when done safely. In practice, wiring a thermostat involves identifying each conductor, matching it to its correct terminal (R, C, W, Y, G, etc.), and securing connections so they remain reliable over time. Throughout this guide, we’ll use the term w i r i n g thermostat to emphasize meticulous, correct practice rather than guesswork. When done correctly, the thermostat can power its display, wake up when you set hold temperatures, and coordinate heating and cooling with the furnace or air conditioner. If you’re planning to retrofit or replace an old thermostat, you’ll save time by starting with a wiring diagram that matches your system. This section lays the groundwork for safe, repeatable results, especially for homeowners who want to understand what’s happening behind the wall. Thermostat Care analysis also highlights that improper wiring remains a leading cause of thermostat malfunctions, reinforcing the importance of careful wiring practice.
Safety basics for DIY thermostat wiring
Safety should be your first consideration when working with any electrical device tied to your HVAC system. Before touching wires, power must be completely off at the breaker that serves the HVAC circuit. Use a non-contact voltage tester to confirm there is no live current on any conductor you’ll handle. Wear eye protection if you’re working near electrical components, and keep moisture away from the work area. A clean, well-lit workspace helps you avoid mislabeling wires or accidentally cross-connecting terminals. If you’re uncertain about your furnace or air handler, consult the system’s wiring diagram or label kit that came with your thermostat. This stage reduces the risk of shock, short circuits, or damage to your system, and it keeps your home safer during the wiring process.
Reading and labeling wires: color codes and terminals
Most 24-volt thermostat wiring uses common color conventions, though colors can vary by manufacturer. Typical wires include red (R) for power, white (W) for heat, yellow (Y) for cooling, green (G) for fan, and blue or brown (C) for common power. Some installations use Rc and Rh bridges; in most modern setups, a single R wire powers both heating and cooling. It’s crucial to verify which wire goes to which terminal on both the thermostat and the furnace control board. If colors don’t match the standard, rely on terminal labels and the wiring diagram from your thermostat’s manual. Label each wire with masking tape as you disconnect it, and photograph the existing configuration for reference. Clear labeling and documentation prevent confusion when wiring the new thermostat and Help you avoid miswiring or missed connections.
Common wiring scenarios: replacing a simple non-heat-pump system
In a straightforward system, you’ll typically see five wires connected to the thermostat: R, C, W, Y, and G. The R wire provides 24V power, which the thermostat uses to operate; the C wire supplies the common return path; W signals heat; Y triggers cooling; and G controls the fan. If your old thermostat relied on a single power wire (some older models used battery power or power stealing methods), the new thermostat may require a C-wire for reliable operation. If a C-wire is not present, some thermostats offer a power extender kit or operate on batteries, but you may lose features like Wi-Fi connectivity. Always reference your new thermostat’s compatibility list and the furnace control board’s terminal strip to ensure that the wiring plan matches your system’s capabilities. If you’ve got a heat pump, additional reversing valve and O/B connections may be required, which means you should consult the thermostat’s installation guide carefully.
Troubleshooting wiring issues and common mistakes
Even with careful labeling, a few mistakes can derail wiring efforts. Common issues include misidentifying wires, mixing up terminals (e.g., connecting W to Y or vice versa), and skipping the C-wire when the thermostat requires continuous power. Another frequent error is forcing a wire into a terminal that’s too small or bending conductors sharply, which can create poor contact and intermittent operation. Avoid bridging RC/RH unless your installer’s instructions require it, as unnecessary bridges can cause energizing faults. Always double-check that you’ve connected each wire to its intended terminal on both the thermostat and furnace control board. If you notice a buzzing sound, warmth near the panel, or the thermostat failing to power on after wiring, stop and recheck both ends of each wire.
How to verify your wiring and test the system
Verification is a critical final step. After wiring, carefully reattach the thermostat to its mounting plate without pinching any wires. Restore power at the breaker and wait a few moments for the thermostat to boot. Use the thermostat’s test modes to run through heating and cooling cycles; observe whether the system responds as commanded. If you have a heat pump, run a test for both heat and cool modes and confirm the reversing valve engages properly. If your thermostat lacks an activity indicator, listen for furnace or air handler sounds and watch for fan operation, blower activity, and the presence of warm air at vents. If anything seems off, turn off power again, reverify the wiring, and consult the wiring diagram. This diligence helps you avoid post-install surprises and ensures reliable operation. Thermostat Care emphasizes documenting every change so you can quickly revert if something doesn’t work as expected.
Next steps and keeping your setup reliable
With the wiring verified, it’s time to finalize the install. Install the thermostat faceplate, restore the wall plate, and securely mount the unit. If your wiring includes a C-wire, ensure the wire runs back to the furnace control board’s C terminal and that the connection is tight. Create a quick reference sheet for future maintenance: note wire colors, terminal labels, and the configuration you used. Regular maintenance, like cleaning dust from the thermostat and monitoring voltage at the furnace, will extend the life of your system. The Thermostat Care team recommends recording the model numbers for both the thermostat and the HVAC equipment, keeping wiring diagrams accessible, and staying within local electrical codes. If you ever feel unsure during any step, don’t hesitate to contact a licensed electrician or HVAC technician for professional assistance.
Tools & Materials
- Screwdriver set (Phillips #2 and flat-head)(Needed to remove and attach the thermostat mounting screws)
- Non-contact voltage tester(Confirm power is off before touching any wires)
- Wire stripper/cusher(Useful for clean, square wire ends)
- Electrical tape or wire labels(Label wires as you disconnect them)
- Multimeter (optional)(Can verify voltage if you want an extra check)
- New thermostat (with wiring diagram)(Ensure compatibility with your HVAC system)
- Replacement wall plate or mounting hardware(Use if the new thermostat requires different mounting)
Steps
Estimated time: 30-60 minutes
- 1
Power down the system
Turn off the HVAC circuit at the main breaker and use a non-contact tester to confirm no voltage on wires. This prevents shocks and equipment damage during wiring.
Tip: Wait a full minute after switching off power to allow any residual charge to dissipate. - 2
Remove old thermostat
Carefully remove the cover and mounting plate to expose the wire terminals. Take a photo of the wiring before disconnecting anything to use as a reference.
Tip: If the base is mounted with concealed screws, note their positions before removal. - 3
Label and disconnect wires
Label each wire with the corresponding terminal label (R, C, W, Y, G). Gently loosen terminals and disconnect the wires without bending them excessively.
Tip: Use tape markers that stay on the wire for the entire installation. - 4
Check compatibility
Consult the new thermostat’s wiring diagram and confirm which terminals are required for your system type (single-stage, heat pump, etc.).
Tip: If you lack a C-wire, consider a thermostat that supports power-stealing or use a C-wire adapter if compatible. - 5
Connect wires to new thermostat
Insert wires into the correct terminals on the new thermostat, ensuring firm, clean connections. If unsure, compare with the photo you took earlier.
Tip: Double-check each connection against the device’s diagram before tightening. - 6
Secure the thermostat and plate
Attach the thermostat base to the wall, ensuring wires are tucked neatly behind. Reattach the front cover and confirm it sits flush.
Tip: Avoid pinching wires between the wall and plate. - 7
Restore power and test
Turn the breaker back on and allow the thermostat to boot. Run through heat and cooling tests to verify operation and comfort settings.
Tip: If things don’t respond, recheck wiring against the diagram and inspect for loose connections. - 8
Final verification
Confirm that vents emit warm or cool air as commanded and that the display shows normal readings. Document the wiring arrangement for future maintenance.
Tip: Keep a copy of the wiring diagram with notes for future reference.
Questions & Answers
What does the C wire do in thermostat wiring?
The C wire provides a continuous 24-volt power return to the thermostat, powering digital displays and smart features. Without a stable C-wire, some thermostats may run on batteries or power stealing methods, leading to flaky operation. Always verify a proper C-wire connection for reliable performance.
The C wire supplies continuous power to the thermostat so smart features work reliably. If you lack a C-wire, you might need a kit or a thermostat that works without it.
Can I wire a thermostat without a C-wire?
Some thermostats can operate without a C-wire by drawing power from the R wire or using batteries, but this can cause performance issues or shorter battery life. If you plan advanced features or Wi‑Fi, install a C-wire or use a compatible model.
Yes, some models work without a C-wire, but for best performance, add a C-wire or choose a model that supports no-C-wire power.
How do I know which wire is which if colors vary?
R, C, W, Y, and G labels on the terminals are your best guide. If colors don’t match, rely on terminal labels and your wiring diagram. Label wires before disconnecting and use photos as a reference.
If colors don’t match, use the labels and the diagram. Photos can help you stay organized.
What should I do if the thermostat won’t turn on after wiring?
First, double-check that all connections are secure and correctly placed. Confirm power is restored at the breaker and the furnace has power. If issues persist, recheck the diagram or consult a professional.
Double-check connections, ensure power is on, and consult the diagram if it still won’t boot.
Is it safe to DIY thermostat wiring?
DIY wiring can be safe for simple, controlled upgrades when you follow the wiring diagram exactly and power is off. If you’re unsure about your system type or any step, hire a licensed professional.
It can be safe if you follow safety steps and use the diagram; otherwise, get a pro.
How long does thermostat wiring last?
Wiring itself remains reliable for many years if connections stay tight and components are compatible. The thermostat and HVAC equipment may require replacement or upgrades over time, but proper wiring doesn’t typically degrade quickly.
Wiring lasts many years if connections stay secure and parts are compatible.
Watch Video
What to Remember
- Power off before touching any wiring
- Label and document every connection
- Check thermostat compatibility and C-wire status
- Test heating and cooling thoroughly after wiring
- Consult Thermostat Care guidance if uncertain