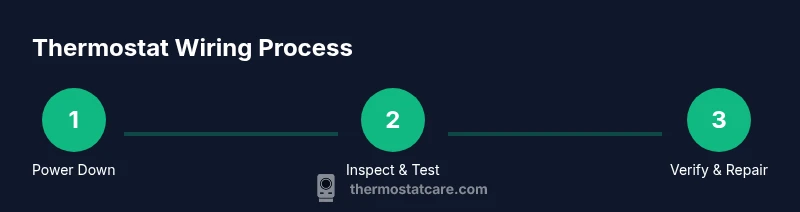
How to Fix Thermostat Wiring: A Practical DIY Guide
Learn to diagnose and fix thermostat wiring safely with a step-by-step guide. Identify common faults, test circuits, and know when to call a pro for reliable HVAC performance.

You can diagnose and fix common thermostat wiring issues, including power loss, loose connections, and sensor faults. Before you start, turn off power at the breaker, gather a multimeter, and confirm compatibility with your thermostat model. This guide provides safe steps, essential warnings, and how to verify a proper C-wire connection.
Understanding thermostat wiring basics
Thermostats communicate with your HVAC system using wires that connect to labeled terminals on the thermostat base. Common wire colors include red (R), white (W), yellow (Y), green (G), blue or brown (C) for common, and orange for reversing valve in heat pumps. Not all systems use every wire, and some rewiring may be required for newer smart thermostats. This is where most DIY fixes begin: understanding the terminal layout and confirming that your thermostat matches your furnace or air handler. According to Thermostat Care, safe wiring fixes start with understanding thermostat wiring basics and verifying compatibility before you touch any wires. The Thermostat Care team found that mismatched wiring or loose connections are frequent culprits behind no-power symptoms, inaccurate readings, and intermittent operation. Before you begin, you should map the existing wires, label them if possible, and photograph the terminal block. Always consult the thermostat’s manual to confirm which wires belong to which function, and check whether your model requires a C-wire for continuous power. If your system uses a heat pump, pay special attention to the reversing valve wire (often O or B) and its interaction with the thermostat’s settings. This section lays the groundwork for a careful, methodical approach.
Common wiring problems and how to spot them
Wiring faults manifest in several ways: the thermostat display goes blank, the system won’t heat or cool, or the HVAC unit cycles involuntarily. The most frequent culprits are loose terminals, damaged insulation, and missing or incorrect C-wire connections. A tripped breaker or a blown fuse can also mimic a wiring fault by starving the thermostat of power. If a terminal is visibly corroded or loose, tighten it gently and check for movement. Thermostat Care analysis shows that wiring issues are among the most common thermostat faults. Keep an eye on the age of the wiring; brittle insulation or frayed conductors are signs you should stop and replace affected parts rather than forcing a fix. This section helps you distinguish between simple reseating and more complex repairs that require a pro.
Safety first: power, live circuits, and protecting yourself
Electrical work around a thermostat involves low-voltage circuitry, but it can still cause shocks or short circuits if mishandled. Always cut power to the thermostat at the main breaker and confirm zero voltage with a non-contact tester before touching any wires. Use insulated tools and wear protective gloves as an extra precaution. Keep water away from the work area and avoid working in damp or confined spaces. If you smell burning or see melted insulation, stop immediately and call a licensed HVAC technician. This safety mindset reduces the risk of injury and equipment damage during the repair process.
Tools, materials, and preparation
Before touching wires, assemble the right tools and spare parts. Required items include a multimeter (set to 24 VAC range) and a non-contact voltage tester to confirm dead circuits, a small screwdriver set for thermostat screws, and wire strippers for clean insulation removal. Have labeling supplies handy to mark each wire (R, W, Y, G, C, O/B, etc.). An extra length of thermostat wire can be useful if you need to adjust connections, but avoid introducing extra wire into a tight terminal block. Secure a camera or notebook to document the original wiring, making reassembly easier. This preparation helps you work methodically and reduces the chance of miswiring.
How to test power and identify the problem safely
With power restored (only after confirming dead during the initial checks), use your multimeter to verify that the thermostat circuit is delivering around 24 VAC between the R and C terminals. If you do not see the expected voltage, the problem may lie upstream (furnace control board, transformer, or wiring between components). If voltage is present but the thermostat still misbehaves, inspect the terminal screws and ensure wires are fully seated. Remember to power down again after testing and before you adjust wiring further. This testing step is crucial to distinguish a power issue from a faulty thermostat or miswired terminals.
A diagnostic flow you can follow
Start by turning off power and removing the thermostat faceplate. Photograph the wiring and label each conductor. Inspect for loose screws, corrosion, or damaged insulation. Restore power and measure R–C voltage; if voltage is present, proceed to reseat or tighten wires. If the problem persists, compare the wires to the thermostat’s wiring diagram, then reattach wires to the exact terminals. If any step reveals damage or uncertainty, pause and seek professional help. A calm, stepwise approach minimizes mistakes and keeps your system safe.
Repair options you can perform safely
Most fixes involve reseating, tightening, or replacing a damaged wire segment. If a C-wire is missing, you may connect the C terminal to a spare conductor or use a C-wire adapter designed for your model. For a loose R or W connection, remove power, trim the insulation back slightly, and reterminate the conductor under the correct terminal screw. Avoid twisting wires together or forcing wires into terminals that are not intended for them. If insulation is nicked or wires are frayed, replace the affected wire rather than attempting a temporary splice. After repairs, reassemble the cover and test the thermostat across heating and cooling cycles.
When to call a pro and what to expect
If you encounter damaged wires, signs of burning, melted insulation, or consistent errors after reassembly, stop and call a licensed HVAC technician. A professional can diagnose internal control board issues, transformer faults, or incompatibilities between the thermostat and furnace that may require replacement parts. When you call, be prepared with a description of symptoms, a photo of the wiring, and the thermostat model. A pro can often complete the job quickly and safely, and may offer a warranty or service plan for future reliability.
Tools & Materials
- Multimeter (AC voltage tester)(Set to 24 VAC; verify between R and C when powered)
- Non-contact voltage tester(Confirm circuit is dead before touching wires)
- Screwdrivers (Phillips & flat-head)(Small sizes fit thermostat screws; have precision tools)
- Wire strippers/cutters(Trim insulation cleanly without nicking conductors)
- Electrical tape or wire nuts(For insulating exposed conductors or making safe splices)
- Wire labeling materials(Label wires (R, W, Y, G, C, O/B) during disassembly)
- Spare thermostat wire (at least 6 inches)(Useful if you need to extend or replace a damaged lead)
- Camera or notebook(Document original wiring to aid reassembly)
Steps
Estimated time: 30-60 minutes
- 1
Power down at the breaker and verify dead
Switch off the thermostat circuit at the main breaker. Use a non-contact tester to confirm zero voltage before touching any wires. This prevents shocks and accidental short circuits as you work.
Tip: Double-check the HVAC disconnect near the outdoor unit—some systems have a separate power switch. - 2
Remove the thermostat cover and document wiring
Carefully detach the faceplate and take a clear photo of the terminal block. Label each wire by its terminal (R, W, Y, G, C, O/B) to simplify reassembly. Keep wires organized and avoid twisting or pulling aggressively.
Tip: Label wires immediately as you disconnect them to prevent misplacement later. - 3
Inspect terminals for damage
Check screws for looseness, inspect insulation for wear, and look for signs of corrosion. If a terminal shows burn marks, do not reuse it; note for replacement. A damaged terminal can cause intermittent operation or failure to power the thermostat.
Tip: Gently tug each wire to verify a secure connection; do not overtighten terminal screws. - 4
Restore power and check for 24 VAC
With power on, use the multimeter to test voltage between R and C. A healthy setup should show about 24 VAC. If voltage is absent, focus on upstream components (furnace board or transformer) rather than the thermostat alone.
Tip: Keep hands clear of live conductors and maintain a safe stance while testing. - 5
Tighten or reseat loose wires
If any wire is loose, re-seat it fully under its terminal screw. Trim damaged insulation if needed and re-terminate. Ensure that each conductor only touches its proper terminal and isn’t kinked or stretched.
Tip: After reseating, gently wiggle wires to confirm a solid hold before powering down again. - 6
Reconnect and verify terminal functions
Reconnect wires to the correct terminals according to the thermostat’s diagram. Confirm that R powers the thermostat and that W, Y, G, and C engage their respective functions when tested.
Tip: If you’re unsure about a wire’s function, refer to the original photos or the thermostat manual. - 7
Test the thermostat in heat and cool modes
Power up and run through a few heating and cooling cycles. Verify that the system responds correctly and that readings on the thermostat match the room temperature. If issues persist, stop and consult a professional.
Tip: Document any abnormal behavior and share it with the technician if you call one.
Questions & Answers
Do I need to turn off power at the breaker before starting?
Yes. Always switch off the circuit feeding the thermostat and HVAC, then verify zero voltage with a tester before handling wires.
Yes. Turn off the breaker and verify there’s no voltage before touching any wires.
Can I fix thermostat wiring myself if I'm not an electrician?
You can handle simple tasks like reseating wires or tightening terminals. Avoid major rewiring or changes to the system without guidance.
You can do simple fixes, but avoid risky rewiring or changes to the system without guidance.
What is a C-wire and why is it important?
The C-wire provides continuous 24-volt power to the thermostat. Without it, many smart thermostats may power poorly or fail to operate reliably.
The C-wire supplies continuous power; without it, smart thermostats can misbehave or drain batteries quickly.
What if my thermostat uses heat-only or cool-only wiring?
Single-stage systems use specific wires for heat or cool functions. Do not connect unnecessary wires unless your thermostat manual confirms compatibility.
If you have a heat-only or cool-only system, follow the thermostat’s manual; not all extra wires are needed.
How can I verify the wiring is correct after reassembly?
Power the system and test several cycles. Check for correct 24 VAC across R and C and ensure accurate temperature readings.
Power up, run a few cycles, and check that readings are accurate.
When should I call a professional for thermostat wiring?
If you notice burning smells, damaged insulation, cracked wires, or persistent faults after checks, stop and contact a licensed HVAC technician.
If you smell burning, see damaged insulation, or still have faults after checks, get a pro.
Watch Video
What to Remember
- Power down before touching wires
- Check and secure the C-wire for smart thermostats
- Use a meter to verify 24 VAC supply
- Label wires and document wiring before changes
- Call a pro for high-risk repairs