How to Set Temperature on an Old Honeywell Thermostat
Learn how to set the temperature on an old Honeywell thermostat with a clear, step-by-step approach. This Thermostat Care guide covers dial and early digital models, safety tips, and troubleshooting.

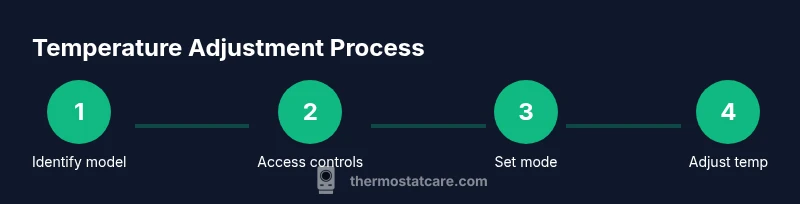
Goal: Set your home temperature using an old Honeywell thermostat. Identify if the model uses a dial or button controls, set the mode (heat or cool), and adjust to the desired setpoint. After you adjust, give the system a minute to respond and verify the thermostat shows the new setting. If the display is inaccurate, check power and wiring.
Understanding Old Honeywell Thermostats
Old Honeywell thermostats span several decades and typically fall into two families: dial-based analog units and early digital models with simple push or up/down controls. The essential goal is to signal your heating or cooling system to hold a chosen temperature. If you're wondering how to set old honeywell thermostat temperature, the answer depends on model type, but the core idea remains the same: first identify the control layout, then adjust the setpoint. According to Thermostat Care, locate the model number on the back of the unit or inside the cover and study the control arrangement before making adjustments. On dial models, rotate the knob to increase or decrease the setpoint. On older digital units, use the up/down buttons or a small wheel to reach the target. Some displays show only a numeric setpoint, not the room temperature, so you must observe the HVAC response to confirm accuracy. Regular maintenance and careful handling preserve accuracy and safety.
Tip from Thermostat Care: Start by confirming you’re targeting the correct zone (heating versus cooling) and that the thermostat is powered and responsive before making large changes.
Safety and Preparation
Before touching any thermostat, ensure you can access the unit safely. If the thermostat is connected to the HVAC system, consider turning off power at the breaker to reduce shock risk. If you must remove the cover, handle wires gently and keep screws in a labeled container. If your model uses batteries, replace them with fresh ones to prevent intermittent readings. If you’re unsure about electrical safety, consult a licensed professional. The goal is to avoid shorts, miswiring, or trips to the breaker while preserving old hardware.
Safety note: Do not force gears or switches; older mechanisms can be delicate and may break if treated like modern digital units.
Model Identification: Dial vs Digital
Identifying whether you have a dial-based or digital Honeywell thermostat is the first critical step. Dial models use a physical knob that rotates to set the temperature. Digital older units use basic buttons or a wheel to adjust the setpoint. Look for markings such as HEAT, COOL, OFF, or a mode indicator. If you see a liquid-crystal display with a numeric readout, you’re likely dealing with digital controls. Knowing which control scheme you have helps you apply the correct adjustment method and reduces the risk of overshooting the target.
Observation tip: If you’re unsure, photograph the control panel from several angles before making changes so you can reference the layout later.
Basic Troubleshooting Before You Adjust
If the thermostat isn’t responding, there are a few quick checks you can safely perform. Verify the thermostat is powered (batteries fresh or a connected power supply). Check that the HVAC breaker is on and hasn’t tripped. If you’ve recently replaced the cover or opened the thermostat, ensure all wires are properly connected and re-secured. A mismatch between the thermostat setting and the actual system mode (HEAT vs COOL) is a common source of confusion—double-check the active mode before changing the setpoint.
Pro tip: Keep a small notepad handy to document settings before and after adjustments so you can revert if needed.
How to Approach the Setting Process
When you’re learning how to set old honeywell thermostat temperature, approach the process with a clear sequence. Start by confirming the mode (heat or cool) is correct for the current season. Then adjust the setpoint in small increments to avoid overshoot and re-check after 60 seconds to confirm the system has responded. If the unit uses batteries, ensure they’re fresh. If it’s wired, confirm the wiring is intact and the power is live. Finally, replace the cover and restore any labeling you removed.
Key idea: Changes on older thermostats can take longer to reflect in the room, especially on systems with longer HVAC runtimes.
When to Replace or Upgrade
Older Honeywell models can be reliable but often lack modern features like tight temperature hold, smart scheduling, and energy optimization. If you consistently experience inaccurate readings, frequent resets, or if the unit is physically damaged, upgrading to a newer thermostat can improve comfort and efficiency. Consider models with simple installation and compatibility with your HVAC system. Regular maintenance and occasional upgrades help maintain comfort and energy savings over time.
Note: Replacements may qualify for rebates or energy savings programs in your area.
Tools & Materials
- Screwdriver set (Phillips #0 or #1)(Needed if the cover is screwed on; keep screws in a small container)
- Batteries (if battery-powered)(Replace to ensure reliable readings)
- Notebook or camera to document wiring(Capture photos before disconnecting any wires)
- Non-conductive gloves(Optional for extra safety when handling wires)
- Voltage tester (low-voltage safe)(Only if you know how to use safely; otherwise skip)
Steps
Estimated time: 15-25 minutes
- 1
Identify model and access controls
Inspect the thermostat face to determine if you have a dial or digital controls. Note the mode indicators (HEAT/COOL/OFF) and locate any model numbers on the back or inside the cover. This identification ensures you follow model-specific instructions.
Tip: Keep track of screws and labeling; a small tray helps prevent mix-ups. - 2
Power check and prepare
If the unit uses batteries, replace them with fresh alkalines. If it’s hardwired, ensure the HVAC power is safe to interact with by turning off the breaker or confirming power is live with a tester before any wire handling.
Tip: Always document current wiring before disconnecting anything so you can restore it exactly. - 3
Set the operating mode
Confirm the thermostat is in the correct mode for the season (HEAT for winter, COOL for summer). If a mis-set mode is causing no response, correct it before adjusting the setpoint.
Tip: A wrong mode is a common source of the feeling that the thermostat isn’t working. - 4
Adjust the setpoint to the target
For dial units, turn the dial slowly toward the desired temperature until the target is reached. For digital units, press the up or down button (or use the wheel) to reach the target setpoint. Do not force the mechanism.
Tip: Make small changes and wait 30–60 seconds between adjustments. - 5
Verify system response
Give the HVAC system time to respond after each adjustment. Listen for the furnace or compressor starting, and check if the room starts to warm or cool toward the new setting. If there’s no response, recheck power and wiring.
Tip: Use a secondary thermometer to verify air temperature gradually changes toward the setpoint. - 6
Finalize and document
Once you reach the target, reinsert the cover and ensure all screws are snug. Label the change date and setting if you keep records for future reference. If problems persist, consider a replacement thermostat for consistent control.
Tip: Note the exact model and any trouble you encountered for future service calls.
Questions & Answers
Can I set temperature on any Honeywell thermostat the same way?
Most older Honeywell thermostats share similar controls, but model variations exist. Check the cover or the manual for exact steps. The general approach—set the mode first, then adjust the setpoint—applies to many units. If in doubt, consult the model's documentation or a professional.
Most older Honeywell thermostats use a similar pattern: set the mode, then adjust the temperature. If yours looks different, refer to the manual or a professional.
What should I do if the thermostat display is blank or inaccurate?
If the display is blank or inaccurate, first check power and batteries. Replace batteries if present, and ensure the HVAC breaker is on. If the issue persists, there may be an internal fault or wiring issue requiring professional service.
If the display is blank or inaccurate, replace batteries, check the breaker, and consult a technician if it continues.
Is it safe to remove the thermostat cover?
If power is off and you’re careful, removing the cover is generally safe. Keep screws safe and avoid touching live wires. If you’re unsure or uncomfortable, skip removal and call a pro.
Yes, with power off and careful handling. If unsure, skip and contact a pro.
How can I tell if the problem is the thermostat or the HVAC system?
Test by adjusting the thermostat and listening for the furnace or compressor. If the HVAC doesn’t respond, the issue may lie with the thermostat wiring or power. If the system responds inconsistently, the HVAC components may be at fault.
If the HVAC doesn’t respond to thermostat changes, the issue may be wiring or power; otherwise, the HVAC itself may be at fault.
What if my Thermostat uses a mercury switch?
Mercury-based thermostats require special handling and replacement due to safety concerns. If you suspect a mercury switch, avoid DIY repairs and consider upgrading to a safer, modern thermostat.
Mercury thermostats are hazardous; upgrade to avoid risk and simplify operation.
Do I need an electrician to adjust or replace an old thermostat?
Most basic adjustments on old low-voltage thermostats can be done by a careful homeowner. If wiring is complex, involves high voltage, or you’re uncertain about safety, hire a licensed electrician or HVAC technician.
Only hire an electrician if wiring is complex or dangerous; otherwise, you can usually handle simple adjustments yourself.
Watch Video
What to Remember
- Identify model before adjusting to ensure correct method.
- Check power or batteries first to verify readings are trustworthy.
- Set mode (heat or cool) before adjusting the temperature.
- Test after adjustments and wait for HVAC response.
- Consider upgrading for better accuracy and energy savings.