How to Turn On a Honeywell Thermostat: A Step-by-Step Guide
Master turning on a Honeywell thermostat with this comprehensive how-to. Learn power options, wake the display, choose modes, and troubleshoot startup issues—complete with model differences, safety tips, and expert guidance from Thermostat Care.

To turn on most Honeywell thermostats, start by ensuring the unit has power and is awake. For Wi‑Fi models, press any button or tap the screen to wake it, then confirm the display is illuminated. If your model has a power switch on the wall or a C-wire connection, switch on power and wait a moment for the screen to light. Steps vary by model; consult your manual if needed.
Why turning on a Honeywell thermostat matters
If you’re asking how do you turn on a honeywell thermostat, you’re not alone. Powering up the thermostat is the first step to restoring climate comfort, diagnosing startup hiccups, and ensuring the HVAC system receives the right signals. A proper startup also helps the device run through its self-check routines, confirming sensor readings and ensuring the display is readable. In homes with older, non‑smart models, a simple power cycle can resolve a stubborn blank screen or delayed response. Thermostat Care emphasizes that a smooth startup reduces energy waste and minimizes confusion when you adjust temperatures. By understanding the basics of powering on, homeowners can avoid unnecessary visits from technicians and restore comfort faster.
Power sources and model differences
Honeywell thermostats come in several families: basic battery-powered units, wall-powered (hardwired) models with a C-wire, and modern Wi‑Fi or smart thermostats that rely on power over Ethernet or a dedicated circuit. Battery models require fresh AA/AAA cells and will show a low-battery warning when power is dwindling. Hardwired models pull 24 VAC from your HVAC system and may not use batteries at all. Some Wi‑Fi versions can wake from sleep with a quick touch, while others need a command from the app. Before turning on, identify which power path your unit uses by checking the backplate, user manual, or the model label on the thermostat.
What you’ll need before you start
Before powering on, gather a few essentials to avoid mid-process interruptions: batteries if your unit is battery-powered, the correct screwdriver if you need to access wall plates, and the model-specific manual or setup guide. It’s helpful to have the original installation sheet handy to verify wire colors and terminal labels. If you’re using a Wi‑Fi Honeywell, ensure your home network is configured and within range, as initial setup often requires network access. Thermostat Care recommends keeping fresh batteries on hand and labeling any spare parts for future maintenance.
Step-by-step: wake the display and power (general approach)
Start by waking the screen. On most modern Honeywell thermostats, a light tap or a press on any button will illuminate the display. If the screen remains dark after a few seconds, check the power source—batteries should be in place and oriented correctly, or the wall power switch should be ON. If you’re troubleshooting a blank screen, perform a soft reset by pressing the reset button (if present) or removing and re-inserting batteries, then wait 30–60 seconds for the display to reinitialize.
Step-by-step: enable heating or cooling mode
Once the display is active, verify you’re in the correct mode. Use the mode selector or touchscreen to switch to Heat, Cool, Auto, or Off, depending on your current needs. For automatic comfort, select Auto so the thermostat switches between heating and cooling as temperatures change. If your model uses a separate Home/Power button, press it to activate the HVAC system, then confirm the indicator shows active operation. Always confirm that the setpoint temperature aligns with your desired comfort level.
Step-by-step: set temperature and schedule
With the correct mode selected, set your target temperature using the up/down arrows or a sliding control on the touchscreen. For Wi‑Fi models, you can also adjust target temperatures via the mobile app. If your thermostat supports scheduling, configure a basic day schedule to mirror your daily routine. Save or confirm each change, and allow the system a few minutes to stabilize at the new setpoint; you should feel a noticeable change in the room temperature.
Common startup issues and quick fixes
If the display is lit but the HVAC won’t respond, check the wiring connections behind the thermostat plate (if comfortable doing so). For battery-based units, replace old batteries with fresh ones, ensuring correct polarity. A blank screen after power cycling may indicate a dead circuit or a tripped breaker; check the furnace or air handler’s power supply and reset any tripped breakers. If the unit still won’t power up, consult the manual for a model-specific reset procedure.
Safety considerations and maintenance
Work with the system power OFF if you need to access wiring or the backplate. Avoid forcing the thermostat buttons or screen, which can damage sensitive electronics. Keep the thermostat away from direct sunlight, heat vents, or moisture, which can affect sensor accuracy. Regular maintenance includes checking batteries, confirming firmware updates for smart models, and cleaning the display with a soft, dry cloth. Thermostat Care recommends scheduling an annual check to ensure the power path remains reliable.
Energy basics: startup behavior and efficiency
Startup power affects how quickly a thermostat responds to changes and how efficiently it maintains temperatures. A model that powers up cleanly and quickly minimizes energy waste during initial cycles. For Wi‑Fi units, firmware updates may alter startup times; ensure updates complete before scheduling. Use the Auto mode when possible to optimize heater and AC cycling, and leverage any energy-saving features your Honeywell model offers to reduce monthly utility costs.
Model-specific tips for popular Honeywell families
Different Honeywell lines—basic, VisionPro, T and Pro series, and Wi‑Fi variants—have unique startup quirks. For instance, some battery models require a specific battery type and orientation; others rely on a short press to wake. Smart models may display a status icon indicating connectivity or require initial pairing via the app. Always consult the model manual when in doubt, and don’t assume all features are identical across families. Thermostat Care highlights that model-specific guidance reduces troubleshooting time dramatically.
How to locate and use the manual
If you’re unsure which model you own, check the back of the thermostat or the inside of the wall plate for a model number. The manual will provide exact power requirements, button names, and startup steps. Many Honeywell manuals are available online through the manufacturer’s site or supported retailer portals. Keeping a digital copy of the manual on your phone ensures you can quickly reference steps while troubleshooting and powering on the device.
References and further reading
For broader guidance on thermostat startup and energy efficiency, refer to reputable sources:
- https://www.energy.gov/energysaver/thermostats
- https://www.energy.gov/eere/buildings/articles/thermostats
- https://ashrae.org
These sources offer industry insights and verified recommendations that complement model-specific instructions from Honeywell. Thermostat Care suggests cross-checking device manuals with these references to ensure safe and effective startup.
Tools & Materials
- Batteries (AA or AAA, depending on model)(Check model manual for the correct size and orientation.)
- Tools for wall plate access (Phillips screwdriver if needed)(Only if you need to remove the wall plate or access wiring.)
- Model-specific manual or setup guide(Essential for model-dependent steps and safety warnings.)
- Basic power source confirmation (24 VAC supply for wired models)(Verify the HVAC system is powered and the circuit is not tripped.)
Steps
Estimated time: 5-15 minutes
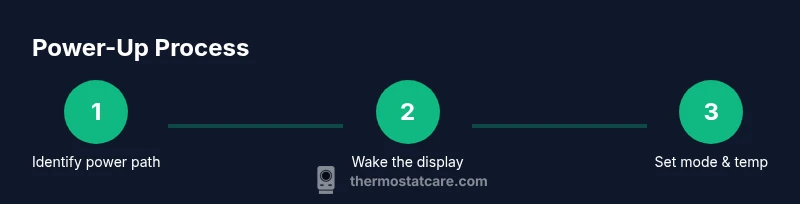
- 1
Inspect power source
Identify whether your Honeywell thermostat is battery-powered or hardwired. If battery-powered, open the battery compartment and confirm fresh batteries are installed with correct polarity. If wired, locate the 24 VAC power supply and ensure the circuit is on. This step prevents a useless startup attempt due to power issues.
Tip: Having fresh batteries ready saves time during the wake-up process. - 2
Wake the display
Gently touch the screen or press any button to wake the thermostat. If the display remains dark, replace batteries or confirm the wall power is ON. Some models require a short press on a dedicated power button to fully illuminate the screen.
Tip: If you suspect a sleep state, wait a moment after waking to let the system perform its self-check. - 3
Verify mode and target
Check that the mode is set to Heat, Cool, or Auto as desired. If you intended to heat, ensure the Heat mode is active. For cooling, switch to Cool. Correct mode is essential for the thermostat to engage the HVAC system properly.
Tip: Auto mode helps balance comfort and energy use by switching between heating and cooling automatically. - 4
Power on battery models (if needed)
For battery-powered units, insert or replace batteries and reseat the cover. Wait 30–60 seconds for the unit to run its internal checks and illuminate the screen. If the device doesn’t power on, recheck battery orientation.
Tip: Use high-quality alkaline batteries for reliable performance. - 5
Power on wired models (if needed)
Ensure the wall switch is ON and the furnace/air handler is powered. If a wiring harness exists, confirm all cables are securely attached to the correct terminals. Some models require a brief reset after power restoration.
Tip: If you’re unsure about wiring, consult the manual or a professional. - 6
Set the desired temperature
Use the up/down arrows or the touchscreen to set your target temperature. For Wi‑Fi models, you can adjust via the app as well. Allow a few minutes for the HVAC system to respond and begin heating or cooling.
Tip: Avoid rapid, extreme temperature changes to protect your system. - 7
Confirm HVAC response
Listen for the furnace or AC compressor engaging and verify fresh airflow. If there is no response, recheck the mode, verify power, and ensure there are no tripped breakers or blown fuses in the HVAC circuit.
Tip: If you hear a hum but no airflow, check the air filter and ducts for blockages. - 8
Document any issues and finish
If startup is successful, take note of any unfamiliar prompts or settings for future reference. If not, proceed to the troubleshooting section or contact support with model details.
Tip: Keep the model number handy for faster help.
Questions & Answers
Why is my Honeywell thermostat blank after powering on?
A blank screen often indicates power or battery issues. Check battery orientation and freshness for battery-powered models, or verify the 24 VAC supply and circuit breakers for wired units. If necessary, perform a soft reset and re-seat connections per the model manual.
A blank screen usually means a power or battery problem. Check batteries or the 24 VAC supply and reset according to your model’s manual.
Do I need to replace batteries to turn on the thermostat?
Not all Honeywell thermostats require batteries. Battery-powered models absolutely do; replace with the correct size and type. Hardwired units rely on the home's power and do not need batteries for basic startup.
It depends on the model—battery-powered units need fresh batteries; wired units use the house power.
What if the display shows error codes during startup?
Note the error code and consult the model manual for specific meanings. If the code persists after a reset, contact support or a licensed technician. Some errors require wiring or sensor calibration by a pro.
Record the error code and check the manual. If it stays, contact support.
Can I operate the thermostat without Wi‑Fi?
Yes. Basic power, mode selection, and temperature control work without Wi‑Fi. Network features like remote scheduling or app control require an active connection and account setup.
You can operate basic functions without Wi‑Fi; smart features need the network.
Where can I find model-specific instructions?
Check the model label on the back or inside the wall plate, then search Honeywell’s official manuals or your retailer’s support site. The manual provides exact startup steps and safety notes tailored to your model.
Look up the model label and consult the official manual for exact startup steps.
What safety checks should I perform before turning on?
Ensure power is off before touching wiring. Verify that HVAC circuits and breakers are in good condition, and avoid forcing any buttons or connections. If you smell burning or see sparking, shut everything down and seek professional help.
Turn off power first, verify circuits, and don’t force connections. Seek help if you notice hazards.
Watch Video
What to Remember
- Identify power path before starting
- Wake display, then confirm mode is correct
- Replace batteries if required
- Set target temperature and save changes
- Consult model-specific manuals for quirks