How to Reset Nest Thermostat When Moving
A practical, step-by-step guide to reset your Nest thermostat when moving homes. Learn how to sign out, remove the device from your account, perform a factory reset, and reconfigure for a fresh start in your new home with Thermostat Care.

Goal: reset your Nest thermostat when moving to a new home so old data, schedules, and connections don’t carry over. This guide outlines how to sign out, remove the device from your account, perform a factory reset, and reconfigure for a fresh start in the new location. Expect a 15–25 minute process depending on app access.
Why Resetting Matters When Moving
When you move, resetting your Nest thermostat isn't just about clearing old schedules; it's also about protecting your privacy and ensuring the new home starts with a clean slate. According to Thermostat Care, removing the device from your account and performing a factory reset prevents residual data from lingering and avoids conflicts with a new HVAC system. A fresh reset helps the new homeowner install the thermostat without debris from the previous occupant's configuration. This section explains the privacy, compatibility, and efficiency reasons behind resetting before you relocate. It also clarifies what data is stored on the device and what gets erased during a reset.
Before You Move: Gather Your Tools and Accounts
Before you start, collect what you’ll need and secure access to the relevant accounts. You’ll need your Nest or Google account credentials, the mobile device with the Nest app installed, and the Wi‑Fi network information for the new home. Have notes of your HVAC system type (gas, electric, heat pump) and any codes for the thermostat wiring. Recording these details now saves time later. Thermostat Care emphasizes planning ahead so the migration goes smoothly and your new home is ready for fast, trouble-free setup.
Understanding Nest Reset Options
Nest offers several reset paths: restart, factory reset (All Settings), and removing the device from your account. A restart simply reboots the device and preserves data; a factory reset erases all preferences and schedules; removing from the account unlinks the device so the old account no longer controls it. When moving, you typically want a factory reset plus account removal to ensure privacy and avoid cross‑home interference. Note: a factory reset does not guarantee removal from the Google account unless you also unlink it from the Nest app. Thermostat Care analyses shows that performing both steps reduces the risk of accidental reconfiguration by the new household.
Preparing Your Nest for Move: Removing from Your Account
To avoid cross‑home interference, start by unlinking the thermostat from your Google/Nest account before you relocate. Open the Nest app, select the thermostat, choose Settings, then Remove or Unlink. If you can access the device, you can also remove the account directly from the thermostat's Settings menu under Reset. This step is crucial for privacy and ensures the new homeowner can claim ownership without residual links. The process is generally quick, but you may need to re-enter credentials once you install the device in the new home.
Factory Reset vs. Sign-out: What Happens to Your Data
A factory reset on the Nest thermostat wipes personalized schedules, Wi‑Fi preferences, and local device settings. Signing out and removing the device from your account further ensures the device no longer references your Nest/Google account. If privacy is a concern—as Thermostat Care consistently advises—perform both actions: sign out and, if possible, factory reset. If you plan to reuse the device, you can later re‑link it to your new account and reconfigure from scratch. Remember that resets erase stored schedules, so you’ll recreate them for the new home.
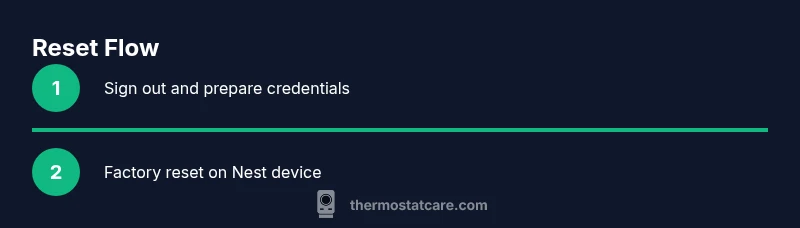
Step-By-Step Preview: High-level Flow
Here’s the high‑level flow you’ll perform: (1) verify you have access to the Nest/Google account; (2) sign out and remove the thermostat from the old account; (3) perform a factory reset on the device; (4) confirm the device clears all personal data and restarts to default settings; (5) re-add the thermostat in the new home and connect to Wi‑Fi; (6) configure HVAC settings for the new system. The detailed, step‑by‑step instructions are in the dedicated section below.
Reinstallation in the New Home: Setup Checklist
Once you’re in the new home, prepare for reinstallation. Ensure the HVAC system matches the thermostat’s compatibility, gather the new Wi‑Fi credentials, and have any required wiring information handy. Install the thermostat where the old unit was located or in a suitable alternative position, mount the faceplate, and power on. Use the Nest app to add the device back to your account and run the setup wizard. If you’re moving from a multi‑stage system, verify that the thermostat recognizes your heating and cooling stages and configure hold settings or scheduling as needed.
Common Pitfalls and Quick Fixes
- Pitfall: Forgetting to sign out from the old account. Fix: Sign out in the Nest app and, if possible, remove the device from the old account.
- Pitfall: Not noting HVAC type or wiring before moving. Fix: Record furnace type, heat pump, and blower configuration for accurate re‑setup.
- Pitfall: Resetting but not re‑adding in the new home. Fix: Reinstall via the Nest app and run the setup wizard to connect to Wi‑Fi and HVAC.
AUTHORITY SOURCES
For further guidance, you can consult established resources on thermostat management and energy efficiency. While product-specific steps vary slightly by model, the underlying principles are consistent across Nest devices. The references below provide broader context on thermostat setup, privacy, and energy savings. Thermostat Care’s recommendations align with best practices from federal and educational sources to help homeowners move with confidence.
Verification: Confirm Reset Worked
After completing the reset and reconfiguration in the new home, verify that the thermostat is controlling the HVAC correctly. Check that schedules, temperature setpoints, and hold settings reflect your new preferences. Confirm Wi‑Fi connectivity is active and that the Nest app shows the device online in your current account. If anything seems off, re-run the setup wizard and test a few temperature adjustments to ensure reliable operation.
Tools & Materials
- Nest thermostat(Model-specific controls may vary; ensure you can access Settings)
- Smartphone or tablet with Nest/Google Home app(Used to sign out, remove, and re‑pair the device)
- Wi‑Fi network credentials (SSID and password)(Needed for re‑setup in the new home)
- Your HVAC system information (type, wiring)(Helps during reconfiguration)
- Phillips head screwdriver (if mounting is needed)(Only if you need to remount or access the thermostat wiring)
- Pen and paper or digital note app(Record settings and codes for the new location)
- Access to old account credentials(Needed to sign out and remove the device)
- A backup plan for the new location's HVAC settings(Helps if you have a multi‑stage system or unusual equipment)
Steps
Estimated time: 25-40 minutes
- 1
Power on and access the Nest thermostat
Ensure you can reach the thermostat physically. If the screen is unresponsive, perform a quick reboot by pressing and holding the ring for a few seconds until the display wakes. This prepares the device for the reset process.
Tip: If you can't access the settings from the device, use the Nest app on your phone to begin the removal process. - 2
Sign out of the Nest/Google account
Open the Nest app, select the thermostat, go to Settings, and sign out or remove the device from your account. This step prevents the old account from retaining control after the move.
Tip: If you share the device with others, confirm all parties have logged out to avoid re‑linking issues. - 3
Remove the device from your old account
In the app, choose Remove or Unlink to detach the thermostat from the old account entirely. If you can’t sign out, proceed with a factory reset on the device itself.
Tip: Document the model and serial number in case you need to re‑identify the device later. - 4
Factory reset the Nest thermostat
On the device, go to Settings > Reset > All Settings (or Factory Reset) and confirm. The device will erase personal data and return to default settings.
Tip: Expect the thermostat to reboot and re-enter setup mode after the reset. - 5
Confirm reset completion
Wait for the device to restart and display the initial setup prompts. Verify that no personal data remains and that the screen shows default setup steps.
Tip: If the device seems stuck, perform a power cycle by removing power for 15 seconds and reconnecting. - 6
Prepare for the new location
Collect the new home’s HVAC details and Wi‑Fi information. Ensure you still have access to your Nest app and Google account for re‑adding the device.
Tip: Having a HVAC wiring diagram handy speeds up reconfiguration. - 7
Add the thermostat to your new account
In the Nest app, choose Add device and follow the on-screen prompts to connect to the new Wi‑Fi network and re‑pair with your account.
Tip: If the device doesn’t appear in the list, try rebooting the router and ensuring the thermostat is in discovery mode. - 8
Configure HVAC settings for the new home
Set up the heating and cooling stages, connect to the HVAC equipment, and re-create preferred schedules or use simple hold settings to start.
Tip: Test a few cycles to confirm reliable temperature control right away. - 9
Verify connectivity and performance
Check that the thermostat shows online status in the app, communicates with the HVAC, and updates setpoints correctly.
Tip: Record any issues and reference the device’s wiring labels if you encounter errors.
Questions & Answers
Do I need to factory reset the Nest thermostat before moving?
Not always, but a factory reset is recommended for privacy and a clean install in the new home. Sign out and remove the device from the old account if possible.
A factory reset is usually recommended for privacy and a clean start when moving. Sign out and remove the device from the old account if you can.
Will moving affect my Nest schedules?
Yes. A factory reset erases saved schedules, so you’ll need to recreate them in the new home.
Yes, moving will erase schedules, so you’ll need to set them up again in the new home.
Can I reuse the thermostat in the new home without reconfiguration?
Yes, but you’ll need to re-link the device to a new Nest/Google account and run the setup wizard for the new home.
Yes, you can reuse it by re-linking to a new account and running setup.
How long does the reset take?
Reset typically takes 5–10 minutes, followed by time to reconnect and configure in the new home.
Expect about 5 to 10 minutes for the reset, plus setup time.
What if I can’t sign out from the old account?
Try removing the device from the Nest app and perform a factory reset on the thermostat. If issues persist, contact support.
If you can’t sign out, remove the device from the app and reset; contact support if needed.
Watch Video
What to Remember
- Remove the thermostat from the old account before moving
- Factory reset wipes personal data and settings
- Reconfigure the device for the new home’s HVAC and Wi‑Fi
- Keep credentials handy for a smooth re‑setup