How to remove old thermostat and install nest
Learn how to remove your old thermostat and install a Nest thermostat with a step-by-step approach, safety tips, and wiring guidance. This guide covers compatibility, tools, wiring types, and troubleshooting for common scenarios.

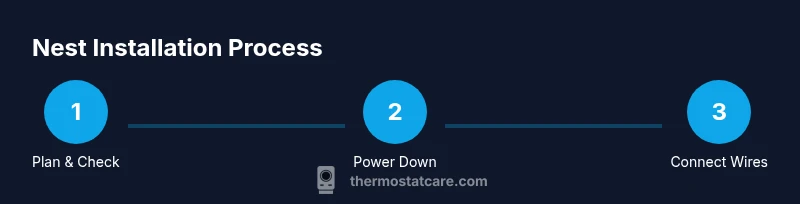
Goal: remove your old thermostat and install a Nest so you can control comfort and energy use more efficiently. This guide covers compatibility checks, safety steps, required tools, and a clear step-by-step process. By powering down first, labeling wires, and following Nest’s wiring guide, homeowners can install confidently and test functionality. According to Thermostat Care, careful preparation reduces risk.
Planning and compatibility for Nest installation
Upgrading to a Nest thermostat starts with planning and compatibility checks. You want to confirm your HVAC system uses standard wiring and that your existing wiring includes essential terminals such as R, C, Y, G, and W. If your old thermostat uses unusual terminals or has a heat pump with specialized controls, you may need a compatibility check before proceeding. According to Thermostat Care, compatibility checks reduce the risk of incompatible wiring that can prevent your Nest from powering on or controlling heat and cooling accurately. Begin by locating the furnace or air handler's control board, and note the type of system you have (gas, electric, heat pump, or boiler). Then, inspect the thermostat cable to count the conductors and verify the presence of a common wire (C). Nest typically supports most conventional systems, but very old or exotic setups may need professional evaluation. If you discover missing wires or nonstandard configurations, plan alternative wiring or consult Nest's official compatibility resources. This initial step saves time and helps you avoid wasted effort during installation.
Safety first: power down and verify
Electrical safety is non-negotiable whenever you work around wiring. Before touching anything, switch off the circuit that feeds the thermostat from the main breaker panel. If you have a Z-Wave or smart home controller, you may want to disable related modules, but ensure that the HVAC equipment remains powered down to prevent unexpected starts. Use a non-contact voltage tester to confirm that the thermostat wires are dead. Do not rely on the old power switch or outlet; the thermostat wiring runs directly from the HVAC system. Keep a clean workspace, and avoid pulling on wires that slip behind the wall. After you confirm power is off, take a quick photo of the existing wiring for reference. This reduces confusion when you reconnect wires to the Nest and helps you re-create the original configuration if needed. Thermostat Care emphasizes safety as the foundation of any successful installation.
Gather the right tools and identify wires
Collect the essential tools before you begin. A Phillips and flathead screwdriver, a non-contact voltage tester, wire labels or painter’s tape, wire cutters or strippers (optional), and the Nest thermostat unit are the core items. Also ensure you have a reliable Wi‑Fi connection and the knowledge of your HVAC’s wiring terminals (R, C, Y, G, W, and the type of system). Label each wire as you disconnect it from the old thermostat to prevent mix-ups. If you encounter unusual wire colors or a missing common wire, plan to use a Nest compatibility checker or a Power Extender Kit (PEK) if your setup supports it. Having everything ready minimizes surprises at the wall.
Remove the old thermostat and document wiring
Carefully remove the thermostat cover and detach the wall plate. Before detaching wires, photograph the terminals and note which wire goes to which terminal. Gently pull each wire from its terminal and label them with the corresponding letter (R, C, Y, G, W, etc.). Check for a jumper between R and RC or RH and RH; many old thermostats use jumpers that are not needed with Nest, since Nest handles power routing internally. Place the wires in a safe container, then remove the old base from the wall. If the wall is damaged or wires are recessed, you may need to widen the opening slightly. This documentation step helps you reproduce the exact wiring on the Nest if needed.
Check system type and prepare the Nest base
Determine whether your system is single-stage heat/cool, heat pump, or a specialized configuration (multi-stage or boiler with hydronic heat). Nest supports many common systems, but exotic configurations may require additional adapters or professional advice. Use the Nest compatibility checklist to confirm which wires are present and which terminals will be used. Clean the wall surface and prepare the mounting area. Attach the Nest base to the wall with the screws, making sure the base is level. If you find a missing C-wire, decide whether to run one or use a PEK based on your wiring. This stage sets the foundation for a reliable connection between the Nest base and your HVAC equipment.
Wire Nest terminals and mount the base
Begin connecting wires to the Nest base according to the letters on the Nest diagram. Ensure each wire is fully inserted and secured under the correct terminal. Do not force wires into terminals that aren’t designed for them. If a wire has sharp ends or is difficult to insert, trim or retouch the insulation for a clean contact. After wiring, gently tug on each wire to verify a secure fit. Attach the Nest display to the base and mount the assembly back on the wall. If your system requires a C-wire, connect the C terminal accordingly and verify the wire is continuous to the furnace control board. This step is critical for stable Nest power and reliable operation.
Attach the display, connect Wi‑Fi, and update settings
Power the Nest by restoring power at the breaker. The Nest should power up and prompt you to connect to Wi‑Fi. Follow on-screen prompts to connect to your network, enter your location, and configure basic preferences such as language and units. The Nest app will guide you through selecting your HVAC type, calibrating temperature, and setting up home/Away routines. If your system includes a heat pump or two-stage equipment, use the Nest wiring chart to configure the correct settings. This phase translates the mechanical wiring into a responsive, programmable thermostat experience.
Test, troubleshoot, and finalize installation
With the Nest connected, run a quick test to verify heating and cooling operation. Simulate a temperature change to ensure the system responds correctly and that the fan operates as expected. If you notice no response or erratic behavior, re-check wire connections and verify that the power is stable. Consult the Nest app’s readings for voltage and wire status, and use a multimeter if you have one to verify continuity on critical wires. If problems persist, revert to the original wiring diagram you photographed and reseat wires, or consult Nest support for compatibility guidance. Completing a thorough test helps prevent post-install surprises.
Compatibility notes and common scenarios
Every home is unique, and some configurations require additional steps. If your system uses a two-wire setup, Nest may still install using a Power Extender Kit or a battery-based model, but there could be limitations in charging power. For heat-only systems, ensure a constant power source and verify whether the Nest’s power needs can be met without a dedicated C-wire. For heat pumps with auxiliary heat, follow the Nest wiring schematic for O/B, Y, and AUX terminals. If you encounter a nonstandard control sequence, consider consulting a professional before finalizing the installation. Proper planning and careful wiring are the keys to a successful Nest upgrade.
Tools & Materials
- Screwdrivers (Phillips and flathead)(Assorted sizes for thermostat screws and wall plate.)
- Non-contact voltage tester(Verify power is off before handling wires.)
- Wire labels or painter’s tape(Label each wire by terminal letter (R, C, Y, G, W).)
- Nest thermostat(Choose the Nest model that matches your wiring (3rd gen or newer).)
- Wi‑Fi enabled device for setup(Phone or tablet for the Nest app during setup.)
- Optional: Wire cutters/strippers(Use if wires are difficult to insert or need trimming.)
- Power Extender Kit (PEK) or C-wire adapter(Needed for some two-wire or nonstandard configurations.)
Steps
Estimated time: 60-120 minutes
- 1
Check compatibility and plan wiring
Review your HVAC type and confirm you have access to all wires (R, C, Y, G, W). If your system uses heat pumps or unusual configurations, consult Nest's wiring diagrams to anticipate compatibility needs. This preparation reduces surprises once you start the physical work.
Tip: Use the Nest compatibility checker before disconnecting anything. - 2
Power down and verify dead wires
Turn off the furnace breaker and the thermostat's corresponding circuit. Use the non-contact tester to verify there is no voltage on the wires you will handle. Powering down prevents shocks and equipment damage.
Tip: Double-check the main breaker label and test the circuit with your tester. - 3
Label and photograph existing wiring
Take a clear photo of the wiring at the old thermostat and label each wire with its terminal letter. This creates a reference map for reassembly on the Nest base. If you encounter jumpers, note their placement and purpose.
Tip: A second photo from a different angle helps if wires obscure terminals. - 4
Remove the old base and detach wires
Carefully unscrew and remove the old thermostat base. Detach wires one by one, keeping them organized by label. Avoid yanking; if a wire is stubborn, gently loosen the terminal clamp with a small screwdriver.
Tip: Keep screws in a small container to avoid losing them. - 5
Prepare Nest base and identify wires
Position the Nest base on the wall, ensuring the wire slots align with the labeled wires. If a C-wire is present, connect it to the C terminal; otherwise decide whether to use PEK or run a new C-wire. Do a quick visual check that none of the wires are frayed.
Tip: Make a continuous wire path from the wall to the Nest to reduce stress on wires. - 6
Connect wires to Nest terminals
Insert each labeled wire into the corresponding Nest terminal (R, C, Y, G, W, etc.). Ensure a snug fit and twist any exposed copper for a clean contact. If you need to trim insulation, do so evenly and avoid nicking the conductor.
Tip: Avoid using jumpers; Nest internally manages power routing for most configurations. - 7
Mount the Nest base and restore power
Secure the Nest base to the wall and reattach the display. Turn the HVAC power back on at the breaker. The Nest should boot up and prompt you to choose system type and language.
Tip: If the Nest struggles to power on, re-check the C-wire connection and breaker status. - 8
Configure settings and connect Wi‑Fi
Follow on-screen prompts to connect to Wi‑Fi, set your location, and configure system type (single-stage, heat pump, etc.). Calibrate temperature and adjust schedule preferences. Use the Nest app to refine energy-saving features and Away routines.
Tip: Keep your Wi‑Fi password handy and ensure strong signal at the thermostat location. - 9
Test cooling, heating, and fan functions
Run a quick test of heating, cooling, and the fan to verify proper operation. Watch for any unusual noises or delays in response. If something is off, re-check wiring against the original map and test again.
Tip: Document test results in case you need to revert or seek support.
Questions & Answers
Can I install a Nest thermostat myself, or should I hire a pro?
Many homeowners can install Nest themselves if the wiring is standard and you follow the compatibility guidelines. Complex HVAC configurations or unusual wire setups may benefit from professional help.
You can often install Nest yourself if your wiring matches Nest’s diagrams; otherwise, consider a pro for complex systems.
Do I need a C-wire for Nest?
A C-wire provides reliable power for Nest in many setups. If you don’t have C, a Power Extender Kit or an alternative wiring plan may be required. Check the Nest compatibility guide for your model.
A C-wire helps Nest stay powered consistently; if you don’t have one, look into a PEK or other wiring options.
What if my old thermostat is heat-only?
Nest can work with many heat-only systems, but wiring specifics vary. You may need a C-wire or adapter, and verify compatibility with your boiler or furnace.
Nest works with many heat-only setups, but wiring details matter.
Will Nest work with a two-wire thermostat without a C-wire?
Some Nest models can operate with two wires using a PEK, but performance may be limited. A C-wire is generally recommended for best reliability.
Two wires can work in some cases, but a C-wire is better for reliability.
How long does installation take?
Most installations take about 30 to 90 minutes depending on wiring and system complexity. Allow extra time for Wi‑Fi setup and testing.
Most installs take 30 to 90 minutes, with some variations.
What should I do if Nest won’t power on after installation?
Double-check wiring and power from the breaker. If it still won’t power, review the original wiring map and consider consulting Nest support for compatibility help.
If it won’t power, re-check wiring and breaker; seek support if needed.
Watch Video
What to Remember
- Start with compatibility checks and power down.
- Label wires and photograph the existing wiring map.
- Follow Nest wiring diagrams precisely and test thoroughly.