How to Replace Thermostat with Nest
Learn how to replace your thermostat with Nest in a safe, step-by-step process. Verify compatibility, gather tools, wire correctly, and configure using the Nest app. Practical guidance from Thermostat Care for DIY homeowners.

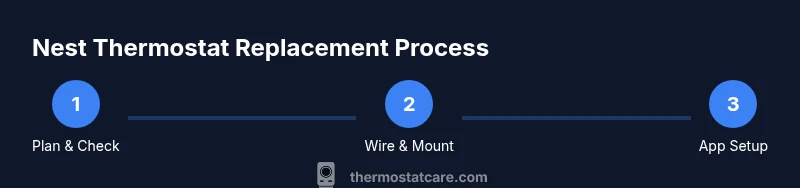
By following a safe, step-by-step process, you can replace your current thermostat with a Nest model and keep your HVAC system running smoothly. Start by confirming your system type, turning off power at the breaker, and gathering the right tools. Then mount the Nest base, connect labeled wires, install the display, and complete setup in the Nest app. Thermostat Care advises caution and testing after installation.
What You Need to Know Before Replacing
Before you dive in, understanding your current HVAC setup and Nest compatibility is essential. Nest works with most standard 24V heating and cooling systems, but some configurations—particularly older setups or non-24V controls—may require adapters or professional assistance. According to Thermostat Care, planning ahead reduces surprises and speeds up the process. Verify system type, confirm wire presence, and review the Nest compatibility tool before touching any wires. A careful plan saves time and protects your equipment while ensuring a reliable, long-term upgrade to smart home control.
In this guide, you’ll learn how to replace thermostat with nest safely and effectively, with practical tips for labeling wires, mounting the base, and configuring app settings. You’ll also see common pitfalls to avoid and how to test the system after installation to ensure everything runs smoothly.
Nest Compatibility and Wiring Basics
Nest thermostats are designed for many common 24V HVAC systems, including heat-only, cool-only, and multi-stage configurations. The crucial factor is having compatible wiring and, ideally, a common C-wire to provide consistent power. If you don’t have a C-wire, Nest can still operate in some setups using power-sharing or a compatible adapter, but performance may vary. Start by mapping existing wires to a labeled diagram and cross-checking them with Nest’s terminal map. This upfront step helps prevent miswiring and delays later in the install.
You’ll typically see wires labeled R, W, Y, G, and C. The Nest base accepts these connections at specific terminals. If a wire is not obviously attached to a matching terminal on the old thermostat, take a photo for reference. Retaining the original wiring order when you install the Nest reduces configuration errors and makes app setup faster.
Safety Essentials and Power-Down Steps
Safety should always come first. Power down the HVAC system at the circuit breaker and, if accessible, at the furnace control board. This reduces the risk of electric shock and prevents power from feeding into the thermostat during removal. Use a non-contact voltage tester to double-check that no live voltage remains on the wires you’ll be handling. Keep the thermostat’s wiring area clean and dry to avoid short circuits. When you’re ready, begin disconnecting wires one at a time, keeping track of where each wire goes.
Thermostat Care emphasizes verifying power is off and taking time to label wires. A careful approach minimizes mistakes and protects both you and your equipment.
Preparing the Wall and Choosing the Right Nest Model
Examine the wall for space and mounting stability. If the old plate is loose or cracked, replace the wall plate before attaching the Nest base. Use a level to ensure the base sits flat, which helps the Nest screen read properly and ensures a clean aesthetic. Nest models vary slightly in size and terminal labeling, but the installation concept remains the same: attach the base, route wires, and snap on the display. If your existing wiring is unusual (for example, a nonstandard color scheme), refer to the wiring diagram that accompanies your Nest model to avoid misconnections.
Selecting the right Nest model matters for compatibility with features like humidity sensors and outdoor temperature reporting. When in doubt, choose a standard Nest thermostat compatible with most 24V systems and upgrade later if you need specific advanced features.
Step-by-Step Installation Overview (High-Level)
This section provides a high-level walkthrough of the installation process without duplicating the detailed steps in the STEP-BY-STEP block. You will verify compatibility, label wires, remove the old thermostat, mount the Nest base, connect wires to the Nest terminals, and finalize the Nest app setup. The Nest base should be level and secure, with wires neatly tucked in the wall cavity. After mounting the base, you’ll push in the wires to their corresponding terminals and attach the display. Finally, you’ll configure the scheduling and room settings in the Nest app and run a quick test to confirm heating and cooling respond correctly.
Following this flow helps ensure a smooth transition to smart control and reduces the risk of voltage or wiring mismatches.
Common Pitfalls and How to Avoid Them
Rushing the wiring process can lead to misconnected terminals, which may cause HVAC misbehavior or damage. Always label wires before disconnecting and double-check each connection against the Nest terminal map. If you encounter a missing wire or unusual wire color, pause and consult the Nest wiring guide. Avoid using power-sharing features on systems that require a dedicated C-wire unless you’re following Nest’s official guidance. Finally, don’t skip the app setup stage; the Nest app provides critical configuration steps, including Wi-Fi setup and system testing, that are easy to miss if you jump straight to physical installation.
Testing, App Setup, and Post-Install Troubleshooting
Once the Nest base is mounted and all wires are connected, reapply power to the system and verify that the thermostat displays correctly. Use the Nest app to connect to Wi‑Fi, configure your HVAC type (heat, cool, fan, auto), and set up schedules. Run a quick test by triggering heat and then cool to confirm responses. If the system doesn’t respond, recheck wire placement and ensure a solid C-wire connection if used. If issues persist, consult the Nest support resources or consider a professional inspection to verify compatibility and wiring integrity.
Tools & Materials
- Nest thermostat (3rd generation or latest compatible model)(Ensure it includes the power adapter and mounting hardware)
- Screwdriver set (Phillips #2)(For wall plate and thermostat screws)
- Wire labels or masking tape(Label each wire with its function)
- Non-contact voltage tester(Verify power is off before touching wires)
- Pliers (needle-nose)(For gently tucking wires or bending connectors)
- Small level(Ensure Nest base is level for proper display alignment)
Steps
Estimated time: Total time: 45-75 minutes
- 1
Power down the system
Switch off power at the main breaker and, if accessible, the furnace control. Confirm no voltage is present with a non-contact tester before handling wires.
Tip: Double-check the breaker OFF position by attempting to wake the thermostat – if it doesn’t respond, power is off. - 2
Remove the old thermostat cover
Gently pry off the faceplate and expose the wiring. Do not pull wires loose; note their orientation and how they attach to the base.
Tip: Take a photo from multiple angles to capture wire placement for reference. - 3
Label the wires
Wrap small labels around each wire and write its function (R, W, Y, G, C). This makes matching to the Nest terminals straightforward.
Tip: If a wire lacks a clear label, trace it to the corresponding terminal on the old base for accuracy. - 4
Disconnect wires from the old base
Carefully loosen the terminal screws and detach each wire. Keep them organized so you know which wire goes where on the Nest.
Tip: Keep wires in the same order to reduce confusion during terminal placement. - 5
Mount the Nest base
Secure the Nest wall plate to the stud or wall using the mounting screws. Use a level to ensure a straight installation.
Tip: If the wall is difficult, use a thin mounting block to improve stability and alignment. - 6
Connect wires to the Nest terminals
Insert each labeled wire into the corresponding Nest terminal according to the Nest wiring map. Do not force wires if they don’t fit.
Tip: If a required wire is missing, consult the compatibility resources before forcing a connection. - 7
Attach the Nest display and power
Snap on the Nest display and power up the unit. The screen should illuminate and indicate ready for setup.
Tip: Hold the display gently to avoid stressing the wires behind the wall. - 8
Configure in the Nest app
Connect to Wi-Fi, select your HVAC type, and customize your schedules. Run a test for heat and cool to confirm operation.
Tip: Follow on-screen prompts for room temperature preferences and energy-saving options. - 9
Test system performance
Turn on heat and then cooling to observe immediate responses. Confirm temperature readings match setpoints and verify fan behavior.
Tip: If you notice lag or inconsistent temperatures, re-check wire connections and C-wire stability.
Questions & Answers
Is Nest compatible with my HVAC system?
Nest generally works with most standard 24V HVAC systems, but always use the official compatibility tool to confirm before purchasing. Some non-standard setups may require adapters or professional assistance.
Nest usually works with common 24-volt systems, but check compatibility first to be safe.
Do I need a C-wire for Nest?
Many Nest models benefit from a C-wire for reliable power. If yours lacks a C-wire, you can use power-sharing methods or a compatibility adapter, though performance may vary.
Most Nest units do need a common wire; if you don’t have one, check compatibility options before proceeding.
What tools do I need for installation?
You’ll typically need a screwdriver, wire labels, a non-contact voltage tester, and the Nest thermostat. Having a level handy helps ensure a neat install.
A screwdriver, labels for wires, a tester, and the Nest are the essentials.
How long does installation take?
Most installations take about 30 to 60 minutes, depending on wiring complexity and mounting conditions. Allow extra time for app setup.
Most installations are between 30 and 60 minutes, plus app setup.
What safety precautions should I take?
Power down at the breaker, avoid touching live wires, and test circuitry with a non-contact tester. If you’re unsure, seek professional help.
Turn off power, test for voltage, and don’t push your luck—call a pro if unsure.
Watch Video
What to Remember
- Verify Nest compatibility before starting
- Label wires and map them to Nest terminals
- Power off and handle connections with care
- Configure the Nest app and test thoroughly
- Consult a pro if wiring or compatibility seems uncertain