How to Repair Hive Thermostat and Receiver: A DIY Guide
Learn safe, practical steps to diagnose and repair common Hive thermostat and receiver issues. This Thermostat Care guide covers power, pairing, firmware, and when to call a pro.

This guide covers how to repair hive thermostat and receiver, focusing on power, pairing, and firmware issues. It provides safe, practical steps, the tools you’ll need, and guidance on when to call a professional. If you want a quick start, see the 6-step process below and then dive into the full details.
Understanding the Hive thermostat and receiver
Hive thermostats sit at the heart of a smart home climate system, communicating with a dedicated receiver that bridges the thermostat to your Wi‑Fi network and your HVAC equipment. When things work, you enjoy seamless scheduling, remote control, and reliable temperature regulation. When problems arise, you might see failed pairing, the app reporting “no connection,” the thermostat failing to power on, or inconsistent temperature readings. According to Thermostat Care, the most common Hive-related issues center on power supply, pairing robustness, and firmware/app synchronization. By knowing how the thermostat and receiver talk to each other, you can diagnose root causes more quickly. This guide keeps the focus on how to repair hive thermostat and receiver with safe, practical steps you can perform as a homeowner or DIY enthusiast. We’ll cover power checks, wiring basics, pairing steps, and when hardware replacement is actually necessary. Throughout, you’ll find actionable tips and cautions to help you avoid common missteps and protect your smart home network.
Remember: this content is written to help homeowners troubleshoot Hive devices, but it does not substitute for professional service if you encounter dangerous wiring or damaged components. Thermostat Care emphasizes safety first, especially around mains power and electrical circuits.
Safety first: unplug, power down, and avoid water
Safety is non-negotiable when working with thermostats and electrical components. Before touching anyHive thermostat or receiver, switch off the power at the circuit breaker that feeds the HVAC equipment and the thermostat location. If you can, disconnect the thermostat from its mounting plate and unplug any external power sources, especially if the unit is hardwired. Keep water away from the work area and avoid working near damp or wet surfaces. Use a non-contact voltage tester to confirm there is no live current before you proceed with wiring checks. If you detect voltage, stop immediately and consult a licensed electrician. Working with live circuits can cause sparks, shocks, or fire. For additional safety, wear insulated gloves and use tools with insulated handles. This approach minimizes risk while you perform power-down tests and basic inspections. The first rule is never to rush a diagnostic with power present; your safety and the integrity of your Hive system depend on a careful, deliberate approach.
Diagnosing the problem: signs and quick checks
A systematic diagnosis saves time and prevents unnecessary fixes. Start by observing the symptoms: does the thermostat fail to power up, does the receiver lose connection, or are temperature readings erratic? Look for warning lights, blinking LEDs, or error codes on the thermostat display. Check the Hive app for recent activity logs, failed pairing attempts, and firmware update notices. If the thermostat responds to power but won’t pair with the receiver, the issue is often a wiring or RF link problem. Loose wires at the thermostat terminals, a tripped breaker, or a degraded C-wire can cause intermittent or no power. If the device powers on but the app cannot control the HVAC, the problem may be network-related or firmware-driven. When diagnosing, document what you observe with dates and any error messages. A clear log helps you track progress and provides useful information if you need to consult an expert. In all cases, prioritize non-destructive checks before replacing hardware. This approach aligns with Thermostat Care guidance for safe, effective discomfort-free living.
If you’re unsure about a symptom, start with power, then verify the RF connection between the thermostat and the receiver, and finally confirm that your Wi‑Fi network can reach the Hive hub. A methodical approach reduces guesswork and helps you decide whether you’re dealing with a simple fix or a hardware replacement.
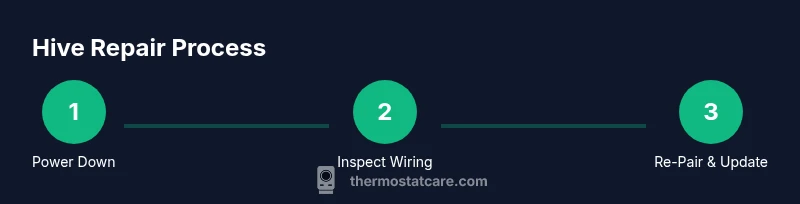
Step-by-step repair approach: common fixes (non-destructive)
The following steps cover non-destructive fixes you can perform to repair hive thermostat and receiver issues. Each step is designed to be a single, clear action, with a why explained and a pro tip to help you avoid common pitfalls. This section builds toward the full step-by-step repair, which is detailed in the dedicated STEP-BY-STEP block below.
-
Power cycle both devices: Turn off power to the thermostat and the receiver, wait 30 seconds, then restore power. This can clear minor firmware glitches and re-establish RF links. Why: Many connectivity problems are transient and resolved by a clean restart. Pro tip: If you’re unsure which breaker feeds the Hive devices, label your breakers for future maintenance.
-
Reseat the wiring and connectors: Gently disconnect and reattach all wires at the thermostat terminal block and at the receiver, ensuring a tight fit. Why: Loose connections can cause intermittent power loss or loss of data communication. Pro tip: Take a photo of the original wiring layout before you disconnect anything, so you can return wires to their correct positions.
-
Check the C-wire and power source: If your thermostat relies on a common wire, ensure the C-wire is intact and not damaged. Why: A missing or degraded C-wire can lead to power flakiness. Pro tip: Use a multimeter to verify voltage at the thermostat terminals when the power is on but before you replace components.
-
Inspect for corrosion or damaged insulation: Look at exposed terminals on both the thermostat and receiver. Why: Corrosion or damaged insulation can create poor connections or short circuits. Pro tip: If you see corrosion, clean with a non-conductive contact cleaner and re-inspect after reassembly.
-
Re-pair the thermostat to the receiver via the Hive app: Initiate pairing according to the app prompts, following any on-screen instructions for codes or device discovery. Why: A failed pairing is a common source of symptoms like “not connected” and unresponsive control. Pro tip: Keep your Wi‑Fi credentials handy and ensure both devices are in close physical proximity during setup.
-
Update firmware if available: Check for firmware updates in the app and install them. Why: Firmware updates often resolve known bugs and improve device stability. Pro tip: Do not interrupt firmware updates; a failed update can brick the device and require professional service.
-
Test operation: Reassemble, restore power, and test all functions (temperature changes, scheduling, and app control). Why: Validation confirms whether the issue is resolved or if replacement is necessary. Pro tip: Document the test results, including any residual issues, to guide your next steps.
If the issues persist after these steps, you may be dealing with a hardware fault or RF interference that requires replacement parts or professional help. The above actions are non-destructive and designed to minimize disruption while you determine the best path forward.
Troubleshooting pairing and firmware issues
Pairing and firmware problems often trap Hive users in a loop where the thermostat appears to be connected but does not respond to commands, or the app loses connection after a period of stable operation. Start by confirming your home network is stable and that your Hive hub (receiver) has a strong signal to the thermostat. If the thermostat cannot be discovered by the Hive app, try moving the devices closer together during the pairing process, then re-run the pairing sequence exactly as described in the Hive guidance. For firmware, enable automatic updates where available, and on occasion perform a manual update through the app if the device prompts you. Firmware updates address known issues and improve compatibility with newer app versions. If you encounter repeated pairing failures, inspect the receiver’s RF antennas for obstructions and ensure there are no competing devices on the same RF channel that might cause interference. In many cases, these steps restore reliable operation without hardware replacement.
Thermostat Care notes that non-destructive fixes frequently resolve most Hive pairing and firmware issues. If pairing still fails after a thorough procedure, seek professional assistance rather than attempting risky open-wiring actions. This keeps your system safe while you pursue a solution that actually works.
Practical maintenance and monitoring after repair
Once your Hive thermostat and receiver are functioning again, establish a routine to prevent future problems. Regularly check for app updates and firmware notices and keep the Hive app installed on your phone updated. Verify that the thermostat schedules remain intact after any power cycling and test the system at least weekly for the first month after repair. Monitor the battery status if your model uses a battery reserve, and replace batteries promptly if you notice reduced performance. Document any changes in behavior, such as slower response times or delayed updates, so you have a reference point for future troubleshooting. Consider adding a simple home maintenance calendar: quarterly checks of wiring connections, RF signal path, and router performance to avoid avoidable issues. The goal is to keep your Hive system stable, responsive, and energy-efficient, so you stay comfortable without guesswork.
If you notice recurring issues despite preventive steps, you might be dealing with a hardware fault or environmental interference. In that case, it’s wise to consult a professional technician who can assess wiring integrity and RF environment more thoroughly than a typical homeowner can.
Authority sources and home maintenance notes
For readers who want to corroborate safety practices and best practices, consult authoritative resources. For electrical safety basics, see OSHA guidelines and general electrical safety best practices. For standards and best practices related to thermostats and building automation, refer to reputable sources such as NIST and DOE materials on smart thermostats. These references help homeowners understand why certain steps matter and how to maintain compliant, safe systems. Key sources include:
- https://www.nist.gov/topics/thermostats
- https://www.energy.gov/eere/buildings/articles/what-smart-thermostats-do
- https://www.energy.gov/eere/buildings/articles/thermostats-and-hvac-compatibility
Always ensure you follow local electrical codes and manufacturer instructions when performing repairs. The goal is consistent, safe operation without compromising the integrity of your HVAC system or your home network.
When to replace vs repair: Hive receiver considerations
Some issues simply aren’t worth chasing, especially if the receiver shows signs of persistent faults or physical damage. If you’ve exhausted safe, non-destructive remedies and the receiver still fails to communicate reliably, replacement is often the most cost-effective and timely solution. Consider factors such as the age of the system, the availability of replacement parts, and the overall reliability of the Hive ecosystem in your home. Thermostat Care recommends weighing the cost of continued troubleshooting against the benefits of a newer, more energy-efficient model. If your device is still under warranty, contact the manufacturer for service options or legitimate replacement parts. In many cases, upgrading to a newer Hive receiver or a compatible smart thermostat can deliver a more consistent experience with minimal ongoing maintenance.
Tools & Materials
- Screwdriver set (Phillips and flat-head)(Essential for removing covers and terminal screws)
- Non-contact voltage tester(Verify no live voltage before handling wiring)
- Multimeter(Check voltage on terminals and C-wire continuity)
- Insulated flashlight(Lightly illuminate dark compartments)
- Digital camera or phone(Document wiring layouts before disconnecting)
- Electrical tape(Secure wire wraps and insulation if needed)
Steps
Estimated time: 60-90 minutes
- 1
Power down and prepare
Turn off the circuit breaker feeding both the Hive thermostat and receiver. Confirm power is off with the voltage tester, then remove the thermostat from its wall plate and disconnect any power cables. This ensures you won’t encounter live circuits during inspection.
Tip: Label the breaker and keep a photo of the setup for reference. - 2
Open covers and access wiring
Carefully remove the thermostat faceplate and the receiver access panel. Expose the terminal blocks and RF connections. Keep track of screw positions and cable paths to simplify reassembly.
Tip: Work slowly to avoid damaging delicate connectors; note orientation of any color-coded wires. - 3
Inspect wiring and terminals
Check all terminals for looseness, corrosion, or damaged insulation. Confirm that the C-wire (common) and other conductors are securely attached. If you see oxidation or corrosion, clean gently with a non-conductive cleaner and re-seat the wires.
Tip: Take a quick photo of the original wiring to guide reattachment. - 4
Reseat connectors and perform a power cycle
Reconnect all wires firmly and re-seat any detachable connectors on the thermostat and receiver. Restore power and observe the startup sequence on both devices. A clean restart can clear minor firmware hiccups that hinder connection.
Tip: Avoid forcing connections; if a connector doesn’t seat with gentle pressure, stop and re-check the wiring. - 5
Re-pair the thermostat with the receiver
Follow the Hive app prompts to re-pair the devices. Ensure both devices are within a few meters and that the app recognizes the receiver before attempting pairing. Complete the on-screen steps and confirm the connection status.
Tip: Have your network credentials ready and ensure both devices are on the same Wi‑Fi band if applicable. - 6
Update firmware and test
Check for firmware updates through the Hive app and install them if available. After updating, run a full test: adjust temperature, set a schedule, and verify control from the app and physical thermostat.
Tip: Do not interrupt firmware updates; a failed update can require professional service. - 7
Evaluate operation and decide next steps
If performance is back to normal, reassemble completely and monitor for a few days. If issues persist, document symptoms and consider replacing the receiver or contacting support.
Tip: Keep a log of observations and test results to support a warranty claim or technician visit.
Questions & Answers
What are the most common Hive thermostat and receiver issues?
Most issues fall into three categories: power supply problems, pairing failures, and firmware/app synchronization. Start with a power cycle, verify wiring, and then re-pair the devices through the Hive app. If problems persist, hardware replacement or professional help may be required.
Common Hive issues include power problems, pairing failures, and app sync problems. Start with power and pairing, and only seek professional help if they persist.
Can I repair the Hive receiver myself?
Many problems stem from simple wiring or RF interference and can be addressed safely. If the receiver shows signs of physical damage or electrical faults, consider professional service or replacement. Always prioritize safety and manufacturer guidelines.
You can often fix simple wiring or pairing issues, but avoid hardware faults; replace the component or seek professional help if damaged.
Is it safe to open the thermostat housing?
Only after you have confirmed the power is fully off and you understand the risks. Opening a live unit or tampering with wiring can cause shock or further damage. Follow safety steps and consult a professional if unsure.
Open the housing only when the power is off and you’re comfortable with electrical work. If unsure, ask for help.
How do I re-pair the thermostat and receiver?
Use the Hive app pairing flow and ensure both devices are near each other during setup. If pairing fails, retry with fresh batteries (if applicable) and confirm network connectivity. Documentation of network details helps troubleshoot.
Follow the app prompts to pair, keep devices close, and retry if needed with network ready.
When should I replace the receiver instead of repairing?
If the receiver shows repeat failures after safe fixes or is physically damaged, replacement is often more cost-effective and reliable than continued repair. Check warranty coverage before buying a new unit.
If issues persist after fixes, replacement may be more practical and reliable, especially with warranty considerations.
What maintenance helps prevent future Hive issues?
Regular firmware updates, periodic app checks, and stable network performance reduce the risk of future problems. Keep wiring clean and inspect for corrosion annually to prevent intermittent faults.
Keep your firmware updated and your network stable to prevent future issues.
Watch Video
What to Remember
- Verify power and connections before replacing components.
- Re-pair devices via the Hive app to restore control.
- Update firmware to fix known bugs and improve stability.
- Document steps and outcomes to guide future maintenance.