How to Pair Thermostat with Hive Hub
Learn step-by-step how to pair your thermostat with Hive Hub, troubleshoot issues, and optimize your Hive ecosystem for comfort and energy savings at home.

By the end of this guide you will pair your thermostat with Hive Hub to enable remote control, scheduling, and energy insights. Make sure you have a compatible Wi‑Fi thermostat, a working Hive Hub, and access to the Hive app on a smartphone. You’ll also need a stable 2.4 GHz network and your Hive account credentials.
How Hive Hub pairing works with your thermostat
Pairing a thermostat with Hive Hub creates a two-way communication channel between your home's heating controller and the Hive smart hub. When paired correctly, you gain reliable scheduling, remote control via the Hive app, and energy-use insights that help you optimize comfort. According to Thermostat Care, the foundation of a stable pairing is a compatible thermostat, a functioning Hive Hub, and a dependable Wi-Fi network. This article explains the core concepts and what you should expect before you start. You’ll typically follow a simple journey: check compatibility, prepare devices, place the thermostat in pairing mode, and complete the setup in the Hive app. Remember that some thermostats and hubs require firmware updates to communicate effectively; check for updates in the app or device settings before proceeding. In many homes, users notice faster response times and fewer dropouts once the hub and thermostat are on a common network.
Compatibility and prerequisites you should verify
Before you begin the pairing process, confirm that your thermostat supports Hive integration and that the Hive Hub is the correct model for your setup. The Hive system generally requires a compatible thermostat with Wi‑Fi and a stable network connection. Ensure your router is broadcasting a 2.4 GHz band (many devices don’t pair reliably over 5 GHz networks). Update both the thermostat and the Hive Hub to the latest firmware if options are available. Have your Hive account credentials handy and make sure your mobile device has the Hive app installed and updated. A quick network readiness checklist can save time: test internet access, verify device visibility on the same network, and disable VPNs during setup. This reduces the chance of connectivity hiccups that disrupt pairing.
Common pairing scenarios and what can go wrong
Pairing problems are usually caused by network misconfigurations, firmware mismatches, or account issues. A frequent issue is attempting to pair on a 5 GHz network; many devices require 2.4 GHz for device-to-hub communication. Another common problem is using an old firmware version on either device; firmware updates often resolve compatibility gaps. If the thermostat doesn’t appear in the Hive app, double-check that the hub is online, the app has permissions, and you’re signed into the correct Hive account. If you encounter timeouts, try temporarily moving the thermostat closer to the hub or restarting the router and hub. Patience is essential—some devices perform a few quick handshakes before the final pairing completes.
Security, privacy, and best practices for the Hive ecosystem
Security matters when linking home devices. Use a strong, unique password for your Hive account and enable any available two-factor authentication. Keep your firmware up to date to reduce vulnerabilities and improve compatibility. When possible, connect the Hive Hub to a guest network or a segmented home network to minimize exposure of personal devices. Regularly review connected devices in the Hive app and remove any you no longer use. Finally, document your setup steps and keep a backup of important credentials in a secure location for future maintenance.
Tools & Materials
- Hive Hub(Powered on and connected to router via Wi‑Fi or Ethernet (recommended).)
- Wi‑Fi-enabled thermostat compatible with Hive(Check compatibility with Hive integration before starting.)
- Smartphone or tablet with Hive app(Ensure the app is updated to the latest version.)
- Stable 2.4 GHz Wi‑Fi network(5 GHz networks may not support pairing for some devices.)
- Hive account credentials(Email/username and password; have any 2FA codes ready if enabled.)
- Ethernet cable (optional)(Useful for initial Hive Hub setup if you have a wired network option.)
- PIN or activation code (if prompted)(Some models require a code shown in the Hive app during setup.)
Steps
Estimated time: 25-40 minutes
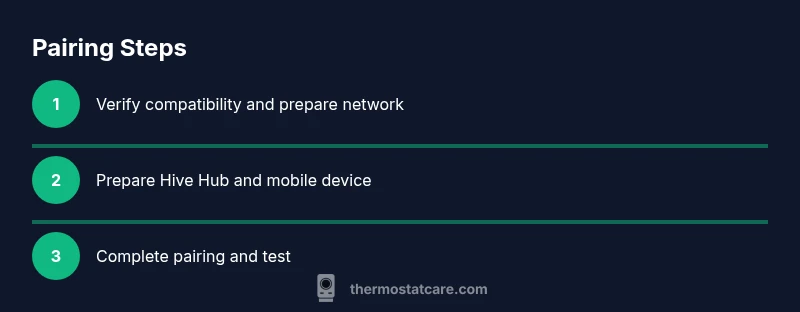
- 1
Verify compatibility and prepare network
Confirm your thermostat supports Hive integration and check that your router broadcasts a 2.4 GHz band. Update the thermostat and Hive Hub firmware if possible. Sign into the Hive app and ensure your account is active. This step prevents common connectivity issues later.
Tip: If you can’t find a 2.4 GHz option, consult the device manual or support site for compatibility notes. - 2
Prepare Hive Hub and mobile device
Place the Hive Hub in an accessible central location with a stable power supply and a solid link to your router. Open the Hive app on your phone and navigate to the add-device section. Have your account ready for quick pairing.
Tip: Avoid placing the hub inside cabinets or behind metal objects; clearance improves wireless performance. - 3
Put thermostat into pairing mode
On the thermostat, access the pairing or add-device option from the settings menu. If there’s a physical pairing button, press and hold it as described in the manual until the indicator starts blinking. This signals the thermostat is ready to pair.
Tip: If you can’t find pairing instructions, use the search feature in the app’s help center or consult the manufacturer’s support site. - 4
Initiate pairing in the Hive app
In the Hive app, choose Add Device and select Thermostat. Follow the on-screen prompts to connect to the thermostat. You may need to enter your Wi‑Fi password or confirm the device’s network name.
Tip: Keep the thermostat within a few meters of the Hive Hub during the initial pairing to reduce interference. - 5
Authorize and confirm connection
The app will request authorization to access the thermostat’s data. Grant access and wait for a confirmation message showing the pairing is successful. If the pairing fails, repeat the previous steps and verify network settings.
Tip: If you encounter errors, reboot both the Hive Hub and thermostat, then retry the pairing sequence. - 6
Test and finalize
Test basic functions: adjust temperature, set schedules, and verify remote control via the Hive app. Confirm that changes reflect on the thermostat and in the app. Document any specific steps you took for future maintenance.
Tip: Create a simple routine to validate that scheduled changes occur at the expected times.
Questions & Answers
Do I need a 2.4 GHz network to pair a thermostat with Hive Hub?
Yes. Most pairing processes rely on the 2.4 GHz band for stable device discovery and communication. Ensure your router is broadcasting this band during setup.
Pairing typically requires a 2.4 GHz network for stable device discovery. Make sure your router is on that band during setup.
Can I pair multiple thermostats to one Hive Hub?
In many Hive configurations, you can add more than one thermostat, but availability depends on your hub model and the specific thermostats. Check the Hive app for supported devices in your setup.
You can usually add more than one thermostat, but verify compatibility in the Hive app for your specific hub model.
What if pairing fails?
First, reboot the Hive Hub and thermostat, then reattempt pairing. Ensure firmware is up to date and that you’re using the correct Hive account. If problems persist, consult the support resources in the Hive app.
If pairing fails, reboot devices, check firmware, and retry. If it still fails, seek Hive support within the app.
Will pairing affect energy usage or schedules?
Pairing itself doesn’t increase energy use, but it enables smarter control and scheduling, which can lead to energy savings when used effectively.
Pairing enables smarter control that can save energy through better scheduling.
Do I need to keep the Hive app open for remote control?
Remote control typically works through the Hive cloud, so you don’t need the app to stay open on your phone once devices are linked. You can control your thermostat from anywhere with internet access.
No, you don’t need the app open; you can control it remotely via the cloud.
Watch Video
What to Remember
- Verify device compatibility before starting
- Use a 2.4 GHz network for reliable pairing
- Follow the official app prompts to complete setup
- Test the connection thoroughly after pairing