How to Replace Thermostat with Hive: Step-by-Step DIY Guide
Learn how to replace a traditional thermostat with Hive in a safe, DIY-friendly process. This guide covers compatibility, wiring basics, app setup, and testing, with tips from Thermostat Care to help homeowners achieve a reliable smart-thermostat upgrade.

This guide teaches how to replace a traditional thermostat with Hive in a safe, DIY-friendly process. You’ll verify compatibility, prepare the wiring, install the Hive base, connect to Wi‑Fi, and run a test to confirm heating and cooling respond correctly. Expect a step-by-step approach with safety as a priority.
Overview: Replacing your thermostat with Hive
If you’re exploring how to replace thermostat with Hive, you’re aiming for a smarter, more controllable home climate setup. Hive is designed to work with many common HVAC configurations, but success hinges on correct wiring and proper configuration in the Hive app. According to Thermostat Care, Hive installations tend to be straightforward for standard single‑stage systems with a functional C‑wire. The Thermostat Care team found that homeowners who follow the wiring diagrams and safety steps typically achieve reliable results without professional help. This article walks you through compatibility checks, wiring considerations, installation steps, and post‑install testing so you can enjoy modern comfort with confidence.
Compatibility checks: is Hive right for your system?
Before you begin, confirm that your HVAC system is compatible with Hive. Hive generally supports most conventional heating and cooling setups, including gas furnaces, electric heat pumps, and central AC, but some older or unusual configurations may require additional adapters or a professional assessment. If your current thermostat used specialized equipment (proprietary backplates, unusual wire gauges, or nonstandard wiring), take note of those details and compare them to Hive’s installation guide. Also verify that you have a C‑wire available, as this often ensures a stable power source for the Hive display. For renters or multi‑zone systems, plan how the Hive unit will replace the existing control for each zone and how the app will communicate with multiple thermostats.
Why Hive can simplify daily control (and where it may challenge you)
Hive can make temperature adjustments, scheduling, and energy insights easier through the app, voice assistants, and smart routines. The initial learning curve is mainly about wiring correctness and app pairing. Some homeowners report occasional glitches if the Hive hub has weak Wi‑Fi or if the HVAC control board requires a powered interface that Hive doesn’t provide out of the box. If you encounter issues during setup, revisiting the wiring labeling and re‑checking the compatibility checklist often resolves most problems without professional help.
Safety first: powering down, labeling wires, and avoiding shortcuts
Safety is non‑negotiable when replacing a thermostat. Always power down at the circuit breaker before touching any wires, and use a non-contact voltage tester to confirm no live voltage on the wires you’ll handle. Label each wire as you remove it, photograph the current wiring, and keep a copy of the old thermostat’s wiring diagram for reference. Do not skip the power‑down step or jump ahead to “trial and error” wiring, which can damage the HVAC control board or cause electrical shock. If you’re uncertain at any point, pause and consult the Hive installation guide or Thermostat Care’s troubleshooting resources.
What you’ll need: a quick pre‑install checklist
Gather the tools and materials you’ll need to complete the Hive replacement, such as a screwdriver, voltage tester, wire labels, and the Hive starter kit. Ensure you have access to the Hive app and a stable Wi‑Fi connection. If your system uses an uncommon control wire arrangement or you lack a C‑wire, plan for a power adapter or an included C‑wire accessory. Making a quick checklist now helps keep the installation smooth and minimizes the chance of missing a critical step later.
Tools & Materials
- Screwdriver set (Phillips #2 and flat-head)(Needed to remove old stat and mount Hive base)
- Voltage tester(Ensure power is fully off before touching wires)
- Wire stripper/cutter(Prepare wires for terminals if needed)
- C-wire adapter (if no C-wire present)(Only if your system lacks a dedicated common wire)
- Hive starter kit(Includes Hive base and display module)
- Electrical tape(Secure and insulate exposed conductors)
- Smartphone with Hive app(For setup, configuration, and Wi‑Fi connection)
- Labeling materials (masking tape, pen)(Label wires as you disconnect them)
Steps
Estimated time: 45-75 minutes
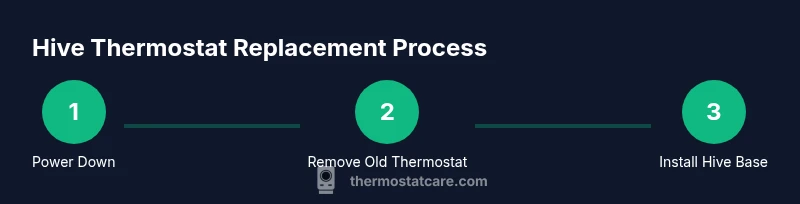
- 1
Power down and remove old thermostat
Switch off power at the breaker to the HVAC system. Remove the old thermostat and carefully disconnect wires, noting their positions. Take a quick photo of the wiring for reference as you prepare to mount the Hive base.
Tip: Label wires as you remove them and verify the power is off with a voltage tester. - 2
Label and plan wire connections
Inspect the wires and label them by function (R, C, W, Y, G, etc.). Compare with Hive’s wiring diagram and plan which wires connect to which terminals on the Hive base. If you lack a C-wire, decide whether to use a C-wire adapter before proceeding.
Tip: Double‑check color codes and refer to your old thermostat photo for accuracy. - 3
Mount the Hive base
Mount the Hive base plate to the wall using the existing screws or new ones provided. Ensure the base is level and the backplate sits flush against the wall. Leave the wires accessible but neatly organized.
Tip: If you need to drill new holes, use a wall stud finder to avoid electrical cables. - 4
Connect wires to Hive terminals
Insert each labeled wire into the corresponding Hive terminal (R, C, W, Y, G, etc.). Make sure the wire ends are cleanly inserted and the screws are tightened firmly without over‑tightening.
Tip: Use small needle-nose pliers to gently crimp wire ends if needed to ensure good contact. - 5
Attach the display and power
Connect the Hive display to the base and power it on. If using a separate hub, ensure it’s plugged in and within range of the Wi‑Fi network. The display should illuminate and guide you through initial setup.
Tip: Keep the hub within 15–20 feet of the thermostat location for reliable communication. - 6
Configure Hive in the app
Open the Hive app, create or sign in to your account, and add a new device. Follow on‑screen prompts to connect to Wi‑Fi and align the Hive base with the thermostat wiring you installed. The app will guide you through basic settings and territory-specific options.
Tip: Use a 2.4 GHz Wi‑Fi network for best compatibility, then update firmware if prompted. - 7
Test heating and cooling control
Use the Hive app to test heating and cooling commands. Verify the HVAC responds to temperature changes, and listen for relays engaging the furnace and AC. If something doesn’t respond, recheck wiring and app pairing.
Tip: Run a quick 10‑minute test for both heat and cool modes to confirm reliable operation. - 8
Finalize and document
Secure all wires, tidy the installation area, and label the Hive unit. Save your wiring photo and note any anomalies observed during testing. Keep the original thermostat documentation for future reference.
Tip: Record the installation date and Hive model in your home maintenance log.
Questions & Answers
Is Hive compatible with my HVAC system?
Hive supports many common HVAC configurations, including gas furnaces, electric heat pumps, and central AC. Some unusual setups may require adapters or professional evaluation. Always verify compatibility before purchasing.
Hive works with many standard systems, but check your model and HVAC configuration to confirm compatibility.
Do I need a C-wire for Hive?
Most Hive installations require a C-wire for reliable power. If your system lacks a C-wire, consider a C-wire adapter or a different wiring approach described in Hive’s installation guide.
Yes, a C-wire is usually needed; if absent, use the adapter recommended by Hive.
Should I hire a professional to install Hive?
If you’re comfortable with basic wiring and power safety, you can install Hive yourself by following the official guidelines. If you’re unsure about wiring or system compatibility, hiring a licensed technician is a safer option.
DIY is possible for many homeowners, but don’t hesitate to hire a pro if wiring or safety feel uncertain.
Will Hive control both heating and cooling?
In most setups, Hive can manage both heating and cooling. Verify your specific model and HVAC configuration in the Hive app to enable full control.
Yes, it typically handles both heating and cooling when properly installed.
How do I connect Hive to Wi‑Fi?
Open the Hive app, add a new device, and follow the prompts to connect to your 2.4 GHz network. Ensure your smartphone is on the same network during setup.
Just follow the app prompts to connect Hive to Wi-Fi.
What if my thermostat won’t power on after installation?
Check the breaker, re‑verify that wires are correctly connected, and ensure the C-wire is properly seated. If issues persist, consult Hive’s troubleshooting resources or Thermostat Care guidance.
Power issues usually come from a tripped breaker or miswired connections; recheck wiring and try again.
Watch Video
What to Remember
- Assess compatibility before buying Hive
- Power down and label wires to avoid mistakes
- Follow Hive wiring diagrams precisely
- Test thoroughly after installation