How to Remove a Nest Thermostat: Step-by-Step Guide
Learn how to safely remove a Nest thermostat from the wall, protect wiring, and prep for replacement. This practical DIY guide covers safety, required tools, step-by-step removal, and post-removal tips.

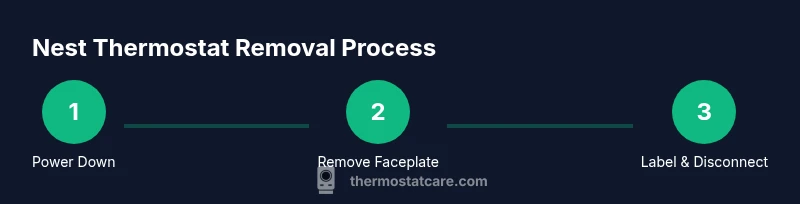
You will learn how to safely remove a Nest thermostat from the wall and prepare for replacement or reinstallation. The key steps include powering down the HVAC system, carefully detaching the thermostat faceplate, labeling wires, and removing the mounting plate. This guide covers safety, tools, and post-removal options. Follow the steps precisely to avoid damaging wiring or the HVAC control board. If at any point you feel uncertain, consult a professional.
Safety and prerequisites for removing a Nest thermostat
Before touching any components, power down the HVAC system at the main breaker or the dedicated HVAC disconnect near the furnace. This simple step prevents shocks, short circuits, and accidental air handler or compressor engagement while you work. According to Thermostat Care, starting with a full power shutoff is the most reliable way to protect both your equipment and yourself. Once power is off, wait a few minutes to ensure there is no residual voltage in the thermostat wires. If you cannot access the breaker easily, switch off the furnace’s power at the equipment itself and avoid touching any live conductors. Safety first keeps your project on track and reduces the risk of expensive damage.
In addition to power, verify that you are working in a dry environment and away from moisture. Nest thermostats control heating and cooling equipment, and incorrect handling can affect safety and functionality. If you notice damaged cables, exposed conductors, or signs of overheating, pause the work and consult a licensed professional. The Thermostat Care Team emphasizes caution with older wiring or unfamiliar layouts, as mistakes here can impact not only the thermostat but the entire HVAC system.
This preparation phase also includes clarifying your goals: are you removing to replace with a new thermostat, to relocate, or to remove entirely? A clear objective helps you decide how far you need to go—whether to keep the mounting plate, patch the wall, or safely store wires for later installation. As you plan, take a moment to note the model year of your Nest device to anticipate any model-specific quirks in the removal process.
Finally, set aside a convenient workspace with good lighting and a camera or phone for reference photos. Capturing a quick shot of the installed wiring and labeling of terminals can save headaches later if you plan to reinstall or swap to a different thermostat. Thermostat Care’s guidance stresses documentation as a best practice for DIY projects involving wiring and mounting hardware.
note”:null},
Tools & Materials
- Screwdriver set (Phillips #1 and #2)(Essential for removing mounting screws and terminal screws on the Nest base.)
- Labeling tape or wire labels(Label each wire as you disconnect to match terminals on reinstallation.)
- Smartphone or camera(Capture wiring photos from multiple angles for reference.)
- Voltage tester (non-contact)(Optional safety check before handling wires.)
- Electrical insulation tape(Wrap exposed conductors temporarily if wires are left unconnected during work.)
- Wall patch materials (spackle) and putty knife(Use if you plan to patch the wall after removing the mounting plate.)
Steps
Estimated time: 25-40 minutes
- 1
Power down the HVAC system
Locate the main breaker for your HVAC or the disconnect switch near the furnace and switch it to off. Confirm the thermostat display is unpowered and that the system cannot cycle on while you work. This reduces the risk of arcing or accidental fan operation.
Tip: If you’re unsure which breaker controls the HVAC, label the panel with ‘HVAC’ and test by turning off the wrong circuit—you can always switch it back on if needed. - 2
Remove the thermostat faceplate
Gently pull the faceplate away from the wall to reveal the base. Some models snap on with clips; others have a single central screw. Do not yank. If the faceplate resists, look for a small release tab or corner screw.
Tip: Use a plastic opening tool or a fingernail to avoid scratching the wall or cracking the plate. - 3
Label and document the wires
As you see each wire, place a small label on its insulation that matches the terminal it attaches to on the Nest base. Take a wide photo set showing terminal labels and wire routing. This step helps ensure accurate reconnection or replacement later.
Tip: Color isn’t always reliable—label by terminal letter (Y, G, W, C, etc.) rather than color alone. - 4
Disconnect wires from the Nest base
Loosen the terminal screws with a screwdriver and carefully withdraw each wire. Do not pull on the wires themselves; hold the wire by the insulation and slide it out. Keep wires organized and avoid letting them fall back into the wall cavity.
Tip: If a wire doesn’t want to come out easily, gently twist it while loosening the screw. - 5
Remove the mounting plate
Unscrew the mounting plate from the wall and detach it from the backplate if they are two separate parts. You may need a small step stool or ladder to reach safely. Inspect the mounting location for drywall damage or paint issues.
Tip: Keep a few screws handy in case you patch and re-use the original mounting hardware. - 6
Finalize and secure for replacement
If you’re keeping the wires open for a future replacement, cap or tape exposed conductors to prevent accidental contact. Store the Nest components and screws in a labeled container. If re-installing a different thermostat, ensure you have a compatible wall plate and updated wiring plan.
Tip: Take a final wall photo showing the exposed backbox and any patch marks for reference.
Questions & Answers
Do I need to power off the HVAC before removing the Nest thermostat?
Yes. Always turn off the HVAC power at the main breaker (or disconnect) before handling wiring to avoid shocks or damage.
Yes. Power off the HVAC at the breaker before you touch any wires.
What should I do with the wires after removal?
Label each wire, take photos for reference, and cap exposed conductors if you’re not reinstalling immediately. Keep wires organized.
Label and photograph the wires, then safely cap any exposed conductors if you’re not reinstalling right away.
Can I remove a Nest thermostat if I can’t access the wall cavity easily?
Yes, but proceed cautiously. If you cannot access the back of the wall or the wires, consider seeking help from a professional to avoid wall damage.
You can, but if access is tough, it’s safer to call a pro to avoid wall damage.
Will removing the Nest affect my HVAC system’s power?
Removing the thermostat itself does not power down the HVAC automatically; ensure the breaker is off so the control board isn’t energized during removal.
Removing the thermostat won’t power down the HVAC by itself—turn off the breaker first.
How do I patch the wall after removing the thermostat?
Fill the hole with drywall patch material, sand smooth, and repaint to match the wall. If you plan a new thermostat, you can cover holes with a blank wall plate.
Patch the wall with a drywall patch, smooth, then repaint. Use a blank plate if you’re not installing a new device yet.
Watch Video
What to Remember
- Power down HVAC before touching wires
- Label and photograph wiring for easy reinstallation
- Remove the thermostat base and mount with care
- Patch or store components as planned for replacement