How to Put Thermostat on Heat: Step-by-Step Guide
Learn how to put thermostat on heat safely with a complete, step-by-step guide. Safety checks, wiring basics, testing, and maintenance for reliable warmth and energy efficiency.

If you're wondering how to put thermostat on heat, this guide covers the essential steps: power down, switch to Heat, and set a comfortable temperature. It includes safety checks, basic wiring concepts, and a system test to confirm warmth. According to Thermostat Care, correct heat-mode configuration improves comfort and energy efficiency. Follow the step-by-step approach and use model-specific diagrams for precise wiring.
Understanding Heat Mode on Thermostats
Heat mode tells your heating system to start warming the home when the indoor temperature falls below the setpoint. Most modern thermostats label this as “Heat” or “Heat 1,” and many models offer Auto, Cool, and Fan options that interact with heat in different ways. Understanding how heat mode works helps you avoid uncomfortable drafts and wasted energy.
According to Thermostat Care, recognizing the difference between heat mode and related settings is the first step toward reliable comfort. A thermostat that is set to Auto may cycle between heating and cooling to maintain a comfortable temperature, while simply selecting Heat forces the system to run until the target is reached. If you have a heat pump, the heat sequence may involve reversing valves and auxiliary heat, so consult your manual for model-specific details. In this section we’ll cover how to identify heat mode on common thermostat types (digital, programmable, Wi‑Fi) and what to expect when you switch to heat.
Safety first: Self-checks before switching to heat
Power down the thermostat and HVAC equipment before touching any wiring. This reduces the risk of electric shock and accidental start-ups. Look for obvious hazards: a warm surface on the wall plate, frayed wires, or loose connections. If you see exposed conductors or smell burning, stop and call a licensed technician. Always work with dry hands and use non-conductive tools when removing covers. If your thermostat uses batteries, replace them with fresh ones and verify the low-battery indicator is not flashing. Doing a quick risk assessment now saves trouble later and protects your system.
Identify your thermostat type and available controls
Thermostats range from simple dial units to advanced digital and wireless models. Power sources include battery-powered, hard-wired, and low-voltage systems that may require a C-wire for continuous power. Start by removing the thermostat cover, note the model, and document the wiring colors. Take a photo for reference and read the wiring diagram in the manual. If you’re replacing an old unit, confirm the new thermostat is compatible with your HVAC system (gas, electric, or heat pump) and supports a dedicated heat setting. This step reduces surprises during installation and helps you select the right replacements.
Common reasons heat mode fails to engage
If heat does not start after selecting Heat, the issue could be simple or more complex. The thermostat may be in the wrong mode (off, cool, or auto), the batteries may be dead, or the unit may not be receiving power. Wiring connections can loosen over time, especially if there has been recent electrical work or if the old thermostat has worn terminals. In some cases, the HVAC system is not delivering fuel or air due to a blown fuse, a tripped breaker, or a clogged filter. Start with quick checks before recalibrating or replacing components.
Preparation for switching to heat on different systems
Gas furnaces, electric systems, and boilers each have unique wiring and control logic. With a gas furnace, confirm the thermostat calls for heat and the furnace door switch is secure. Electric resistance heat and heat pumps may require a C-wire for continuous power and different terminal labels. Regardless of system type, ensure the thermostat is updated to its latest firmware and that any companion apps are configured. If you’re unsure about wiring, consult the manual or a qualified professional before connecting new components.
Wiring and sensor basics you should know
Low‑voltage thermostats connect to the HVAC system with color‑coded wires. Common colors include red (R), white (W), yellow (Y), green (G), and blue or black (C). The White wire typically commands heat; Red provides power; Blue/C is common for continuous power in Wi‑Fi models. Ensure wires are clean, stripped appropriately, and fully inserted under their terminal screws. A secure C‑wire helps prevent voltage drop and false readings. If your system lacks a C-wire, some thermostats work with power stealing, but performance can vary and may affect reliability.
Testing the heat call and verifying operation
After wiring and mounting, restore power and set your thermostat to Heat with a comfortable setpoint. Listen for the furnace or heat pump starting as the air begins to warm, and verify that warm air comes from vents and the room temperature climbs toward the setpoint. If you hear unusual noises or detect burning smells, immediately switch off the system and recheck the wiring. Document results for future reference and watch the thermostat display for any error codes.
Maintenance and long-term care after enabling heat
Regularly replace air filters and schedule seasonal maintenance to keep the heating system efficient. Clean around the thermostat so sensors read room temperature accurately, and keep the wall behind the unit free from obstructions. Check that batteries in battery-powered models stay fresh and update firmware on smart thermostats whenever a new version is released. Proper calibration and routine checks reduce energy waste and help maintain consistent comfort all winter.
Troubleshooting flow and next steps
If heat still does not engage, revisit each step: power, mode settings, wiring, and system readiness. Use the photo you took earlier to confirm wiring matches the diagram and the model’s diagram inside the manual. If issues persist, perform a factory reset only if the manual permits, or call a licensed HVAC technician. For ongoing problems, schedule a diagnostic visit to prevent energy loss and comfort issues.
Tools & Materials
- Screwdriver set (Phillips #2 and flathead)(For mounting screws and panel removal)
- Non-contact voltage tester(Verify power at thermostat wires safely)
- Replacement batteries(Only if your thermostat is battery-powered and needs new cells (AA/AAA depending on model))
- Wire labels or painter's tape(Label wires as you disconnect them)
- Camera or smartphone(Take reference photos of existing wiring)
- Digital multimeter (optional)(Useful for testing voltage in HVAC wiring)
- User manuals for old and new thermostat(Keep handy for compatibility and wiring diagram)
- Smartphone or tablet with app for thermostat (optional)(If installing a smart thermostat and you plan to connect to app)
Steps
Estimated time: 30-60 minutes
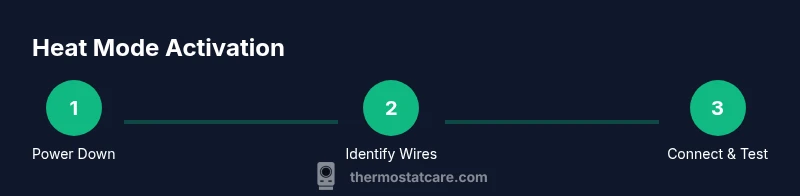
- 1
Power down and prep
Turn off power to the thermostat at the breaker and, if possible, at the HVAC unit. Remove the thermostat cover carefully to access wiring. This prevents shocks and accidental starts during the work.
Tip: Double-check that the breaker is off and keep a clear workspace. - 2
Identify wiring and controls
Label wires and photograph the existing connections before removing any wires. Review the manual to confirm terminal labels match your model. This ensures you reconnect correctly when mounting the new thermostat.
Tip: Use painter's tape to label each wire with its terminal name. - 3
Set thermostat to heat on the new unit
If battery-powered, install fresh batteries. Set the mode to Heat (or Heat/Cool with a heat priority) according to the manual. Confirm that the display shows Heat as the active mode.
Tip: Consult model-specific diagrams for mode names and wiring order. - 4
Connect wires to the new thermostat
Match each wire to the corresponding terminal on the new unit (e.g., R to R, W to W). Ensure wires are fully inserted and tightened. Do not force wires into terminals not labeled for them.
Tip: Recheck wire colors against the labels you created earlier. - 5
Mount the thermostat and restore power
Mount the unit on the wall and reattach the cover. Restore power at the breaker and verify the thermostat powers up normally.
Tip: If the screen stays blank, power down again and recheck connections. - 6
Test the system and tune settings
Set a comfortable setpoint and listen for the heating system engaging. Check airflow and temperature rise toward the target. Adjust fan and hold settings as needed.
Tip: If heat does not engage, verify the C-wire is properly connected and the furnace is calling for heat.
Questions & Answers
Why won't my thermostat switch to heat?
Common causes include incorrect mode, dead batteries, no power, or loose wiring. Check each area step by step.
Heat won’t switch often due to mode, power, or wiring issues.
Can I switch to heat mode on my thermostat without a professional?
Yes for basic models with clear wiring diagrams, but stop if you see exposed wires or burning smells.
You can do basic steps if the wiring is safe.
What is the role of the C-wire in heat mode for smart thermostats?
The C-wire provides continuous power; without it, some models may misread temperatures or drop offline.
The C-wire gives constant power so your thermostat stays online.
Is a factory reset recommended if heat won't engage?
Only if the manual allows; resets can erase saved settings. Try other steps first.
Resetting can help sometimes, but follow the manual.
How often should I service my heating system after putting thermostat on heat?
Schedule seasonal maintenance and replace filters regularly depending on usage.
Get a seasonal check to keep it running smoothly.
Watch Video
What to Remember
- Power down before starting work.
- Verify mode and wiring before testing.
- Ensure secure C-wire for smart thermostats.
- Test heat function and temperature response.
- Maintain your system to sustain comfort.