How to Put a Thermostat In: Step-by-Step Guide
A practical, safety-focused guide to installing a thermostat in your home. Learn wiring basics, mounting, testing, and optimizing for comfort and energy savings.

This guide shows you how to put a thermostat in safely and confidently. You’ll need a compatible thermostat, basic tools, and a 24-volt HVAC system. The Thermostat Care team found that following a systematic process reduces errors and improves energy management. This quick answer also highlights essential safety steps and common mistakes to avoid, so you can complete the installation with confidence.
What you’ll accomplish with a proper thermostat install
When you put a thermostat in correctly, you gain precise control over your heating and cooling, better comfort, and the potential for energy savings. After installation, your system will cycle more efficiently, respond to temperature changes faster, and support scheduling, learning, and remote access if you’ve chosen a smart model. According to Thermostat Care, the main goals are safety, reliability, and simplicity, so you can operate your HVAC with minimal guesswork. In this section we’ll outline expected outcomes and how to measure success, such as consistent room temperatures, fewer temperature swings, and reliable operation after changes to settings. By focusing on clean wiring, secure mounting, and proper ground and power handling, you’ll reduce future service calls and extend the life of your equipment. Use a well-labeled wiring terminal map and test after each major step to ensure everything is connected correctly.
Compatibility, safety prerequisites and planning
Before you begin, confirm your HVAC system uses a standard 24-volt control circuit compatible with most residential thermostats. Check the existing wiring: a C-wire provides constant power for many smart models, while older non-digital units may work with batteries. Ensure you have access to the breaker panel and know which circuit controls the furnace or heat pump. Safety first: always shut off power at the breaker and use a non-contact voltage tester to verify there is no live voltage on conductors you’ll touch. Finally, match your new thermostat’s mounting type (backplate or wall bracket) to the wall surface and ensure you have a stable mounting location away from heat sources or drafts that affect temperature readings.
Wiring basics and common configurations
Most homes use a 24-volt system with wires colored red (R), white (W), yellow (Y), green (G), and blue or brown (C) for the common. The thermostat's terminals map to these functions; for example R provides power, W calls for heat, Y calls for cooling, and G controls fans. If you’re wiring a heat pump, you may see O or B for reversing valve control. When there is no C-wire, some thermostats can run on battery power or use a power extender kit. Always refer to the thermostat’s wiring diagram and your HVAC equipment manual. If your wires are frayed, or you encounter unfamiliar wire colors, stop and check the model’s compatibility to avoid damage.
Choosing the right thermostat and mounting considerations
Choose a thermostat type that matches your needs: basic non-programmable, programmable, or smart Wi-Fi models. For homes with rapid occupancy changes or energy concerns, a programmable or smart thermostat can deliver tangible benefits. Consider whether you need touchscreens, voice control, geofencing, or energy reports, and verify compatibility with your HVAC system and Wi-Fi router. When mounting, use the existing wall stud or a sturdy wall anchor; ensure the backplate is level to prevent inaccurate readings, and route cables cleanly behind the wall plate to avoid snagging.
Tools, materials, and safety checklist
Before you start, review the Tools & Materials list to gather everything you need. A clean workspace and a calm, step-by-step approach help prevent mistakes. Safety first: never force wires into terminals; use proper connectors and keep wiring neat. If you lack a required wire or the system uses a non-standard configuration, pause installation and consult the thermostat manual or a professional.
Common installation challenges and troubleshooting
Wiring mismatches are a frequent cause of a thermostat not powering up. If the device powers on but doesn’t control the HVAC, re-check terminal labels and ensure the wires are firmly seated. Loose ground connections, corroded terminals, or damaged wiring can also cause problems. For heat pumps, the reversing valve (O/B) must be set correctly in the thermostat’s configuration. When you encounter a communication error between thermostat and furnace, verify the 24V supply is stable and the thermostat is compatible with your equipment brand.
After installation: testing, settings, and optimization
Power the system back on and test heating and cooling across several setpoints to ensure consistent response. Configure schedules, temperature hold, and adapt to your daily routine. If you installed a smart thermostat, connect to Wi‑Fi and run a quick firmware update. Review energy reports (if available) to identify opportunities for optimization, such as adjusting hold settings or enabling adaptive recovery.
Safety, local codes, and insurance considerations
Local electrical codes may require professional installation for certain configurations or high‑voltage systems. Even with a standard 24‑V system, keep documentation of the installation for home insurance and future service. If you’re unsure about a step, stop and seek guidance from a qualified HVAC technician or consult Thermostat Care’s troubleshooting resources. Following code-compliant practices not only protects your equipment but also reduces risk during maintenance.
The Thermostat Care recommended approach
Thermostat Care emphasizes a methodical, safety-first approach to installing a thermostat. Start with a clear wiring plan, use the correct backplate, and verify all connections before powering up. After installation, review all settings for comfort and energy efficiency, and document any unusual wiring for future reference. This structured process helps homeowners achieve reliable climate control and long-term cost savings.
Energy optimization and maintenance tips
Even after successful installation, small refinements can boost efficiency. Use a moderate cooling setpoint, enable scheduling, and keep filters clean to maximize system performance. Periodically inspect the wiring and backplate for signs of wear, and re-test when you notice temperature inconsistencies. Regular checks help maintain comfort and reduce energy waste over time.
Tools & Materials
- Voltage tester (non-contact)(Verify power is off before touching wires; use at the HVAC unit and the thermostat location.)
- Screwdriver set (Phillips and flathead)(Include small and medium bits; have a magnetic tip if possible.)
- Wire labels or painter’s tape(Label wires by function before removal; take a photo for reference.)
- Wire connectors (nuts or push-in)(Choose connectors appropriate for your wire gauge.)
- Backplate and mounting screws(Use screws appropriate for drywall or studs; ensure a level base.)
- New thermostat (backplate + faceplate)(Verify compatibility with your HVAC type and wiring count.)
- Digital multimeter (optional)(Only if you want precise voltage measurements during testing.)
- Safety goggles (optional)(Protect eyes from debris while removing old hardware.)
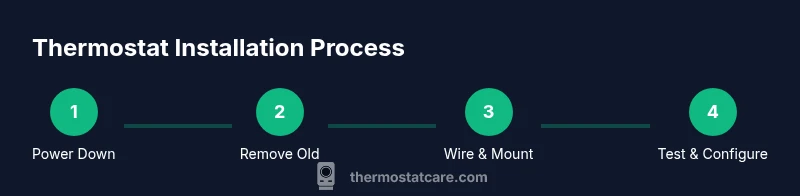
Steps
Estimated time: 45-60 minutes
- 1
Power down and verify safety
Turn off the HVAC breaker and the thermostat’s corresponding circuit. Use a non-contact tester to confirm that no voltage is present on the thermostat wires before you touch them. This prevents accidental shocks and protects equipment during work.
Tip: Pro tip: Wait 2 minutes after turning off power for any residual charge to dissipate. - 2
Remove the old thermostat
Carefully detach the thermostat from the wall plate. Do not yank wires; instead loosen the screws holding the base and note how the wires remain connected. This helps you map connections to the new unit.
Tip: Pro tip: Label each wire or photograph the wiring before detaching anything. - 3
Label wires and photograph
Label each wire by its terminal function (R, W, Y, G, C, etc.) and take a clear photo of the terminal strip. This becomes your reference when wiring the new thermostat and avoids miswiring.
Tip: Pro tip: Use color-coded labels and a simple diagram for quick reference. - 4
Detach wires and prep the new base
Carefully unscrew or release wires from the old stat. If needed, trim the ends and straighten them to fit into the new thermostat terminals. Mount the new base to the wall, using a level to ensure alignment.
Tip: Pro tip: Leave a small amount of slack in wires for easier routing behind the wall plate. - 5
Mount base and route wires
Attach the new backplate to the wall, ensuring it’s level. Route the wires neatly through the center hole and secure them to the backplate to prevent movement.
Tip: Pro tip: Use wire management clips to keep cables tidy and prevent strain on connections. - 6
Connect wires to the new thermostat
Insert each wire into the correct terminal on the new device following the wiring map. Tighten terminals firmly but avoid over-tightening. If your model requires a C-wire, confirm it’s properly connected.
Tip: Pro tip: If a wire doesn’t fit, double-check the terminal labeling and the wire gauge; do not force it. - 7
Attach thermostat, restore power, and test
Mount the faceplate, restore power at the breaker, and power on the thermostat. Run through basic setup: language, date/time, heater/cooler mode, and test each function (heat, cool, fan). Observe response and adjust settings as needed.
Tip: Pro tip: Run a quick temperature test in multiple rooms to confirm even readings.
Questions & Answers
Do I need a professional to install a thermostat?
For most standard 24V residential systems, a confident DIYer can install a thermostat by following the wiring diagram and safety steps. More complex setups (gas furnaces with unusual wiring, or heat pumps with uncommon configurations) may require a professional.
Most homeowners can install a thermostat themselves if the system is standard. For complex setups, consider a professional.
What wires do I connect on a thermostat?
Connect wires to their corresponding terminals: R for power, W for heat, Y for cooling, G for fan, and C for common if the model requires it. For heat pumps, use O/B as applicable. Always reference the thermostat’s wiring diagram.
Hook wires to their matching terminals like R, W, Y, G, and C per the diagram.
Is a C-wire required for my thermostat?
Many modern thermostats need a C-wire for stable power, especially smart models. If your system lacks a C-wire, consider a compatible model that works on batteries or a power extender kit, or run a C-wire if feasible.
A C-wire is often needed for smart thermostats, unless the model supports battery power.
Can I install a smart thermostat myself?
Yes, most homeowners can install a smart thermostat themselves if the system is 24V and compatible. If you have a heat pump or multi-stage system, check compatibility and consider professional help if unsure.
Yes, most people can DIY a smart thermostat if compatible.
Is it safe to install a thermostat on a live system?
It is safe only after you shut off power and verify no voltage remains on the wires. Do not touch live conductors. Use proper safety gear and tools.
Shut off power first and verify no voltage before touching wires.
How long does installation take?
A standard installation typically takes about 45-60 minutes, depending on wiring complexity and wall mounting conditions.
Most installations take under an hour.
Watch Video
What to Remember
- Power off before touching any wires.
- Label wires and document their locations.
- Mount the base level and connect to the correct terminals.
- Test heating and cooling to verify proper operation.
- If in doubt, consult Thermostat Care resources or a professional.