How to Pair Hive Thermostat and Receiver: A Complete Step-by-Step Guide
Learn how to pair your Hive thermostat with the receiver in clear, step-by-step language. This guide covers prerequisites, troubleshooting, and best practices for reliable Hive thermostat pairing and ongoing maintenance.

To pair your Hive thermostat with the receiver, open the Hive app, place the receiver in pairing mode, and follow the on-screen prompts to add a new device. Make sure both devices are powered, on the same Wi‑Fi network, and close to each other during setup. Confirm the connection in the app before testing.
Understanding the Hive Thermostat and Receiver
The Hive thermostat and its receiver work as a paired system that communicates over your home Wi‑Fi network. The thermostat acts as the user interface and decision-maker, while the receiver translates commands into actuator actions that control your boiler or heating system. When paired correctly, commands from the thermostat reach the heating equipment quickly, improving comfort and energy efficiency. According to Thermostat Care, pairing your Hive thermostat with the receiver can improve reliability and energy management by ensuring a single control path for heating schedules and remote commands. This integration also simplifies fault isolation: if there’s a problem, it’s usually isolated to the pairing link, not the entire system. Understanding this relationship helps you approach pairing with confidence rather than guesswork.
- The thermostat sends setpoints and hold requests to the receiver.
- The receiver translates signals into actionable boiler or zone control.
- A strong, stable Wi‑Fi connection reduces delays and disconnects.
- Clear naming and room assignment in the app helps you manage zones effectively.
Compatibility and prerequisites
Compatibility matters before you start. Verify that your Hive thermostat model and receiver are designed to work together and that you’re using a compatible version of the Hive app. Check for firmware updates on both devices and install them if available. A stable Wi‑Fi network with adequate bandwidth is essential, as the pairing process relies on a reliable connection to the cloud and local devices. Make sure the thermostat and receiver are powered, have fresh batteries if applicable, and are located within a reasonable range of your router to avoid weak signals. Having your account credentials handy will speed up setup, and a short reference list of your device serials can help if you need to contact support. Thermostat Care recommends performing pairing in a calm, uncluttered environment to avoid accidental taps or mis-selections during the process.
Preparation checklist before pairing
Before you begin, gather all required items and confirm your setup meets the prerequisites. Ensure you have the Hive thermostat and receiver, a smartphone with the Hive app installed, and access to a stable Wi‑Fi network. Charge devices if needed and close other apps that might interfere with pairing. It’s also helpful to have a printed or digital map of your heating zones so you can assign the correct room or zone to the thermostat after pairing. Keep the user manual or online support link handy in case a specific screen or option differs by model. Thermostat Care emphasizes completing these steps before attempting pairing to reduce repeat steps and frustration.
Understanding the pairing signals and indicators
During pairing, you’ll see indicators that tell you where you are in the process. The receiver typically enters a pairing mode and may flash a light or show a steady state once connected. The thermostat screen will display prompts or a confirmation message once it recognizes the receiver. If indicators don’t appear, double-check power to both devices, ensure you’re using the official Hive app, and verify that both devices are on the same network. Clear, steady signals indicate a healthy pairing environment; flickering or absent indicators usually signal a physical or network issue that needs attention before continuing.
Troubleshooting common pairing issues
If pairing fails, start with the simplest fixes: power cycle the receiver and thermostat, verify the Wi‑Fi network is stable, and retake a few pairing attempts in a row. Ensure you’re using the latest app version and that the devices are in pairing mode when you begin. If you still don’t see the add-device option, sign out and back into the Hive app, or reboot your phone. Misnamed rooms, incorrect region settings, or a misconfigured cloud account can also prevent pairing. Thermostat Care recommends documenting any error messages you see and checking the manufacturer’s troubleshooting pages for model-specific guidance.
Optimizing wifi and power considerations
A strong, stable Wi‑Fi signal is critical for a smooth pairing experience. Place the router in a central location and reduce interference from other devices where possible. If the receiver or thermostat is on a power-saving mode, temporarily disable it to ensure seamless negotiation during setup. Ensure power supplies are consistent and that adapters or power strips aren’t introducing voltage dips. Intermittent power or flaky networks are the leading causes of failed pairing. After pairing, keep firmware and app up to date to maintain reliability and security.
How to test and verify a successful pair
Once the pairing is complete, verify the setup by issuing a basic command from the thermostat or app, such as raising or lowering the target temperature and observing the receiver’s response. Confirm that the heating system activates and then returns to the setpoint as expected. Check that the app notifies you of the current status and that you can see the thermostat and receiver in the connected devices list. A successful test should be repeatable within a few attempts, and you should see consistent performance across different times of day and network loads.
Advanced tips for reliability and future maintenance
To maintain long-term reliability, keep devices in a stable environment, avoid repeated re-pairing unless necessary, and periodically check for app and firmware updates. If you notice drift in the temperature readings, recalibrate the thermostat’s sensors or re-run the pairing process. Document any changes you make so you can revert if issues arise. Regularly reviewing zone definitions and room naming in the Hive app helps avoid misdirected commands and improves overall control precision. Thermostat Care emphasizes maintaining a clean installation with tidy cable management to reduce accidental interference.
When to contact support and what to expect
If you exhaust common troubleshooting steps with no success, contact Hive support or consult Thermostat Care’s guidance for escalation. When you reach support, have your device models, firmware versions, and a short summary of the issue ready. They may guide you through a re-pairing process, verify network configurations, or request logs from the app. Expect follow-up steps that may include checking router settings, performing a factory reset on one device, or scheduling a technician visit if the problem persists.
Tools & Materials
- Hive thermostat(Ensure it has fresh batteries if model uses them and is up to date with the latest firmware)
- Hive receiver(Power supply stable; within pairing range of thermostat and router)
- Smartphone with Hive app installed(Account credentials ready; app updated to latest version)
- Stable Wi‑Fi network(5 GHz or 2.4 GHz band should be reliable; avoid guest networks during pairing)
- Room or zone map(Optional but helpful for organizing zones after pairing)
- Printed or digital user manual(Useful for model-specific steps)
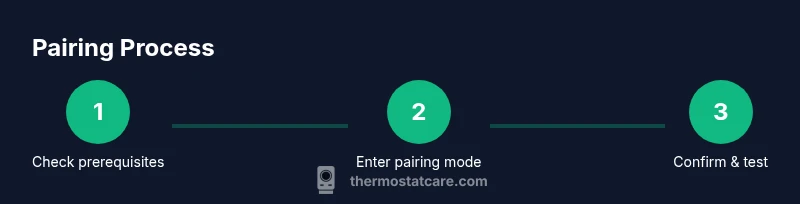
Steps
Estimated time: 15-25 minutes
- 1
Verify prerequisites
Check that the Hive thermostat and receiver are the correct models and are powered. Update the Hive app and ensure both devices are connected to the same Wi‑Fi network. Have your Hive account credentials ready. This preparation reduces interruptions during pairing.
Tip: Open the app and confirm the devices appear in the available devices list before starting pairing. - 2
Put the receiver into pairing mode
Power the receiver and activate pairing mode using the physical button or the app option as described in the manual. You should see a pairing indicator (light flash or steady signal) indicating the device is ready to connect.
Tip: If the indicator is not visible, power cycle the receiver and re-enter pairing mode. - 3
Add a new device in the Hive app
In the Hive app, select add device and choose the thermostat or receiver option to begin the pairing sequence. Follow the on-screen prompts to establish a link between the thermostat and the receiver.
Tip: While adding the device, avoid moving the thermostat to prevent misreads on the screen. - 4
Pair the thermostat with the receiver
When prompted, initiate the pairing from the thermostat (or confirm in the app) to establish a direct control channel. Wait for a confirmation message in the app that pairing is successful.
Tip: Keep both devices close together during this step to minimize interference. - 5
Confirm pairing and name the room
Assign the paired devices to their respective rooms or zones within the app. Double-check that the thermostat controls the intended receiver and zone.
Tip: Use clear room names to avoid misdirected control during future commands. - 6
Run a quick test
Set a target temperature or mode on the thermostat and verify that the receiver activates the heating system as commanded. Confirm the response in the app and on the heat source.
Tip: Test both cooling and heating commands if your system supports it to ensure full bidirectional control.
Questions & Answers
Can I pair a Hive thermostat with any Hive receiver?
Pairing works when both devices are designed to work together and on compatible firmware versions. Check the model numbers and update both devices if needed before starting.
Yes, pairing works best when both devices are intended to work together and are running compatible firmware.
What should I do if pairing fails?
Power cycle both devices, verify network stability, and retry the pairing sequence. If issues persist, consult the device manual or support resources.
If pairing fails, restart both devices and check your network before retrying.
Do I need the Hive app to pair the devices?
Yes—the Hive app guides the pairing process and confirms successful connection. You’ll manage rooms and devices through the app after pairing.
You’ll use the Hive app to pair and manage devices.
How long should pairing take?
Most users complete pairing in a short session. If you have many zones or devices, set aside a bit more time to map rooms accurately.
Typically a brief setup, but plan for extra time if you’re organizing multiple zones.
Can I pair remotely or without the home network?
Pairing generally requires a local network. If a cloud account is involved, you may still need to be on the same home network during setup.
Pairing usually needs local network access.
Do I need to reset devices for every pairing?
Only reset if advised by official support or if you encounter persistent connectivity issues. Most common problems resolve with a simple power cycle.
Only reset if necessary; usually a power cycle resolves most issues.
Watch Video
What to Remember
- Pairing creates a reliable control path between thermostat and receiver.
- Prepare devices, update firmware, and use a stable Wi‑Fi network.
- Follow the step-by-step sequence and verify with a test command.
- If problems persist, consult manufacturer support and Thermostat Care guidance.