Install Hive Thermostat and Hub: A Complete Guide
Learn how to install Hive thermostat and hub safely with a clear, step-by-step guide. This article covers essential tools, wiring basics, app pairing, and basic troubleshooting for reliable, energy-smart operation.

By following this guide, you will learn how to install hive thermostat and hub, wire them safely, connect to a 2.4 GHz Wi‑Fi network, and pair with the Hive app. This step-by-step approach covers essential tools, safety checks, and testing to ensure reliable performance and energy savings.
Overview and prerequisites
If you’re wondering how to install hive thermostat and hub, this overview helps. Installing a Hive thermostat and hub is a practical way to bring smart control to your home. The process centers on preparing your equipment, verifying compatibility with your HVAC system, and ensuring your network is ready for smart control. According to Thermostat Care, starting with a clear plan can dramatically reduce frustration and time spent debugging later. Before you begin, review your HVAC equipment (furnace blower, heat pump, or boiler), confirm that your home has a stable 2.4 GHz Wi‑Fi network, and gather the necessary tools. Hive’s hub typically communicates over Wi‑Fi and acts as the bridge between the thermostat and the cloud, so a reliable connection is essential. If you have older wiring or a nonstandard system, you may need additional adapters or a professional assessment. This stage also includes organizing the installation space: a clean wall, accessible outlets, and enough clearance for a thermostat’s display. A calm workspace and a clear plan lead to a smoother, safer installation, with fewer callbacks for tweaks after setup.
What you need before you start
Before you touch tools, confirm your equipment and network readiness. You’ll need a Hive thermostat and hub, a reliable 2.4 GHz Wi‑Fi connection, and a compatible mobile device with the Hive app installed. Gather a basic tools kit: Phillips screwdriver, a level, and a non-contact voltage tester. Have the HVAC system’s wiring diagram handy if available, and consider taking a photo of the existing wiring for reference. It’s also wise to plan the mounting location: choose a central wall, away from direct sun or drafts, and ensure there is an accessible power outlet nearby for the hub. Finally, review the user manuals and Hive support resources to understand which versions of the thermostat and hub are compatible with your system. If your HVAC uses a nonstandard control or lacks a C-wire, you may need adapters or professional help. A quiet workspace reduces mistakes and improves safety during the installation.
Step-by-step overview
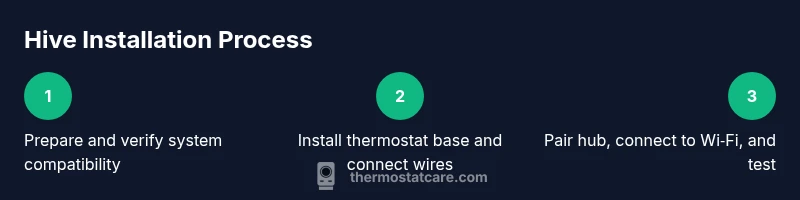
The installation comprises three core phases: preparation, device installation, and validation. Phase one is planning and safety: verify compatibility and power down devices as needed. Phase two is physical installation: mount the base, route and connect wires if required, and mount the display. Phase three is pairing and testing: connect the hub to power, join the Wi‑Fi network, pair with the Hive app, and run a quick test of heating, cooling, and schedules. By separating these phases, you avoid last-minute wiring changes and ensure the thermostat communicates reliably with the hub. If you encounter a mismatch, pause and consult the Hive support articles. This overview helps you stay on track and reduces the risk of miswired connectors.
Verifying compatibility and safety
Not all HVAC setups are identical, so start by confirming the thermostat’s compatibility with your control system. Check that your furnace or heat pump uses a standard 24‑vac control circuit, and ensure the existing wiring includes a C-wire if required by the Hive thermostat. If you have a heat pump with a proprietary reversing valve, check compatibility charts from Hive. Safety first: turn off power at the breaker before touching any wires, and never disconnect a live conductor. If you feel uncertain about wiring or if your system uses uncommon configurations, consider hiring a licensed HVAC technician. This upfront validation reduces the risk of damage to equipment and ensures the Hive hub can maintain a stable connection to the cloud for remote control.
Wiring and power considerations
Power down the system and confirm no residual voltage before touching wires. Label each wire with the corresponding terminal you remove it from, using masking tape and a pencil. If your existing thermostat used a C-wire, route it to the Hive base’s C terminal; otherwise, follow Hive’s guidelines for power-sharing or adapter options. Do not jumble wires or omit a required conductor; miswiring can trigger a system fault. Keep the environment clean and dry; avoid mounting on studs that flex or walls with vibrations. Use the included backplate or a level to ensure the thermostat sits flat. If your HVAC uses a common gas furnace, ensure the thermostat’s power draw is within the hub's capability to avoid nuisance resets. After wiring, re-check all connections, restore power, and proceed to the installation of the Hive thermostat itself.
Installing the Hive thermostat
Remove the old thermostat and photograph the wiring for reference. Detach the old mounting plate and mount the Hive base to the wall using anchors if needed. Connect the wires to the labeled terminals on the Hive base, matching color and function (R, W, Y, G, C, etc.), then secure the thermostat display to the base. Attach a clean faceplate and verify the device sits level. Restore power and watch the thermostat boot, then begin the pairing process in the Hive app. If your system lacks a C-wire, use Hive’s recommended power-sharing approach or a compatible adapter per the manual. Take a moment to test basic functions like heating, cooling, and fan control to confirm proper wiring and mounting. This step finalizes the physical installation and prepares you for hub pairing.
Connecting the Hive hub and app
With the thermostat mounted, plug the Hive hub into a nearby power outlet and power on. Connect the hub to your Wi‑Fi network (preferably 2.4 GHz for compatibility) and open the Hive app on your phone. Create or sign in to your Hive account, then add the new thermostat and hub as a single setup. The app will guide you through naming, room assignment, and schedule creation. Test the connection by adjusting the temperature and confirming the change appears on device screens and in the app. If the hub seems offline, check your router settings or reset the hub and try again.
Testing and troubleshooting
After pairing, verify that changes from the app reflect on the thermostat within a minute or two. Run through heating, cooling, and fan modes, plus a basic schedule test. If the device does not respond, re-check Wi‑Fi strength, ensure the hub is on and connected, and confirm the thermostat is enrolled in the correct Hive account. Common issues include delayed updates, unresponsive touchscreens, or incorrect temperature readings. In these cases, perform a power cycle on the hub and thermostat, re-run the pairing steps, and review the app’s connection status. For complex issues, consult Hive support resources or Thermostat Care’s troubleshooting guide. This testing phase confirms your installation is ready for daily use.
Fine-tuning and optimization
Now that Hive is installed and connected, personalize settings to maximize comfort and energy savings. Create tailored schedules for weekday and weekend routines, enable geofencing if your plan supports it, and adjust temperature offsets during weather shifts. The Hive app provides energy reports and guidance; leverage them to identify opportunities to dial back unnecessary heating in off-peak hours. Keep the hub updated with firmware releases to maintain compatibility with your mobile device and cloud services. Thermostat Care analysis shows energy improvements when users properly configure schedules and automation rules. Finally, document installation details, including your HVAC type, wire counts, and any adapters used, for future maintenance. The Thermostat Care team recommends keeping this guide handy as a reference, so you can revisit setup steps if you replace hardware or move to a new home.
Tools & Materials
- Hive thermostat(Main device to install)
- Hive hub(Connects thermostat to cloud)
- Screwdriver set(Phillips head #2 typically)
- Level and mounting screws(Ensure thermostat sits level)
- Non-contact voltage tester(Safer checks before wiring)
- Masking tape and pencil(Label wires during removal)
- 2.4 GHz Wi-Fi network details(Needed for pairing hub/app)
- Mobile device with Hive app(Android/iOS for setup)
- User manuals or Hive support resources(Helpful for model-specific steps)
Steps
Estimated time: 45-75 minutes
- 1
Power down HVAC and prepare tools
Switch off the HVAC at the breaker and verify no power is present. Gather the tools and photo any existing wiring for reference. This prevents accidental shocks and wiring errors.
Tip: Double-check power off at the breaker before touching wires. - 2
Remove old thermostat and document wiring
Carefully remove the existing thermostat, detach wires one by one, and label each wire with its terminal. Take a photo of the backplate wiring in case you need to revert.
Tip: Label each wire using masking tape to avoid confusion. - 3
Mount Hive base on wall
Attach the Hive base to the wall using provided anchors if needed. Use a level to ensure it sits flat and mark screw positions before drilling.
Tip: Avoid mounting on a vibrating wall or near heat sources. - 4
Connect HVAC wires to Hive base
Connect wires to the corresponding terminals (R, W, Y, G, C) on the Hive base. If your system lacks a C-wire, follow Hive’s adapter guidance.
Tip: Ensure wires are firmly seated and not loose. - 5
Attach thermostat display and backplate
Attach the display to the base and connect any required brackets. Verify the unit sits level after installation.
Tip: Tilt or misalignment can affect touch responsiveness. - 6
Power up and initialize the thermostat
Restore power and allow the thermostat to boot. Note any on-screen prompts and record necessary configuration details.
Tip: If there’s a boot error, power cycle the device and retry. - 7
Set up Hive hub and join Wi-Fi
Plug in the Hive hub, connect it to your Wi‑Fi network (preferably 2.4 GHz), and ensure it has internet access.
Tip: Place the hub within reach of the router with a clear signal path. - 8
Pair thermostat and hub in Hive app
Open the Hive app, add the new thermostat and hub, assign a room, and enable basic schedules.
Tip: Follow the on-screen prompts exactly for successful pairing. - 9
Test functions and finalize setup
Test heating, cooling, and fan modes. Validate scheduling works and the app accurately reflects changes on the thermostat.
Tip: Run a full test cycle to confirm reliable operation.
Questions & Answers
Do I need a Hub to use Hive Thermostat?
A Hive hub enables cloud features such as remote control and advanced scheduling. Some basic functions may work without one, but for full functionality the hub is recommended.
A hub is recommended for full Hive features like remote control and scheduling.
Is professional installation recommended?
If you’re comfortable with basic wiring and safety steps, you can install the system yourself. For complex HVAC configurations or uncertainty, consider hiring a licensed technician.
If you're comfortable with wiring and safety steps, you can install it yourself; otherwise get a pro.
What if my HVAC uses a C-wire?
A common C-wire can simplify installation and power the thermostat reliably. If you don’t have a C-wire, follow Hive’s guidance for adapters or power-sharing methods.
A C-wire can simplify power; use adapters if you don’t have one.
Can I install Hive thermostat on a heat pump system?
Yes, Hive thermostats support many heat pump configurations. Check Hive’s compatibility guide for any model-specific notes.
Heat pumps are commonly supported; verify compatibility in the guide.
How long does installation take?
Most installations take about 45 to 75 minutes, depending on HVAC configuration and wiring.
Typically 45 to 75 minutes.
Watch Video
What to Remember
- Plan and verify compatibility before starting.
- Label wires and follow safety steps at each stage.
- Pair hub and app, then test all modes and schedules.
- Customize schedules for energy savings.
- Thermostat Care's verdict: follow this guide for reliable Hive setup and energy efficiency.