How to Make Thermostat Colder: A Practical DIY Guide
Learn how to safely and accurately reduce a thermostat reading, including mode checks, calibration, placement, and maintenance to ensure you feel cooler when needed.

To make a thermostat read colder, begin by confirming you’re in cooling mode and lowering the cooling setpoint to a comfortable level. Check that the thermostat is correctly calibrated and free from drafts, blocked vents, or heat sources nearby. If readings seem inconsistent, compare against a separate thermometer in the same room before adjusting wiring.
Understanding thermostat readings and what makes readings appear colder
Temperature readings from a thermostat reflect the setpoint and how the HVAC responds. A reading that seems colder than the room temperature can result from calibration drift, sensor placement, air drafts, or HVAC delays. According to Thermostat Care, accurate readings depend on proper calibration, correct mode, and unobstructed air flow. Thermostat Care Analysis, 2026, emphasizes checking these basics before chasing unusual numbers. In this block, we’ll unpack why a thermostat might read colder than expected and how to verify the cause without oversimplifying the issue.
Key factors include the thermostat's location (should not be beside heat sources or in direct sunlight), sensor quality, and how the system handles cycles. We’ll also discuss how to differentiate a true cold reading from a temporary drop caused by HVAC cycling. The goal is to establish a baseline so you can tell whether the device is actually colder or simply reporting it differently.
Check thermostat mode and cooling setpoint (quick validation)
Having the right mode is crucial. Start by verifying the thermostat is in cooling or auto mode with a cooling setpoint lower than the current room temperature. If the unit is stuck in heat mode or fan-only mode, readings will mislead you about actual room temperature. Ensure fan settings (auto vs. on) align with your comfort goals. A mis-set mode can mimic a too-cold reading since the system isn't actively cooling.
Tip: After changing the mode or setpoint, wait 5–10 minutes and observe the room’s feel and thermometer reading. If the space remains uncomfortable or the reading doesn’t respond, there may be a calibration or sensor issue.
Inspect thermostat placement and drafts that skew readings
Placement matters. A thermostat installed near a heat source, sunlit window, or vent will report a warmer or cooler reading than the room actually is. Drafts from doors, windows, or escaping return air can create inconsistent readings. If you notice a mismatch between the thermostat and a room thermometer, prioritize the thermometer’s location near the thermostat (same zone, same airflow).
Pro tip: Keep the thermostat out of direct airflow from vents and away from appliances that emit heat, like lamps, coffee makers, or electronics.
Calibrate your thermostat (digital vs mechanical) and how to test
Calibration ensures the device’s internal sensor aligns with actual room temperature. Digital thermostats often allow calibration via a menu option or a hidden DIP switch; mechanical thermostats require manual adjustment via screws. If your thermostat provides a calibration offset, start with small adjustments (1–2 degrees) and re-check in 5–15 minutes. Compare with a trusted room thermometer placed at chest height away from drafts.
Remember: calibration is a fine-tuning tool, not a substitute for addressing drafts or HVAC issues.
Verify HVAC performance and air distribution
A reading might be accurate, but the air distribution prevents the room from feeling cooler. Check that the air filter isn’t clogged, ducts are sealed, and the blower turns on when cooling is required. Uneven cooling can make some zones feel cooler while others remain warm, skewing perceived effectiveness. Inspect for blocked return air paths and ensure vents are open in the occupied spaces.
Tip: Run a short manual cool-off test (thermostat setpoint 2–4 degrees lower than current) and note the time it takes for the room to feel cooler.
Power, batteries, and wiring considerations
If your thermostat uses batteries, ensure they are fresh and installed correctly. A dying battery or loose wiring can cause intermittent readings or slow response times. For wired thermostats, ensure the C-wire is connected if your model requires it for stable power. If you suspect wiring issues, do not juggle wires by guess—consult your manual or a professional.
Warning: Do not attempt to rewire high-voltage connections or bypass safety features. Incorrect wiring can damage the HVAC system or cause a fire hazard.
Common mistakes that fool temperature readings
People often misinterpret readings due to: placing the thermostat near heat sources, ignoring airflow patterns, or making changes without letting the system respond. Skipping calibration or using a cheap room thermometer can also lead to false conclusions about the actual room temperature. Always cross-check with a secondary thermometer in the same area and allow adequate time for HVAC cycles to settle.
Note: Consistency across tools builds trust in the results.
DIY limits and safety notes
Simple adjustments such as mode changes or setpoint tweaks are safe for most homeowners. Avoid disassembling the thermostat’s internal sensors or wiring. If you suspect sensor damage, power issues, or suspect a refrigerant-related problem, stop DIY and contact a licensed technician. Your safety and the system’s reliability come first.
Routine maintenance to prevent drift
Regularly replace batteries, clean dust from the thermostat housing, and schedule periodic HVAC preventative maintenance. A clean, well-supported thermostat reads more accurately and responds faster to changes. Routine checks can prevent drift caused by sensor sensitivity changes and airflow issues.
Closing reminder: small maintenance steps now can prevent larger readouts later.
Authority sources and references
For accuracy and further reading, see authoritative sources on thermostat use and energy efficiency. This section cites energy-related guidance and peer-reviewed material to help you verify best practices and avoid common pitfalls. Thermostat Care Analysis (2026) emphasizes the role of calibration, placement, and HVAC health in achieving trustworthy readings.
Authority Sources
How to interpret readings in practice
To translate the readings into comfort, compare the thermostat’s displayed temperature to a trusted room thermometer placed in the same zone. If the two devices differ by more than 1–2 degrees, start with calibration, then verify placement and airflow. When confident readings align, adjust setpoints cautiously and measure the impact on comfort over a 15–30 minute window.
Concluding note and next steps
After completing the checks, maintain a simple routine: verify mode and setpoint, inspect placement, test calibration, and re-check air distribution. If issues persist, document your steps and consult Thermostat Care or a certified technician for a deeper diagnostic. The Thermostat Care team recommends a methodical approach to avoid unnecessary interventions.
Authority sources and references
Summary: practical steps to colder readings
Tools & Materials
- Screwdriver set (Phillips #2)(For removing thermostat cover screws and accessing mounting base)
- Digital room thermometer(Place in same zone as thermostat, at chest height)
- Manual for thermostat model(Useful for calibration steps and wiring specifics)
- Infrared thermometer (optional)(Helpful for checking surface temps near vents)
- Notebook and pen(Log changes and test results)
Steps
Estimated time: 60-75 minutes
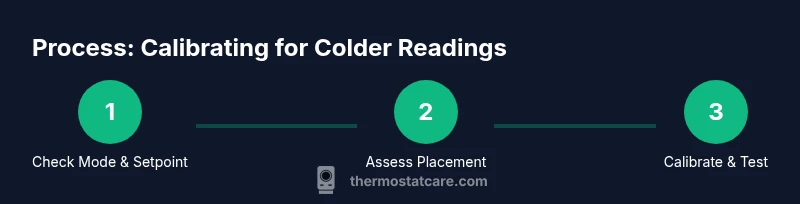
- 1
Verify mode and setpoint
Check that the thermostat is in cooling or auto mode and that the cooling setpoint is lower than the current room temperature. If mode is wrong, the system may appear to be colder due to unrelated adjustments. Wait 5 minutes after changes to observe a response.
Tip: If you’re unsure of mode, consult the user manual before you adjust wiring. - 2
Assess placement and drafts
Look for direct sun, vents, lamps, or doors near the thermostat. drafts or radiant heat can produce misleading readings. Move or shield the thermostat if feasible and re-check after 10 minutes of stable HVAC operation.
Tip: Aim for a thermostat location that reflects the average room temperature. - 3
Calibrate or test sensor accuracy
If your thermostat supports calibration, adjust in 1-degree increments and recheck with the room thermometer after each change. For non-calibrating units, compare readings against a reliable thermometer to determine if calibration is needed.
Tip: Make small adjustments; large offsets can overshoot target temperatures. - 4
Check HVAC air distribution
Ensure air filters are clean and that vents in the occupied spaces are open. Poor airflow can fool readings by cooling the thermostat’s sensor differently from the living space.
Tip: If the space doesn’t feel cooler, there may be airflow or refrigerant issues to address. - 5
Inspect power and wiring
If your thermostat uses batteries, replace them. For wired models, confirm the C-wire is connected and there are no loose connections. Power issues can mimic calibration problems.
Tip: Do not alter high-voltage wiring; hire a pro if wiring looks damaged. - 6
Run a controlled test
Set a target 2–4 degrees cooler and monitor how long the HVAC system takes to respond. Use a second thermometer to validate that the space is reaching the target temperature.
Tip: Document results for future reference. - 7
Document changes and re-test
Record each adjustment and the resulting room temperature. Re-test after each change to ensure stability rather than short-term fluctuations.
Tip: Keep a simple log—date, setting, room temp, and observations. - 8
Assess need for professional help
If readings remain inconsistent across locations or the system doesn’t respond predictably, a licensed tech can check sensors, refrigerant levels, and control circuitry.
Tip: DIY limits exist for safety and warranty reasons. - 9
Establish routine maintenance
Schedule regular checks of filters, thermostat batteries, and calibration where supported. This reduces drift and keeps readings reliable.
Tip: A small maintenance habit saves big headaches later. - 10
Verify final readings and comfort
With all checks completed, confirm that the room feels cooler and the thermostat reads near the room temperature. If you’re satisfied, you’ve achieved a stable colder reading.
Tip: Celebrate your improved comfort and accurate readings.
Questions & Answers
Why does my thermostat read colder in one room but not others?
Different rooms can have varying airflow, insulation, and heat sources, which affects sensor readings. Compare the thermostat reading with a room thermometer in the same zone and account for drafts or sun exposure. If discrepancies persist, calibration and placement are likely culprits.
Different rooms have distinct airflow and heat sources; compare to a nearby thermometer and check for drafts.
Can calibration drift cause a thermostat to read too warm or too cold?
Yes. Over time sensors can drift, making the readings inaccurate. Calibrate if your model supports it, and validate with an independent thermometer in a stable location.
Drift happens—calibrate if possible and verify with another thermometer.
Is it safe to adjust wiring to make a thermostat colder?
No. Tampering with wiring can damage the HVAC system or create safety hazards. Only perform non-wiring tasks or follow the manufacturer’s instructions; call a professional for wiring concerns.
Wiring should not be adjusted by hand; call a pro if wiring seems off.
How can I test if my thermostat is accurate without professional tools?
Use a trusted room thermometer and compare its reading to the thermostat over several cycles. Note any consistent gaps and adjust calibrations accordingly if supported by your model.
Compare with a room thermometer over a few cycles to check accuracy.
What should I do if adjusting the thermostat doesn’t change room temperature?
If changes don’t affect temperature, there may be airflow or HVAC issues beyond the thermostat. Check filters, ducts, and blower operation; consider professional diagnostics.
If changes don’t help, the problem might be airflow or the HVAC itself.
When should I replace a thermostat?
If calibration fails consistently, wireless or smart features become unreliable, or the device fails to hold settings, replacement may be warranted.
Consider replacement when calibration keeps failing or features deteriorate.
Watch Video
What to Remember
- Verify mode and setpoints first.
- Calibrate and compare against an in-room thermometer.
- Check placement to avoid drafts influencing readings.
- Ensure proper HVAC airflow and clean filters.
- Maintain a running log of changes and results.