How to know if AC thermostat is bad: Troubleshooting for homeowners
Urgent, step-by-step guide to diagnose a failing AC thermostat. Learn signs, quick checks, and when to call a pro. Practical tips for homeowners and DIYers.

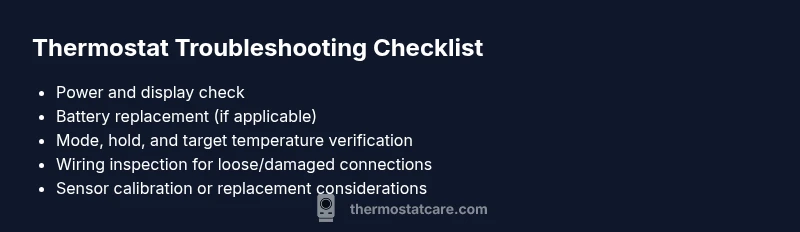
If your AC isn’t following thermostat commands or the display is erratic, the thermostat is the most likely culprit. Start with power, battery (if applicable), and basic settings, then confirm wiring and sensor function. If the issue persists after these easy checks, plan a deeper diagnosis or professional help.
Quick Reality Check: Is the thermostat the culprit?
When you ask how to know if ac thermostat is bad, you’re not alone. According to Thermostat Care, many problems that look like an air conditioner failure actually originate in the thermostat. The fix is often simple and safety‑driven. Start with the basics: ensure the unit is powered, the display is readable, and the mode and setpoint are correct. If the thermostat is offline, unresponsive to changes, or showing inconsistent readings, the thermostat could be the root cause. The Thermostat Care team has found that most early misbehavior traces back to dead batteries, loose wires, or an incorrect schedule. By ruling out these causes first, you can avoid a costly service call and restore comfort quickly.
Common symptoms indicating thermostat trouble
Several telltale signs point to thermostat trouble rather than a failing system. Look for: temperatures that don’t match the setpoint, frequent temperature swings in a short period, or a blank/display error on the thermostat. If the unit’s screen flickers, buttons feel stuck, or the fan runs continuously without cooling, the thermostat is a strong suspect. You may also notice that changes you make in the app or on the device don’t take effect, or the system ignores hold settings. These symptoms aren’t definitive proof, but they raise a red flag that you should investigate further, especially if the rest of the HVAC system seems healthy. Remember to document dates and symptoms to share with a pro if needed, as this helps speed the diagnosis.
Safe, quick checks you can perform now
Start with the simplest, safest fixes before touching any wiring. Verify the thermostat is powered: for battery models, replace the batteries with fresh alkaline ones; for hard‑wired units, confirm the 24‑volt supply from the furnace/air handler. Check the display for any error codes and reset the thermostat to its default settings if available. Confirm the mode (cool/heat) and target temperature align with the room’s needs. Inspect accessible wiring for loose terminals or obvious damage and reseat connections carefully. If you have a smart thermostat, ensure the app shows the same temperature as the device and that network connectivity is solid.
How to verify thermostat responsiveness and sensor accuracy
After the basics, test responsiveness by changing settings and watching the system respond within a few minutes. Compare the actual room temperature with the thermostat’s readout and the setpoint. If there’s a persistent offset (for example, room is consistently several degrees warmer than setpoint), the sensor may be out of calibration or the device may be on the fritz. Some models allow sensor calibration; if yours does, follow the manual to adjust. If the thermostat still disagrees with the room, you should suspect a sensor fault, wiring issue, or control board problem rather than a random HVAC fault. In all cases, document readings and timestamps to help a technician reproduce the behavior.
Diagnostic overview: symptom, diagnosis, and next steps
A structured approach helps keep you from chasing false leads. Start with symptoms you observe, like “no response to temperature changes” or “random temperature drift.” Next, consider likely causes (power, settings, sensor, wiring) and the recommended fixes. If the symptom remains after the basic checks, escalate to more advanced testing (multimeter checks, voltage verification, or component swap) only if you’re comfortable. If you smell burning or notice scorching on wiring, stop immediately and call a professional. This staged approach aligns with the safety rules for DIY thermostat troubleshooting and minimizes risk while maximizing the chance of a quick fix.
What to do if you confirm thermostat is the culprit
If you’ve ruled out HVAC faults and the thermostat still misbehaves, you have a few paths forward. Replacing the thermostat is common for older units with worn sensors or flaky boards. For newer models, you may benefit from calibration or a firmware update. Consider wiring and compatibility with the HVAC system, especially if you have a hybrid heat or multi‑stage setup. If you’re unsure, seek professional help rather than guessing, particularly when wiring is involved or you notice signs of electrical issues. The goal is to restore accurate temperature control while avoiding safety risks and unnecessary component replacements.
Steps
Estimated time: 60-90 minutes
- 1
Power down and safety check
Turn off the thermostat power at the breaker or switch, then remove the faceplate carefully. Wait 60 seconds and power back on. This safe reset can clear minor firmware hiccups and restore responsiveness.
Tip: Always confirm the breaker is off before touching any wiring to avoid shocks. - 2
Inspect basics and reset
Check that the device is set to the correct mode (cooling vs heating), confirm the target temperature, and reset the thermostat to factory defaults if option is available. Observe whether the display returns to normal and the system responds to changes.
Tip: Write down current settings before resetting to easily reconfigure later. - 3
Battery and power check
For battery‑powered models, replace with fresh alkaline batteries. For hard‑wired units, verify the 24V supply at the furnace/air handler with a multimeter if you have one, or consult your HVAC panel wiring diagram.
Tip: Battery changes can resolve many flaky responses; don’t skip this step. - 4
Wiring inspection
Remove the thermostat from its mount and inspect accessible wires for loose or damaged connections. Reseat any loose wires firmly and ensure the terminals match the wiring diagram for your model.
Tip: Take a photo of the wiring before disconnecting to ensure correct reattachment. - 5
Test sensor and calibration
If your model supports sensor calibration, follow the manual to adjust until room readings align with the setpoint. Run a controlled test by setting a comfortable temperature and verifying the HVAC responds correctly.
Tip: Avoid over‑calibration; small adjustments yield the best accuracy. - 6
Decision point: call a pro
If the thermostat still misbehaves after these steps, the issue may be a failed sensor, control board, or wiring problem beyond DIY scope. Schedule professional service to prevent further damage and ensure safe operation.
Tip: Provide the technician with your symptom log and calibration notes.
Diagnosis: AC system not responding to thermostat controls; inconsistent temps; display errors
Possible Causes
- highPower issue: thermostat not receiving proper power
- mediumWrong settings or mode (cool/heat, fan, hold)
- highDefective temperature sensor or wiring problem
Fixes
- easyPower cycle the thermostat and verify it is receiving power (check breakers, fuses, and battery status)
- easyVerify settings, reset to defaults, and recalibrate the sensor if available
- mediumInspect wiring terminals for loose connections or damage; reseat or replace as needed
- hardIf issues persist after these steps, arrange professional inspection for sensor calibration or board fault
Questions & Answers
What are the most common signs that my thermostat is failing?
Common signs include inconsistent room temps, slow responses to changes, display errors, and unexpected cycling. If these occur, test power, batteries, settings, and wiring before concluding a fault.
Look for inconsistent temperatures, delays in changes, or display errors. Start with power, batteries, and settings, then wiring before deciding the thermostat is faulty.
Can a bad thermostat cause the AC to run continuously?
Yes. A faulty thermostat can cause the AC to run nonstop or short‑cycle, wasting energy and reducing comfort. Verify power and calibration before replacing components.
Yes, a bad thermostat can make your AC run all the time. Check power and calibrations first.
Should I replace batteries in a digital thermostat?
If your thermostat uses batteries, replace them with fresh alkalines. If the unit is hard‑wired, focus on the power supply and wiring connections.
If it uses batteries, replace them. If not, check the power supply and wiring.
Is it safe to troubleshoot thermostats myself?
Basic checks are generally safe if power is off and you follow the manual. Avoid handling live wires and contact a pro for wiring or electrical concerns.
Basic checks are usually safe, but don’t mess with live wires—call a pro if you’re unsure.
How do I tell if the problem is the thermostat or the HVAC system?
If the HVAC system seems fine but temperatures don’t align with the setpoint, the thermostat is likely at fault. Perform sensor checks and calibration first.
If the system runs fine but temps are off, start with the thermostat checks.
When should I call a professional?
Call a professional if you notice burning smells, obvious wiring damage, or if the thermostat still misbehaves after basic checks. Safety and accuracy are priorities.
Call a pro if you smell burning or wiring looks damaged or if issues persist after checks.
Watch Video
What to Remember
- Start with simple power/settings checks
- Wiring and sensor faults are common culprits
- Calibrate or reset before replacing hardware
- Call a pro for electrical risks or unresolved issues