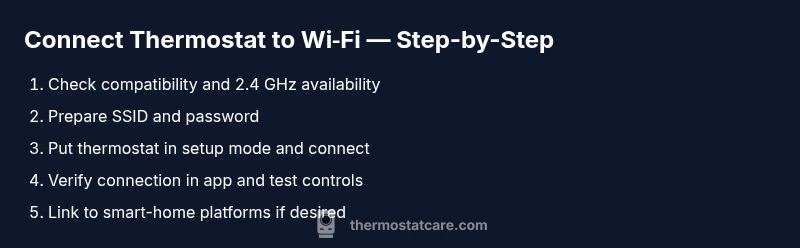
How to Connect a Thermostat to Wi-Fi: Quick Setup Guide
Step-by-step guide to connect your thermostat to Wi-Fi, including compatibility checks, 2.4 GHz network setup, app onboarding, testing, and smart-home integration for reliable performance.

To connect your thermostat to Wi‑Fi, start with a compatible model and a 2.4 GHz network. According to Thermostat Care, a strong, stable connection ensures reliable scheduling and firmware updates. Have your Wi‑Fi name (SSID) and password handy, plus the thermostat’s mobile app installed. In the app, start the setup flow, select your network, enter the password, and confirm the connection. If your thermostat supports a temporary hotspot, connect to it first, then switch back to your home network.
wifi network basics for thermostats
A thermostat that connects to Wi‑Fi relies on a steady, compatible network. Most devices require a 2.4 GHz band to maintain a reliable connection; 5 GHz networks often fail to reach the thermostat due to range and wall interference. Before you start, verify your router can broadcast both bands, and confirm your thermostat is compatible with Wi‑Fi setup. If you only have a 5 GHz network, create a separate 2.4 GHz network or enable a guest network that includes both bands. Also check signal strength in the thermostat’s location; you’ll get better reliability if the device sits within line of sight of the router or near a repeater. According to Thermostat Care, the right combination of hardware, placement, and credentials dramatically reduces setup friction and future dropouts.
Check compatibility and app readiness
Before fiddling with settings, confirm your thermostat model supports Wi‑Fi and that you can run the official app on your phone or tablet. Some older models may require a firmware update before enabling network setup. Check the manufacturer’s support site for the exact steps and any prerequisites. Ensure your mobile device is running the latest operating system version and that the app has permission to access location, Bluetooth, and your network credentials when requested. According to Thermostat Care, using the company app consistently yields faster and more reliable connections than trying to connect via third-party tools.
Gather network details and credentials
Have your network name (SSID) and password ready, and know if your network uses a guest network or enterprise security. Note whether your router broadcasts on 2.4 GHz only or both bands. If your network uses a captive portal or special security settings (like WPA3), check whether your thermostat supports them. Write down the steps in your own words and keep the password secure. A quick password manager entry can save time during setup. These details reduce back-and-forth during the configuration and decrease the chance of mistyping the password. Thermostat Care emphasizes preparing credentials in advance to streamline the process.
Put the thermostat into wifi setup mode
On most models, you’ll access Settings > Network > Add/Join Wi‑Fi. If the device supports a temporary hotspot, you may see a prompt to switch to that mode, which helps the initial pairing when your home network is not detected yet. Stand close to the router during this step to minimize signal loss. Follow the on-screen prompts to choose your 2.4 GHz network and enter the password. If the status shows connecting for more than a couple of minutes, pause, recheck the password, and retry. This step is critical; a wrong password is the most common cause of failure.
Connect using the official mobile app
Launch the thermostat’s companion app and start a new setup or add a new device. The app will scan for nearby thermostats in setup mode and present the list of available networks. Select your home network (2.4 GHz), then enter the password exactly as shown. Some apps auto-fill the SSID if you’ve previously connected to the same network. After submission, wait for a confirmation screen or indicator that the thermostat is online. If needed, toggle airplane mode off and back on to refresh the connection. A successful connection should update the thermostat’s status within the app.
Alternative connection methods for stubborn devices
If the app fails to connect, use a manual entry method if your thermostat supports it, either through a web portal or a built‑in browser. Some models allow you to type the SSID, security type, and password directly. Ensure you select WPA2 or WPA3 if available and set the same network name (SSID). If your router has MAC filtering, temporarily disable it during setup or add the thermostat’s MAC address. In some cases, restarting the router or performing a soft reset on the thermostat helps fix stubborn connectivity issues. Thermostat Care suggests trying both approaches before concluding an issue is device-related.
Troubleshooting common issues step‑by‑step
Start with the simplest checks: confirm the password is correct, verify you're using a 2.4 GHz network, and move the thermostat closer to the router. If there is a strong signal and the app still reports failure, reboot the router and the thermostat. Check for firmware updates on both devices, and ensure the thermostat is not on a guest network that isolates connected devices. If you see a specific error code, consult the manufacturer’s support page for that code. Using the official app and following exact prompts reduces confusion and speeds resolution.
Security considerations when on Wi‑Fi
Keep your home network safe by enabling strong WPA2/WPA3 encryption and using a unique, long password. Create a dedicated network for smart devices if your router supports it, which limits access to your primary network. Regularly update the thermostat’s firmware and the app to protect against vulnerabilities. Avoid leaving remote access enabled unless you truly need it, and review which services are connected to your thermostat. These steps help prevent unauthorized access and potential privacy risks.
Verifying a successful connection and basic testing
After the app shows the thermostat online, run a quick test: adjust the temperature, set a schedule, and confirm that the changes reflect in real time. Check the device status in the app, and ensure you receive system alerts if the thermostat disconnects. If you use voice assistants, test a simple command like 'set temperature to 72' to verify integration. A solid connection should remain stable for several days before you consider it fully reliable.
Linking with smart‑home platforms
Many homeowners want voice control or routines via Google Home or Amazon Alexa. Once connected, open the platform’s app and add your thermostat as a compatible device. Grant access and enable the required permissions, then test a routine to confirm it responds promptly. If you own multiple thermostats, label them clearly in both the thermostat app and the smart-home app to avoid confusion. Thermostat Care notes that clear naming and routine testing streamline daily use.
Maintenance to keep wifi connection reliable
Periodically check your router firmware and reboot if you notice intermittent drops. Place the thermostat away from large metal appliances, microwaves, and other sources of interference. If your home gains new devices, consider re-running the setup to refresh credentials and ensure smooth syncing. Keep the thermostat app updated and monitor the network’s 2.4 GHz stability. A small maintenance routine now prevents larger connectivity problems later, saving time and energy.
Next steps and what to expect after setup
With Wi‑Fi connected, your thermostat will receive automatic updates, sync schedules across devices, and report energy usage more accurately. Expect smoother operation, fewer mid‑cycle errors, and improved integration with smart‑home ecosystems. The Thermostat Care team recommends documenting your setup steps and keeping your credentials secure. Over time, revisit your network placement or router performance to maintain reliability, and consult Thermostat Care’s troubleshooting guides if issues reappear.
Tools & Materials
- Smartphone or tablet with the thermostat’s app installed(Install and log in to the app; ensure latest version.)
- Thermostat with Wi‑Fi capability(Confirm model supports Wi‑Fi setup and firmware is up to date.)
- 2.4 GHz Wi‑Fi network(Most thermostats require 2.4 GHz; verify network bands.)
- Wi‑Fi network name (SSID) and password(Have secure password handy; avoid sharing publicly.)
- Optional: password manager(Helpful for saving credentials securely.)
Steps
Estimated time: 15-30 minutes
- 1
Check hardware and network needs
Confirm your thermostat supports Wi‑Fi and that your router is broadcasting a 2.4 GHz network. If you only have 5 GHz, create a temporary 2.4 GHz network or enable dual-band operation for setup. This initial check saves time later.
Tip: Verify the 2.4 GHz band is active before starting. - 2
Prepare credentials and app
Install and log in to the thermostat app on your mobile device. Ensure location services and Bluetooth permissions are enabled if prompted. Have SSID and password ready to enter during setup.
Tip: Update the app to the latest version for best compatibility. - 3
Put thermostat in setup mode
Navigate to Settings > Network > Add/Join Wi‑Fi on the thermostat. If offered, enable temporary hotspot mode to facilitate initial pairing. Keep the device close to the router to minimize signal loss.
Tip: Do not move the thermostat during the pairing flow. - 4
Connect through the app
In the app, select your home network (2.4 GHz) and enter the password exactly as shown. Wait for a confirmation that the thermostat is online before closing the setup screen.
Tip: Double-check the password for typos or caps. - 5
Try an alternative method if needed
If the app can’t detect the network, use manual entry or a web portal if your model supports it. Enter SSID, security type, and credentials directly.
Tip: MAC filtering? Temporarily disable it or add the thermostat’s MAC. - 6
Verify and test
Confirm the thermostat shows online status in the app. Run a test by adjusting temperature and schedule, ensuring changes reflect in real time.
Tip: Test voice-control integrations if applicable.
Questions & Answers
Why won't my thermostat connect to Wi‑Fi?
Common causes are wrong password, weak signal, or using a network band not supported by the thermostat. Check you’re on a 2.4 GHz network, re-enter the password, and try again from close range to the router.
Wi‑Fi connection failures usually come down to password or signal issues; re-enter the password and ensure you're on a 2.4 GHz network.
Is 2.4 GHz required for all thermostats?
Most thermostats rely on 2.4 GHz for reliable range. If yours only supports 5 GHz, you’ll need to create a 2.4 GHz network or use a bridge.
Yes, 2.4 GHz is common for thermostats; use a 2.4 GHz network if available.
What if my network uses a guest or enterprise setup?
Guest networks or enterprise security can block onboarding. Use a personal network for setup or temporarily disable isolation during pairing.
Enterprise networks can block onboarding; try a home network during setup.
How do I reconnect after changing my Wi‑Fi password?
Re-run the setup in the thermostat app and enter the new password. Ensure you select the same device to avoid creating a new one.
Run setup again in the app with the new password.
Can I control my thermostat with Google Home or Alexa after connecting?
Yes. Link your thermostat in Google Home or Alexa and enable the required permissions for voice control and routines.
Yes—just link it in your smart home app and test a routine.
What if the thermostat shows not connected after setup?
Retry the setup, check signal strength, reboot the router and thermostat, and verify firmware is current.
Try the setup again and reboot devices if needed.
Watch Video
What to Remember
- Use a 2.4 GHz network for best compatibility
- Have SSID and password ready before starting
- Complete setup in the official thermostat app and verify online status
- Keep firmware and app updated for reliability
- If issues persist, consult Thermostat Care’s troubleshooting guides