WiFi Thermostat Setup and Troubleshooting Guide
Thermostat Care explains how to set up and troubleshoot wifi thermostat com videos, covering compatibility, Wi-Fi configuration, app pairing, and common fixes for reliable, energy-saving operation.

Goal: set up and troubleshoot a wifi thermostat com videos for reliable performance. You will confirm compatibility, connect to a stable Wi‑Fi network, pair the device with the manufacturer’s app, and run basic diagnostics. Required: a compatible thermostat, a steady network, and a smartphone. This guide covers wifi thermostat com videos setup, plus common troubleshooting steps to prevent outages.
What wifi thermostat com videos cover and why they matter
Understanding wifi thermostat com videos helps homeowners navigate setup confidently. This approach centralizes compatibility checks, Wi‑Fi configuration, app pairing, and diagnostics into a single resource. According to Thermostat Care, starting with compatibility checks saves time and reduces setup errors. In practice, these videos illustrate how to identify supported features such as remote access, scheduling, and energy-saving modes, and how to avoid common misconfigurations. Throughout, you’ll see real-world scenarios, such as upgrading from a non-smart model or moving to a new router. By following these steps, you can avoid outages, ensure reliable connectivity, and keep your home comfortable with precise temperature control.
Compatibility essentials for wifi thermostat com videos
Before you install, check your HVAC system type and verify that the thermostat model supports your equipment. Review the wiring diagram and confirm the power source is available, whether it uses a common C-wire or a battery only configuration. Thermostat Care analysis shows that clarity on compatibility reduces setup friction and post-install tweaks. If you have a heat pump, confirm the thermostat supports heat pump mode and auxiliary heat control. Having a compatible, future-proof model saves time during firmware updates and feature additions.
Network basics: choosing and securing your network
A reliable setup hinges on a solid network. Favor a 2.4 GHz band for broader compatibility, while some newer models handle 5 GHz as well. Ensure your router broadcasts a stable SSID and that DHCP is enabled. When possible, assign a fixed IP to the thermostat for predictable connectivity. Enable WPA3 or WPA2 security, and disable guest networks if the thermostat needs a dedicated path. The goal is a fast, stable connection that won’t drop during cooling cycles or scheduling changes.
App pairing and initial setup steps
Most wifi thermostats pair directly with the manufacturer app after you install the physical unit. Open the app, create or sign in to your account, and follow prompts to add a new device. You will typically see a list of nearby devices; select your thermostat and enter the Wi‑Fi password. If asked, choose the 2.4 GHz network on a dual-band router. Complete any firmware prompts and agree to data sharing only if you’re comfortable with it.
Running initial tests and diagnostics
Power up and confirm the thermostat boots to the home screen. Use the app to test basic controls such as heating, cooling, and fan modes. Check that scheduling reflects on both the device and the app, and verify remote control responsiveness. If available, run a quick self-diagnostic from the thermostat and record any error codes. Keeping a log helps when you contact support later.
Common issues and quick fixes
If the thermostat won’t connect, re-enter the Wi‑Fi password and ensure the signal is strong enough at the mounting location. Move the router or thermostat closer together if needed, and verify that MAC filtering is disabled. If the device shows intermittent connectivity, reboot the router and re-pair the thermostat. Some issues stem from incorrect wiring; double-check that wires are in the correct terminals and fully seated.
Scheduling, energy savings, and behavior tips
Use schedules to avoid energy waste without sacrificing comfort. Start with a simple home/away schedule and adjust ramp times to prevent abrupt temperature changes. Enable features such as occupancy sensing or adaptive scheduling if your model supports them. The right schedule reduces energy use while maintaining comfort during peak hours.
Security, privacy, and firmware updates
Keep firmware up to date to protect against new vulnerabilities. Use strong, unique passwords for the thermostat account and the Wi‑Fi network. Review app permissions and disable features you don’t use, such as remote access when you’re away for extended periods. Regularly check for official firmware notes and follow recommended update procedures to minimize risk.
Tools & Materials
- Compatible wifi thermostat(Model supports 2.4 GHz (and 5 GHz if applicable))
- Smartphone or tablet(iOS or Android with the thermostat app installed)
- Stable Wi-Fi network(Prefer 2.4 GHz; dual-band routers are acceptable)
- C-wire or compatible power source(Some models require a common wire)
- Screwdriver set (Phillips #1 and #2)(For mounting and wiring)
- Wire labels or masking tape(Helpful to label wires during removal)
- Non-conductive spudger(Safe tool for prying if needed)
- Voltage tester (optional)(Optional safety check for live wires)
Steps
Estimated time: 30-60 minutes
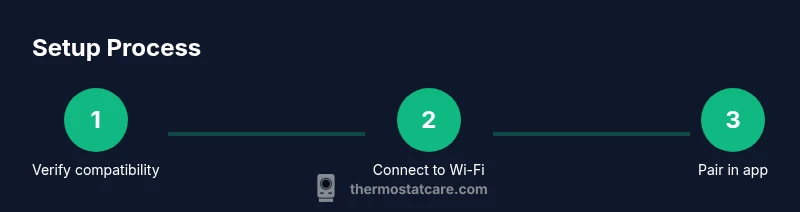
- 1
Verify compatibility
Review HVAC type and confirm the thermostat supports your system. Check the wiring diagram and power requirements before touching any wires.
Tip: Double-check model number and app compatibility before starting. - 2
Power down and remove old thermostat
Switch off the breaker feeding the thermostat and gently remove the cover. Take a photo of the existing wiring for reference.
Tip: Ensure no power is present before touching wires. - 3
Mount base and label wires
Attach the mounting plate and label each wire as you disconnect it to prevent miswiring later.
Tip: Keep wires organized by color and terminal. - 4
Connect wires to the new thermostat
Insert wires into their corresponding terminals as per the wiring diagram. Tighten screws firmly but avoid overtightening.
Tip: If a wire is frayed, trim and re-strip for a clean connection. - 5
Connect to Wi-Fi and enroll in the app
Restore power, connect to the 2.4 GHz network if required, and add the device in the thermostat app. Follow prompts to complete enrollment and firmware update.
Tip: If the network is hidden, temporarily reveal it. - 6
Test controls and finalize
Test heating, cooling, and fan operations from the app and the thermostat. Confirm scheduling and remote access work as expected.
Tip: Run tests at different times to simulate daily use.
Questions & Answers
What is a wifi thermostat and why should I use one?
A wifi thermostat connects to your home Wi-Fi and enables remote control via a smartphone app. It can learn schedules, adjust temperatures automatically, and integrate with other smart devices. This guide explains how to set one up safely.
A wifi thermostat connects to your Wi-Fi and can be controlled from your phone.
Do I need a hub to use wifi thermostats?
Most models connect directly to your home network without a hub. Some ecosystems use hubs for compatibility with other devices, but hubs are not universally required.
Most models connect directly to Wi-Fi; hubs are only needed for certain ecosystems.
Which network bands are supported by wifi thermostats?
Many thermostats require a 2.4 GHz network, while others support dual-band operation. Check the device specifications to confirm compatibility with your router.
Check the thermostat's specs; usually 2.4 GHz is required.
Why won’t my thermostat connect to Wi‑Fi?
Common causes include incorrect passwords, weak signal, or router settings like MAC filtering. Re-enter the password, move the thermostat closer to the router, and reboot the router if needed.
Make sure you entered the password correctly and the signal is strong.
How secure is wifi thermostat data?
Thermostats use encryption and app authentication. Keep firmware updated, use strong passwords, and review app permissions to minimize risk.
Keep firmware updated and use strong passwords.
What should I do if power is interrupted during installation?
Power interruptions are typically recovered by the thermostat. If not, follow the device manual to reset or re-enroll the device after power returns.
If power is interrupted, follow the reset steps in the manual.
Watch Video
What to Remember
- Verify compatibility before wiring
- Use stable 2.4 GHz network for setup
- Pair in-app and test remote control
- Update firmware after installation
- Secure device with strong passwords