How to Connect a Honeywell Thermostat to Wi‑Fi
A comprehensive, step-by-step guide to connect your Honeywell thermostat to Wi-Fi, troubleshoot common issues, and secure your network. Includes app-based and on-device setup, with best-practice tips from Thermostat Care.

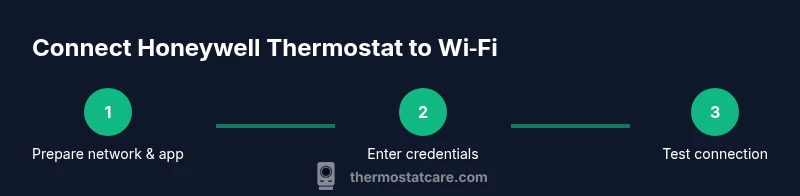
To connect a Honeywell thermostat to Wi‑Fi, you can use the Honeywell Home app or the thermostat’s on-device touchscreen setup. Start by confirming your network is 2.4 GHz, have your Wi‑Fi password handy, and ensure the thermostat firmware is up to date. Then follow the on-screen prompts to select your network and enter credentials, completing the pairing.
Why connecting a Honeywell thermostat to Wi-Fi matters
Connecting your Honeywell thermostat to Wi‑Fi unlocks practical benefits like remote control, easier scheduling across devices, and automatic firmware updates that improve reliability and security. According to Thermostat Care, homeowners who enable Wi‑Fi connectivity tend to experience smoother operation and quicker troubleshooting when an issue arises. A connected thermostat lets you adjust temperature from anywhere, receives alerts if settings drift, and can integrate with other smart home devices. This guide focuses on common setup steps that work for most Honeywell models. While you may encounter model-specific options, the core flow—prepare your network, initiate pairing, and verify the connection—stays the same. The Thermostat Care team will walk you through a safe, efficient, DIY-friendly process that keeps you in control of comfort and energy use.
Network readiness and model compatibility
Before you begin, understand that many Honeywell thermostats require a 2.4 GHz Wi‑Fi network for initial setup and stable operation. Some households attempt to use a 5 GHz network, which can cause connection failures during pairing. Check your router settings and ensure the SSID is broadcasting on 2.4 GHz. If you’re unsure, consult your router documentation or contact your internet provider. Thermostat Care’s 2026 analysis notes that compatibility and signal stability are two common setup hurdles; taking a moment to verify network support saves time and frustration later. When in doubt, test with a phone on the same network to confirm connectivity before starting the thermostat pairing.
What you’ll need before you start
Gather the essentials to avoid interruptions during setup. You’ll need a smartphone or tablet with the Honeywell Home app installed, access to a 2.4 GHz Wi‑Fi network, and the password for that network. Have your thermostat model handy along with any available firmware notes. If you own multiple devices, it helps to close other apps that might interfere with the pairing process. Also, ensure you’re physically near the thermostat during setup to reduce signal dropouts. By preparing in advance, you’ll speed through the initial pairing and minimize back-and-forth troubleshooting.
Understanding the two common setup paths
Most Honeywell thermostats can be connected via two routes: (a) on-device setup using the thermostat touchscreen and (b) app-assisted setup via the Honeywell Home app. The on-device path is convenient if you don’t want to keep a phone nearby; the app path is often faster and offers more guided prompts, including firmware updates and linking to voice assistants. Your choice typically depends on your model and personal preference. In either path, keep your Wi-Fi password handy and make sure your phone is connected to the same network during initial setup.
Phase 1: Prepare the thermostat for setup
Power the thermostat and ensure it’s awake. If the device offers an option such as 'Add Device' or 'Wi‑Fi Setup' in its menu, select it to begin pairing. If the screen does not show the option, you may need to navigate to Settings > Network > Wi‑Fi. Have the network name visible or written down so you can select the correct SSID during setup. Do not interrupt a firmware update cycle, and avoid powering down the thermostat mid-pairing, as this can cause a failed setup and require a restart.
Phase 2: Connect to Wi‑Fi (on-device or app-based)
On-device path: The thermostat will scan for available networks. Choose the 2.4 GHz SSID you prepared, then enter the Wi‑Fi password using the on-screen keypad. If you see a 'Cannot connect' error, retry from the start with a closer proximity to the router. App-based path: Open the Honeywell Home app, add a device, and follow prompts to connect the thermostat to your Wi‑Fi network. The app may request permission to access location for device discovery; grant it if you’re comfortable, as it speeds up detection.
Phase 3: Verify connectivity and test remote access
Once the thermostat confirms a connection, verify by checking the device status in the Honeywell Home app. Try adjusting the temperature from your phone; you should see a responsive change on the thermostat. If the app reports a connection issue, ensure the thermostat is still on the same network and that the router settings haven’t changed. Finally, perform a quick test by changing a schedule or setting a target temperature to confirm the pairing is stable. According to Thermostat Care analysis, ongoing stability improves with periodic firmware updates and a router reboot if signals drop.
Common issues and practical fixes
If you encounter problems, start with basic checks: make sure the password is correct, ensure the network is 2.4 GHz, and verify the thermostat firmware is up to date. If you suspect a weak signal, relocate the router or move the thermostat closer temporarily during setup. Ensure there are no MAC address filtering rules blocking the thermostat. If all else fails, perform a factory reset on the thermostat and reattempt setup from scratch. Documenting the steps you take helps with future troubleshooting and supports smoother re-setup.
Integrating with voice assistants and routines
After connecting to Wi‑Fi, you can link the thermostat to voice assistants like Alexa or Google Assistant via the Honeywell Home app. This enables voice-controlled temperature adjustments and scene automations. In the app, look for the 'Add Skill' or 'Works with' options to complete the linking process. Once linked, you can create routines that adjust heating or cooling based on presence, time of day, or other smart devices. This integration enhances comfort and energy savings while keeping your network secure.
Security, privacy, and ongoing maintenance
Keep your network secure by using a strong router password, enabling WPA3 if available, and applying firmware updates promptly. Regularly review connected devices in your router’s admin page and disable any that are no longer needed. Consider setting up a guest network for visitors to reduce exposure of your primary home network. Thermostat Care recommends performing periodic checks to ensure the thermostat remains current with security patches and firmware improvements.
Tools & Materials
- Smartphone or tablet with the Honeywell Home app installed (iOS or Android)(Use the latest app version; sign in with your account)
- Active 2.4 GHz Wi‑Fi network(Avoid networks with client isolation; ensure SSID is broadcasting 2.4 GHz)
- Wi‑Fi password(Have password ready; confirm you can type it accurately)
- Thermostat model and current firmware version(Check compatibility and update firmware if prompted)
- Optional: Laptop or router app to review network settings(Helpful if you need to verify SSID or security settings)
Steps
Estimated time: 15-25 minutes
- 1
Verify network compatibility
Check that your router broadcasts a 2.4 GHz network and note the SSID. Ensure you can connect other devices to the same network to confirm stability. This step prevents mid-setup drops caused by incompatible networks.
Tip: If you’re unsure about 2.4 vs 5 GHz, log into your router admin page and disable 5 GHz temporarily for the pairing session. - 2
Install and sign in to the Honeywell Home app
Open the app and sign in with your Honeywell account. If you don’t have an account, create one and verify your email. The app guides you to add a thermostat and shows status indicators during setup.
Tip: Close other apps during setup to avoid interruptions and allow the app to access location if prompted for discovery. - 3
Put the thermostat into Wi‑Fi setup mode
On the thermostat, navigate to Settings or Network and select Wi‑Fi Setup or Add Device. The screen should display a list of available networks or a pairing prompt. Prepare to select your network and enter credentials.
Tip: If you don’t see the setup option, consult the manual for the exact path to Wi‑Fi configuration. - 4
Connect to the 2.4 GHz network
From the thermostat’s list, choose your 2.4 GHz SSID and enter the Wi‑Fi password. If the password is long, use the on-screen keypad and double-check for accuracy. Confirm the connection when prompted.
Tip: Keep the device near the router during pairing to reduce dropouts. - 5
Complete app pairing
In the Honeywell Home app, select Add Device > Thermostat, and follow prompts to link the thermostat to your account and network. The app will indicate when the device is connected and may offer firmware updates.
Tip: If prompted to update firmware, allow it to complete to ensure stability. - 6
Test control and automation
Use the app to adjust the thermostat and verify the change is reflected on the device. Set a simple schedule or routine to confirm connectivity is stable across scenarios (home, away, sleep).
Tip: Test from both the app and a voice assistant if you plan to use one. - 7
Link to voice assistants
If desired, link the thermostat to Alexa or Google Assistant via the app’s connected services. This enables voice control and routine-based actions.
Tip: Ensure you’ve granted the assistant the necessary permissions in its own app settings. - 8
Secure and maintain the connection
Regularly check for firmware updates and review connected devices on your router. Reboot the router if you experience dropped connections and keep strong security settings.
Tip: Schedule periodic checks to ensure ongoing reliability and security.
Questions & Answers
Do all Honeywell thermostats support Wi‑Fi?
Most newer Honeywell thermostats include Wi‑Fi capability, but older or specialized models may not. Check your model’s manual to confirm, and look for terms like 'Wi‑Fi' or 'Smart' in the product description.
Most newer Honeywell thermostats support Wi‑Fi. Check your model’s manual to confirm, and use the Honeywell Home app for setup.
Why won’t my thermostat connect to Wi‑Fi?
Common causes include an incorrect password, router on the wrong band (need 2.4 GHz), weak signal, or a firmware update in progress. Double-check settings, restart the router, and retry the pairing.
Typical causes are wrong password, wrong Wi‑Fi band, or a weak signal. Restart the router and retry the setup.
Can I connect without using the app?
Yes. Many Honeywell models support direct on-device setup via the thermostat touchscreen. The app can speed things up and offer additional features, but you can complete basic Wi‑Fi setup without it.
Yes, you can set up Wi‑Fi on the thermostat screen itself, though the app makes things easier.
What should I do if the connection drops after setup?
Reboot your router, reconnect the thermostat to the network, and check for firmware updates. If issues persist, re-run the setup from the start and ensure a stable 2.4 GHz connection.
If the connection drops, reboot the router, rejoin the network, and retry the setup.
Is it safe to use a guest network for the thermostat?
Guest networks can be isolated from your main devices, which may cause the thermostat to lose access or fail to receive updates. Use your primary home network with proper security.
A guest network can cause instability. Use your main network with strong security.
How long does the setup typically take?
Most homeowners complete the setup in under a half hour, depending on network complexity and model. Allow extra time for firmware updates or app linking.
Most setups take less than 30 minutes, plus additional time if updates are needed.
Watch Video
What to Remember
- Verify your network uses 2.4 GHz for compatibility
- Follow on-device or app prompts in order
- Test app and thermostat response before finishing
- Keep firmware updated and secure your network