How to Clean a Thermostat: A Step-by-Step DIY Guide
Learn how to clean a thermostat safely to improve accuracy and save energy. This step-by-step guide covers tools, safety, techniques, and troubleshooting for both digital and mechanical thermostats. Thermostat Care provides practical tips for DIY maintenance.

Learn how to clean your thermostat safely and effectively. This quick guide outlines what you need, the safety checks to perform, and a clear, step-by-step process to improve temperature accuracy and energy efficiency in your home. Follow these steps to maintain reliable climate control without voiding your warranty. From sensors to wiring considerations, this guide focuses on safe, at-home maintenance you can trust.
Why Clean Your Thermostat Matters
Dust, pet hair, and kitchen grease can accumulate on the thermostat’s sensors and display, gradually affecting readings and comfort. According to Thermostat Care, a clean thermostat helps ensure accurate temperature readings, better response from heating and cooling equipment, and more consistent comfort across rooms. When sensors become dirty, the HVAC system may run longer than necessary, increasing energy use and wear. Regular, gentle cleaning removes surface dust and keeps the user interface readable, so labels and buttons stay accessible. In most homes, the thermostat is a visible, frequently touched device; keeping it clean reduces the chance of accidental button presses or screen smudges that could misread the room temperature.
Before you begin, set expectations: cleaning should not involve liquids near internal components, and you should never disassemble parts that aren’t user-accessible or recommended by the manufacturer. For most digital and mechanical thermostats, a light wipe and a quick dusting are enough to remove the main culprits. If you notice corrosion, water leaks, or damaged screens, stop immediately and consult a professional. In addition to the display and sensors, consider cleaning the surrounding area: the wall plate, the micro-gap around the device, and the vents that can indirectly affect airflow in the room. Cleanliness matters, but safety and device integrity come first.
Safety First: Before You Begin
Power is essential. Always turn off the thermostat at the unit, or switch off the circuit breaker that feeds the thermostat if you are comfortable with electrical work. If your thermostat is battery-powered, remove or disable the power source to avoid surprises while you clean. Do not spray liquids directly onto the device; moisture can seep behind the display or into terminals. Use a dry or slightly damp microfiber cloth to wipe the exterior surfaces. If you must use a mild cleaner, apply it to the cloth—not to the device itself. Wear safety gloves if you’re cleaning around older walls or dusty spaces to avoid skin irritation. If the thermostat is mounted behind a cover or panel, consult the manufacturer’s manual before attempting any removal. Remember that improper cleaning can void warranties or cause misreads in temperature, so err on the side of caution. If you smell burning plastic, see signs of scorch marks, or notice any unusual warmth around the device, stop and call a licensed technician.
Exterior Cleaning: Display, Buttons, and Surfaces
Begin with the display and control buttons. Use a soft microfiber cloth to wipe the display in gentle, circular motions. Avoid excessive pressure that could scratch the screen. For stubborn smudges, lightly dampen the cloth with distilled water or a tiny amount of isopropyl alcohol (70%), then wipe and let dry completely. Do not pour liquids directly onto the device or into gaps around the display. Clean the wall plate and any surrounding frame to prevent dust from migrating into the housing. This step improves readability as well as tactile feedback for manual controls. If the thermostat has a touch screen, avoid abrasive cleaners or solvents that can dull coatings. A quick, thorough exterior cleaning reduces the likelihood of misreadings caused by smudges or dust.
Sensor Openings and Airflow Ports: Gentle Care
Sensors and airflow ports are the heart of a thermostat’s accuracy. Use a soft brush or compressed air held several inches away to remove dust from sensor grilles and vents. Do not insert tools into openings; the internal components can be delicate. Work in short bursts and check after each pass. If you see residue around the sensor areas, wipe with a dry microfiber cloth followed by a very light damp cloth. This reduces the risk of moisture damage while keeping readings reliable. After cleaning, give the device a moment to dry before powering it back on. If you notice persistent sensor errors after cleaning, consult the manual or a technician.
Battery and Power Considerations
Battery-powered and wired thermostats have different maintenance needs. If your unit uses batteries, inspect the battery contacts for corrosion and replace with fresh cells if needed. Clean corrosion with a dry cloth or a small amount of isopropyl alcohol on a cotton swab, then reinstall the battery correctly. For hard-wired units, ensure that the wiring terminal connections are snug and free of corrosion, but do not loosen screws to “adjust” wiring. Loose connections can cause inaccurate readings or intermittent power loss. Always follow the manufacturer’s guidelines when handling terminals. If you are unsure about the wiring, stop and call a professional to avoid electrical hazards.
Cleaning Methods by Thermostat Type: Digital vs Mechanical
Digital thermostats with displays and smart features require gentler handling than older mechanical models. For digitals, the goal is to remove dust without saturating any electronics. Mechanical or non-programmable thermostats may tolerate slightly more robust exterior cleaning, but avoid direct liquid contact with internal components. Always check the user manual for any model-specific cautions, especially around battery compartments and sensor openings. In all cases, avoid detergents, solvents, or aerosols near electronic interfaces. When in doubt, perform a test cleaning on a small area first to confirm no adverse effects on readouts or screen sensitivity.
Routine Maintenance Schedule and Quick Monthly Tasks
A simple maintenance rhythm helps keep readings accurate without turning cleaning into a chore. Plan a thorough exterior wipe every 6–12 months, with a quick dusting monthly or as needed. Create a small checklist: power down, wipe the exterior, check the display, and inspect for dust near ventilation openings. If you have pets or live in a dusty area, you may want to shorten the interval. Document any peculiar behavior during cleaning, such as delayed responses from HVAC, so you can recognize patterns over time. Setting a reminder on your phone or calendar helps ensure you stay on track. A consistent routine reduces the risk of accumulated dust causing misreadings and energy waste.
Troubleshooting After Cleaning: What to Do If Readings Are Off
If the thermostat still reads incorrectly after cleaning, verify the room’s actual temperature with a separate thermometer. Compare the readings and check for HVAC system issues such as clogged filters or miscalibrated zones. Ensure that the thermostat’s location isn’t affected by direct sunlight, drafts, or heat from appliances, which can skew readings. If problems persist, consult the manual for calibration options or contact a professional to avoid potential damage to the system. Keep notes about the conditions during the misreadings to help diagnose root causes.
If Cleaning Didn’t Fix It: Next Steps
Sometimes a dirty thermostat is a symptom of a larger issue, such as sensor faults, wiring problems, or HVAC performance limits. If cleaning does not restore accuracy, consider scheduling a professional diagnostic. A technician can verify sensor integrity, inspect wiring, and calibrate the system if necessary. In the meantime, you can still rely on manual controls or a temporary temperature hold to maintain comfort while you arrange service. Thermostat Care recommends documenting model numbers, power type, and a brief description of issues to speed up service.
Final Checks and Next Steps
With cleaning complete, power the system back on and observe how the HVAC responds to setpoints. Check for consistent temperatures across rooms and ensure the system stops and starts within a reasonable interval. If your thermostat integrates with a smart home, verify app readings align with physical display readings. Maintain a short log of maintenance dates, battery replacements, and notable readings. Regular upkeep promotes reliable climate control, helps prolong device life, and boosts energy efficiency, aligning with Thermostat Care’s recommendations.
Tools & Materials
- Soft microfiber cloth(Lint-free, non-abrasive)
- Soft brush or compressed air can(Use at a distance; avoid direct contact with sensors)
- Distilled water(For dampening cloth if needed)
- Isopropyl alcohol 70%(Dampen cloth slightly; avoid direct application)
- Small screwdriver (manufacturer-approved)(Only if manual allows hardware access)
- Safety gloves(Optional for dusty environments)
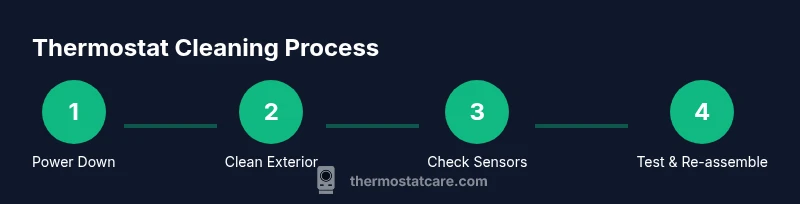
Steps
Estimated time: 45-60 minutes
- 1
Power down and access the unit
Turn off the thermostat and disconnect power. If wired, switch off the circuit breaker for the thermostat. If battery-powered, remove the battery to prevent accidental operation during cleaning.
Tip: Verify power is off by attempting a quick touch on a soft button; no display should respond. - 2
Dust exterior surfaces
Wipe the exterior housing and display with a dry microfiber cloth. If stubborn dust persists, dampen the cloth lightly with distilled water and wipe again. Avoid pressing into the display too hard.
Tip: Use long, smooth strokes to prevent smearing. - 3
Clean the display and controls
Gently wipe the display and touch controls. For touch screens, avoid aggressive cleaning; use a microfiber cloth with a tiny amount of cleaner on it if permitted by the manufacturer.
Tip: Let any moisture dry completely before powering on. - 4
Clean sensor openings and vents
Use a soft brush or compressed air to remove dust from sensor grilles and airflow vents. Do not insert objects into openings. Keep sessions short and cool.
Tip: Hold the air can upright and spray in short bursts away from sensors. - 5
Check battery and power connections
If battery-powered, inspect contacts for corrosion and replace if needed. For hard-wired units, inspect terminals for looseness or corrosion, but do not force any wiring.
Tip: Replace batteries only with the correct type specified by the manufacturer. - 6
Reassemble and power on
Secure the cover, restore power, and verify the unit powers up normally. Listen for clicks or sign of startups that indicate proper installation.
Tip: If the cover doesn’t sit flush, re-check screws and alignment. - 7
Run a quick test
Set a target temperature and observe whether the HVAC responds. Check the display update speed and ensure readings align with the room temperature.
Tip: If there’s a lag, note the conditions to troubleshoot later. - 8
Calibrate or adjust if needed
If readings still appear off, consult the manufacturer’s calibration steps or schedule a professional check. Calibration is model-specific.
Tip: Do not force calibration beyond the manual’s guidance. - 9
Document maintenance and schedule next clean
Record the date, model, and any issues. Set a reminder for the next exterior clean in 6–12 months and adjust based on household conditions.
Tip: Keep a small maintenance log for quick reference.
Questions & Answers
Is it safe to clean a thermostat while it is powered?
No. Always power down the unit before cleaning to prevent electrical shock or short circuits. If you’re unsure, consult the manual or a professional.
Always power down before cleaning. If unsure, consult the manual or a pro.
Can I use alcohol or cleaning solvents on my thermostat?
If you use a cleaner, apply it to the cloth, not directly to the device. Many solvents can damage coatings or internal components; stick to water or isopropyl alcohol sparingly.
Apply cleaners to the cloth, not to the device, and use sparingly.
Will cleaning void my thermostat’s warranty?
Cleaning exterior parts and following manufacturer guidelines typically does not void warranties. Avoid disassembly beyond what the manual permits.
Exterior cleaning as per the manual usually won’t void the warranty.
How often should I clean a thermostat?
Plan a thorough exterior clean every 6–12 months, with a light monthly dusting, especially in dusty homes or households with pets.
Thorough cleaning every 6–12 months, with monthly dusting, works well.
What should I do if the display flickers after cleaning?
Power down, inspect connections, and ensure there’s no moisture. If the issue persists, consult the manual or a professional.
Power down, check connections, and if needed, contact a pro.
Are all thermostats cleaned the same way?
Not exactly. Model-specific guides exist, particularly for digital vs. mechanical units. Follow the manufacturer’s recommendations first.
Follow the manufacturer’s cleaning guidelines first.
Should I schedule professional service for sensor issues?
If after cleaning readings remain inaccurate, a professional can diagnose sensor or wiring faults not obvious to DIY cleaning.
If issues persist after cleaning, a pro can diagnose sensors or wiring.
Watch Video
What to Remember
- Power off before handling the device.
- Use only a microfiber cloth for exterior cleaning.
- Avoid liquids near internal components to prevent damage.
- Regular maintenance improves sensor accuracy and energy efficiency.