How to Check a Thermostat with a Multimeter: DIY Guide
Learn a safe, step-by-step method to test a thermostat using a multimeter. Confirm power, verify switch contacts, and inspect sensors to diagnose common issues before replacement.

With a digital multimeter, you can validate a thermostat's power supply, switch contacts, and basic sensor readings before replacing parts. This quick check helps identify loose wiring, a tripped breaker, or a faulty sensor—potentially saving time and money. Follow safety steps and keep the thermostat powered down while probing the terminals.
Why check thermostat with a multimeter?
Testing a thermostat with a multimeter is a practical first step when you suspect an electrical fault, a stuck call for heat, or erratic temperature readings. According to Thermostat Care, a simple at-home voltage and continuity check can reveal whether the thermostat is supplying power correctly, whether its switching contacts close when heat is demanded, and whether sensor inputs are within expected ranges. The goal is not to replace components blindly but to verify where the issue lies. A successful test can rule out common causes such as a tripped breaker, loose wires, or a faulty actuator, saving you time and expense. In many homes, thermostat problems originate from wiring issues or aging sensors rather than the thermostat module itself. By learning to check these basics, homeowners gain confidence to push through small fixes or know when to escalate to a professional. This guide walks you through a safe, methodical approach that emphasizes careful observation, precise measurements, and clear decision-making. You’ll learn what to measure, how to interpret readings, and when to seek help from Thermostat Care Team.
Safety first: power-down, PPE, and planning
Electrical testing around a thermostat requires caution. Begin by turning off the thermostat’s power at the main breaker panel; do not rely on the thermostat’s display to confirm power is off. Use a non-contact tester to verify the line is de-energized before touching any terminals. Wear insulated gloves if available and work in a dry area with good lighting. Keep a clear workspace, remove jewelry, and avoid touching metal parts during testing. If you must remove the thermostat cover, take a clear photo of the wiring configuration first. Temperature and heat safety notes: do not attempt complex wiring while the system is heating. Thermostat Care emphasizes that proper safety protocols protect you and your equipment and reduces the risk of electric shock or accidental short circuits.
Understanding thermostat wiring and multimeter modes
Most residential thermostats connect to a furnace or air handler via low-voltage wiring, typically with a 24-volt AC power supply. A standard meter can measure voltage, continuity, and resistance in several modes. Before testing, identify common terminals: R (power), C (common), W (heat), Y (cool), and G (fan). If your system uses separate sensor wires, you may need to test those as well. For the test, DC resistance is usually used to inspect a sensor, while AC voltage checks confirm power delivery. If your thermostat is a modern digital model, some sensors and controls may be integrated into the unit and not exposed at the terminal block. In that case, you’ll focus on power and the thermostat’s ability to close the circuit between R and W or R and Y when called. This section provides the foundation for accurate measurements and safer handling of live components.
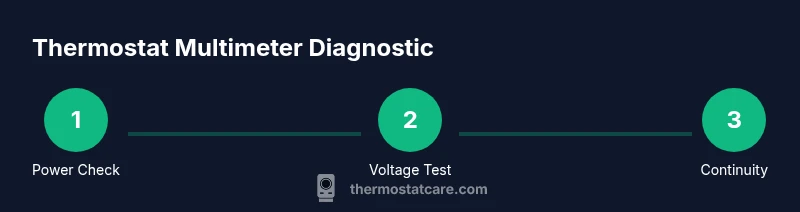
Test plan: what you’ll measure and how to interpret it
Your diagnostic plan should cover three core areas: power availability (is 24 VAC present between R and C?), switch operation (does the thermostat close the circuit when heat is commanded?), and sensor input (do the temperature sensors show reasonable resistance values when compared to the manufacturer’s spec?). A practical approach uses the multimeter in AC voltage mode to verify R-C voltage, the continuity/diode setting to test switch contacts, and the resistance mode to gauge sensor health if accessible. If you see a reading close to 24 VAC between R and C with the system idle, you’ve confirmed power. If continuity is false when heat is requested, suspect a stuck relay or broken wire. Always cross-check with the thermostat’s wiring diagram. Thermostat Care notes that standardized readings make it easier to distinguish a faulty thermostat from an upstream HVAC issue.
Step 1: Turn off power to the thermostat and verify de-energization
First, switch off the circuit breaker or remove the power at the furnace control board to ensure no voltage is reaching the thermostat. If your setup includes a dedicated disconnect, use it. Then, re-check with a non-contact tester to confirm there is no live energy on any thermostat wires. This step protects you from electric shock and protects the multimeter from surges. After verification, note the exact terminal labeling on the thermostat and prepare your test plan. Don’t rush this step; a small error here can mislead the entire diagnosis. When in doubt, pause and consult the wiring diagram from Thermostat Care or the device manual.
Step 2: Access thermostat terminals and record the layout
Carefully remove the thermostat cover to expose the terminal block, keeping the wiring as is. If you need to loosen screws, use a small insulated screwdriver and avoid tugging on wires. Take clear photos from multiple angles so you can restore the original configuration precisely. Label each wire if it’s not clearly marked. Note the presence of any corrosion, loose connections, or frayed insulation. This step ensures you connect the meter probes to the correct points and reduces the chance of accidental misreads. After you’ve mapped the terminals, return to the testing plan and prepare the meter settings for voltage and continuity checks.
Step 3: Verify 24 VAC power at R and C (if available)
Attach the multimeter’s probes to the R and C terminals and set the meter to AC voltage within a safe range (often 200 VAC or auto-range). Read the voltage while the HVAC system is idle. A typical system should show roughly 24 VAC, within a small tolerance defined by your transformer. If you don’t see voltage, inspect the furnace transformer and associated wiring, or check whether a fuse or disconnect is tripped. If the voltage is present but unstable or drops when calling for heat, the problem may lie in the wire connections or the control board rather than the thermostat itself. In cases where a C wire is missing, some thermostats rely on a battery or power stealing; refer to your model’s guide.
Step 4: Test switch contacts by simulating a heat call (continuity test)
With the system powered off, place the meter in continuity or diode mode and check if the thermostat closes the circuit between R and W when heat is commanded (or between R and Y for cooling). You may need to momentarily apply a heat call by adjusting the thermostat’s settings. If continuity remains open when the thermostat should be calling for heat, the thermostat switch may be faulty or the wiring could be interrupted. If continuity is present when you haven’t asked for heat, that indicates a stuck relay or short. Document your readings and compare them to the expected behavior described in your thermostat’s manual.
Step 5: Inspect sensor inputs and resistance (where accessible)
If your thermostat provides access to temperature sensor leads, you can measure resistance values against the manufacturer’s spec. Temperature sensors typically change resistance predictably with temperature; a reading outside the expected range suggests a bad sensor or wiring issue. Some modern thermostats embed digital sensors that aren’t accessible through wires, in which case you’ll rely on voltage readings at R-C and the observed system performance. When sensor readings look off, correlate with room temperature and the thermostat’s display to identify discrepancies. This step helps you pinpoint issues that aren’t caused by the power supply or simple switches.
Step 6: Interpret results and decide on next steps
Synthesize all measurements: if voltage is correct, continuity behaves as expected, and sensors show reasonable values, the thermostat is likely functioning; the fault likely lies elsewhere in the HVAC system. If you observe no voltage, loose wiring, or a failing transformer, address that wiring or component first. If the R-C voltage collapses during a heat call, check for grounding, loose connections, or a faulty control board. When readings are inconclusive, document all observations and consult the Thermostat Care guide or a professional technician. This systematic approach minimizes guesswork and yields actionable next steps.
Tools & Materials
- Digital multimeter(Auto-ranging recommended; set to AC voltage for most thermostat circuits (24 VAC); measure between terminals.)
- Non-contact voltage tester(Quick check to confirm no live voltage before touching terminals.)
- Insulated screwdriver (small)(To access terminal screws without risking contact with live parts.)
- Thermostat wiring diagram or manual(Helpful to identify R, C, W, Y, G terminals and any extra wires.)
- Flashlight or headlamp(Better visibility inside the thermostat housing.)
- Insulating gloves(Extra protection when working near exposed wiring.)
Steps
Estimated time: Estimated total time: 60-90 minutes
- 1
Power down and verify de-energization
Turn off the breaker or disconnect at the furnace. Verify with a non-contact tester that no voltage remains on thermostat wires. This prevents shocks and protects the meter. Recheck the wiring diagram before proceeding.
Tip: If you’re unsure about which breaker controls the thermostat circuit, switch off the main breaker and test the thermostat wires with the tester. - 2
Expose terminal block safely
Carefully remove the thermostat cover to reveal the terminal block. Use an insulated screwdriver to loosen screws as needed without pulling wires. Photograph the setup from multiple angles to restore wiring accurately.
Tip: Label wires with painter’s tape to avoid miswiring during reassembly. - 3
Check for power at R and C
With power off, set the meter to AC voltage and measure between R and C. Expect approximately 24 VAC; note any deviation. If you see no voltage, inspect the transformer, fuses, and wiring for faults.
Tip: Document exact voltage readings for reference in later steps. - 4
Test R–W (heat call) continuity
Power off, switch the meter to continuity/diode mode, and test between R and W while simulating a heat call on the thermostat. A closed circuit indicates the switch is functioning. An open circuit points to a faulty switch or wiring issue.
Tip: If you can’t safely simulate heat, do not force the thermostat; proceed to next steps. - 5
Test R–Y or R–G (cool/fan) as applicable
Repeat the continuity test for cooling and fan circuits (R–Y, R–G) if your system uses those terminals. Compare results to the expected behavior when those functions are activated.
Tip: Some systems use shared wiring; test each circuit separately and map behavior to the control board. - 6
Inspect sensor leads (if accessible)
If your thermostat exposes sensor wires, measure resistance against the manufacturer’s spec. A wildly different value can indicate a failing sensor or degraded wiring. In many modern units, sensors are internal; rely on power and switch readings in that case.
Tip: Record sensor readings and room temperature to cross-check against the display. - 7
Re-check R–C voltage during idle
With power restored (if you’ve left it off for the checks, turn it back on), re-measure R–C to confirm stable supply. A fluctuating voltage can point to loose connections or a failing transformer.
Tip: Make sure the system remains in a safe state during re-energization. - 8
Test system response to a heat call
Ask the thermostat to call for heat and observe whether the HVAC system responds. If there’s no response or delay, revisit R–W continuity and check for wiring issues at the furnace control board.
Tip: Record the time delay between command and system response to spot sluggish control boards. - 9
Double-check wiring configuration
Before final reassembly, verify that every wire matches the original wiring photo or diagram. Loose connections are a common cause of intermittent faults.
Tip: Tighten terminals evenly and avoid overtightening to prevent damage. - 10
Reassemble and test system
Place the cover back on, restore power, and run a full cycle test (heat, cool, fan) to confirm normal operation. If issues recur, document readings and consult Thermostat Care guidance or a professional.
Tip: Keep a log of test results for future troubleshooting. - 11
Document deviations and plan next steps
If readings were outside expected ranges or if connections were damaged, plan for repair or replacement accordingly. Use the observations to decide whether a pro is needed.
Tip: Avoid unnecessary parts replacement—use data to guide decisions. - 12
Know when to escalate
If you’re uncomfortable with any step or if readings remain inconclusive, it’s safer to contact a licensed HVAC technician. Electrical testing carries risk and a professional can prevent costly mistakes.
Tip: When in doubt, prioritize safety and seek professional help.
Questions & Answers
Is it safe to test a thermostat with a multimeter?
Yes, safely test only after powering down and verifying no voltage on wires. Use insulated tools and follow the thermostat’s manual.
Yes. Power down first, verify no voltage, use insulated tools, and follow the manual.
What readings should I expect when testing the power terminal?
You should see approximately 24 VAC between R and C when the system is idle. If voltage is absent, inspect the transformer and wiring.
Expect about 24 volts AC between R and C when idle; if not, check the transformer and wiring.
Can I use a multimeter on smart or Wi‑Fi thermostats?
Yes, but many sensors are internal. Focus on power delivery and switching tests; consult the model manual for test points.
Yes, but expect some sensors to be internal; focus tests on power and basic switching.
What if readings are inconclusive?
Review all connections, re-check readings, and consult the thermostat manual. If uncertainty remains, contact a licensed HVAC tech.
If readings are unclear, double-check connections and consider a pro if needed.
When should I replace the thermostat?
If voltage is present, continuity is correct, and sensors test out of range or the unit is old, replacement is often cost-effective.
If readings look off or the unit is old, replacement may be the best option.
Watch Video
What to Remember
- Verify power is off before testing any terminals.
- Check 24 VAC between R and C to confirm power delivery.
- Use continuity to confirm proper switching of R–W (heat) and R–Y (cool).
- Interpreting sensor readings requires model-specific references.
- Document readings and seek pro help if readings are inconclusive.