How to Change Thermostat and Gasket: A Step-by-Step DIY Guide
Learn to safely replace your thermostat and gasket with a step-by-step DIY guide from Thermostat Care. Improve efficiency, seal openings, and ensure reliable temperature control with practical tips and safety reminders.

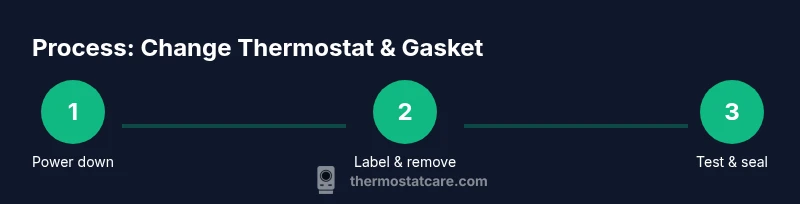
By following these steps, you will successfully change both the thermostat and the gasket, reducing drafts and improving system efficiency. You’ll need a compatible thermostat, the correct gasket, basic hand tools, a non-contact voltage tester, and a safe power-off plan. This Thermostat Care guide provides a clear, step-by-step process plus safety reminders and troubleshooting tips.
How to change thermostat and gasket: why it matters
According to Thermostat Care, replacing a failing thermostat and worn gasket is a practical way to improve comfort and energy efficiency without major system disruptions. A good seal around the thermostat reduces drafts that can cause temperature swings, while a properly functioning thermostat ensures the heating and cooling cycles run on schedule. Homeowners often notice steadier indoor temperatures and lower utility bills after replacing both components. This section explains the core benefits and why a coordinated swap is typically worth the effort for a mid-season tune-up or after a noticeable drop in performance.
Compatibility and gasket sizing: choosing the right parts
Before buying, verify that the new thermostat is compatible with your HVAC system and that the gasket fits the wall opening and the mounting plate. Compatibility means checking furnace or boiler type (gas, electric, or heat pump), the thermostat backplate size, and the wiring options (R, W, Y, G, C). Thermostat Care analysis shows that mismatches between a thermostat, wiring, or gasket can lead to unresponsive controls or air leaks. Take measurements of the wall cutout and gasket groove, and keep the old wiring diagram handy for cross-checking terminal labels.
Safety and preparation: start with a solid plan
Power down the system at the circuit breaker and, if possible, at the cold-water or gas shutoff for related components. Use a non-contact voltage tester to confirm there is no live power on the thermostat wires. Label each wire with masking tape and a marker before disconnecting anything so you can reattach them correctly. This preparation reduces rework and keeps you within safe working limits as you proceed with the replacement.
Removing the old thermostat and gasket: clean removal first
Carefully remove the thermostat cover and mounting screws, then gently detach the unit from the wall. If a gasket surrounds the wall opening, remove it without tearing the drywall or painting. Inspect the wall opening for damage or debris, which can affect the seal and backplate alignment. Keeping the work area organized helps you set aside screws and mounting brackets for reuse or easy replacement.
Selecting a replacement: what to look for
Choose a thermostat with the same mounting footprint and add-on features you want, such as a larger display or smart connectivity, but ensure it supports your heating system type. When selecting a gasket, pick a material and size that match the wall opening and the thermostat backplate. Consider a gasket with a slightly compressible material to seal gaps without adding excessive thickness. Review user reviews and compatibility notes to minimize compatibility surprises once you install.
Installing the gasket and mounting plate: seal and align
If you’re using a new gasket, place it evenly around the wall opening before mounting the plate. Attach the mounting plate to the wall, ensuring it sits flush and level. Tighten mounting screws just enough to snug the plate without warping the wall or cracking the drywall. A well-seated plate with a good gasket reduces air leaks and ensures the thermostat reads ambient temperatures accurately.
Wiring the new thermostat: map, connect, and test
Reconnect wires to the corresponding terminals on the new thermostat using your labeled notes and any photos you took. If the new model requires a common (C) wire for power, verify that the C-terminal is present and connected. After wiring, reattach the thermostat body to the wall plate and snap the cover into place. Turn the power back on and begin a basic setup, checking that the display lights up and shows the current room temperature clearly.
Testing, calibration, and initial run
Program a basic schedule or setpoint to confirm heat and cool calls operate as expected. Listen for any odd noises and monitor the system for consistent cycling over the first few hours. If your thermostat supports it, run a quick calibration to align the display with actual room temperature. This final check helps catch wiring or gasket seating issues early, ensuring reliable operation.
AUTHORITY SOURCES
- Energy.gov Energy Saver: https://www.energy.gov/energysaver/home-heating-and-cooling
- OSHA Safety in Electrical Work: https://www.osha.gov
- EPA Indoor Air Quality and Home Energy: https://www.epa.gov/iaq
Keeping up maintenance after replacement
Record the replacement date and note when you next plan a check-up. A monthly quick wipe to remove dust from the thermostat can improve sensor accuracy. If you notice ongoing temperature swings, recheck the gasket seal and wiring connections, and consider scheduling a professional check if any abnormal readings persist.
Tools & Materials
- screwdriver set (Phillips #2 and flat-head)(Assorted sizes; include a magnetic screwdriver if possible)
- non-contact voltage tester(Verify power is off before touching wires)
- replacement thermostat(Ensure compatibility with your HVAC system)
- replacement gasket(Match the wall opening size and backplate fit)
- masking tape(Label wires with colors or terminal letters)
- wire nuts/terminal connectors(Keep connections secure and insulated)
- pencil and ruler(Mark level mounting and cutouts)
- magnetic tray or small parts organizer(Keeps screws organized)
- gloves and safety glasses(Personal protection during work)
- clean cloth or compressed air(Clear dust from the wall opening)
Steps
Estimated time: 60-90 minutes
- 1
Power down and verify safety
Turn off the HVAC circuit breaker and, if applicable, the thermostat’s power source. Use the non-contact tester to confirm no live current on any connected wires. This prevents shocks and minimizes risk while you work.
Tip: Double-check the main service panel; a mislabeled breaker is a common source of surprises. - 2
Remove thermostat cover and document wiring
Carefully remove the thermostat cover and identify each wire's terminal. Photograph or sketch the wiring layout before disconnecting anything so you can mirror the connections on the new unit.
Tip: Keep a small parts tray handy for screws and tiny connectors. - 3
Label wires and prepare for removal
Label each wire with tape and a brief code, then loosen and remove wires from their terminals. Note any wires that use push-in connectors and set them aside securely.
Tip: Use color-coded labels to reduce confusion during reassembly. - 4
Detach from wall and inspect gasket
Unscrew the mounting plate and gently pull the old thermostat away, keeping wires slack. Remove the surrounding gasket and inspect the wall opening for damage or debris.
Tip: If the drywall shows gouges, repair before mounting the new plate. - 5
Prepare the new gasket and mount plate
Place the new gasket around the wall opening, then align and mount the new backplate level. Tighten screws evenly to avoid bending the plate.
Tip: Check alignment with a small level; a crooked plate can cause cover gaps. - 6
Reconnect wires to the new thermostat
Attach each wire to the corresponding terminal on the new thermostat according to your labels or photo. If the new model requires a C-wire, confirm its presence and secure connection.
Tip: If a wire doesn’t reach, do not force it; consider upgrading the cable or using an adapter. - 7
Mount the thermostat and re-apply cover
Position the thermostat body onto the mounted plate and snap the cover back into place. Ensure there are no loose wires and that the unit sits flush against the wall.
Tip: Avoid overtightening screws; a snug fit is enough for a secure seal. - 8
Restore power and begin setup
Turn the circuit breaker back on and power up the thermostat. Follow the on-screen prompts to configure time, schedule, and HVAC type. Verify the display shows the correct room temperature.
Tip: Run a quick test by setting a heat and cool call to confirm system response. - 9
Test operation and check gasket seal
Monitor cycling over the next few hours. Inspect the gasket seal for signs of air leakage around the wall opening and adjust if needed.
Tip: If you hear drafts near the plate, reseal with a fresh gasket and re-tighten the plate. - 10
Document and plan maintenance
Record the replacement date and any observations for future reference. Schedule a periodic check every 1–2 years to ensure continued efficiency and sealing quality.
Tip: Keep receipts and model numbers with your home records for easy replacement later.
Questions & Answers
Do I need a professional to change the thermostat and gasket?
Not always. If your system is gas-powered, uses complex wiring, or you’re unsure about electrical safety, consult a licensed technician. For most standard electric or heat-pump setups, a careful DIY replacement is feasible with proper safety precautions.
If you have a gas furnace or complicated wiring, it’s best to call a professional. For typical electric systems, you can DIY with care.
Can I reuse the old gasket or mounting plate?
If the old gasket is intact and seals tightly, you may reuse it, but replacement is usually recommended to ensure a proper seal. If the mounting plate is cracked or warped, replace it as well.
Reuse only if it’s intact; otherwise replace to keep a good seal and align properly.
How do I know which thermostat to buy?
Check compatibility with your HVAC system type (furnace/boiler, heat pump), wiring needs (C-wire presence), and backplate size. Then review features you want, like smart connectivity or programmable schedules.
Make sure it works with your system and has the wiring you need.
What if the wiring colors don’t match the labels?
Use your labeled notes and the thermostat’s wiring diagram to map each wire to the correct terminal. If uncertain, pause and consult a basic wiring guide or a professional.
Map wires to the correct terminals using your labels; don’t guess.
How long does the replacement take?
Most replacements take about an hour to an hour and a half, depending on your system, access to the wall, and whether a new gasket needs extra care.
Most people finish in about an hour to 90 minutes.
What should I do if the thermostat still doesn’t work after replacement?
Double-check wiring, verify the C-wire is secured if used, and recheck the wall opening for gaps. If issues persist, refer to the manufacturer’s troubleshooting guide or contact support.
If it still doesn’t work, recheck wiring and consider support from the thermostat maker.
Watch Video
What to Remember
- Replace thermostat and gasket together for best efficiency
- Verify compatibility before purchasing parts
- Label wires and photograph wiring setup
- Secure the wall gasket to prevent future leaks
- Test the system after installation for proper function