Fix Car Thermostat: Step-by-Step DIY Guide
Learn to diagnose and fix a car thermostat safely with practical steps, tools, and troubleshooting tips from Thermostat Care. This guide covers symptoms, diagnosis, and replacement without guessing.

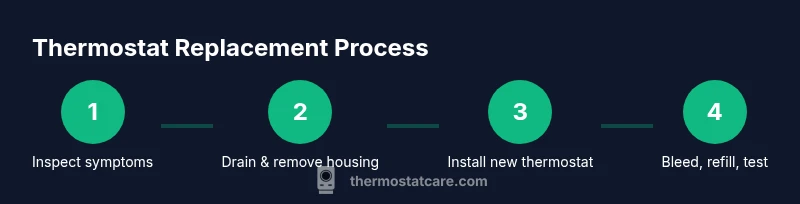
This guide shows you how to diagnose, remove, and replace a car thermostat safely, with essential tools, a new gasket, coolant, and a drain pan. Expect a typical DIY session to take about 60–90 minutes. Following these steps helps prevent overheating and keeps your engine running reliably, saving time and money.
Why fix car thermostat matters
According to Thermostat Care, promptly addressing a faulty car thermostat is crucial to prevent engine overheating, which can cause head gasket damage or warped components. A correctly functioning thermostat regulates engine temperature by controlling coolant flow between the engine and radiator. When the thermostat sticks closed, the engine can overheat; when it sticks open, the engine may run cold, reducing efficiency and increasing wear. Fixing a faulty thermostat not only helps restore optimal operating temperature but also protects critical cooling system parts. This guide focuses on safe, practical steps you can take as a homeowner or DIY enthusiast to diagnose a thermostat issue, plan the repair, and perform a reliable replacement. You’ll learn how to recognize symptoms, gather the right parts, and verify the repair after completion, all while minimizing mess and risk.
How a car thermostat works and failure causes
A car thermostat sits in the engine cooling system and acts like a gatekeeper for coolant flow. When the engine is cold, the thermostat remains closed, allowing the engine to warm up quickly. As the engine reaches operating temperature, the thermostat opens to circulate coolant through the radiator, where heat is dissipated. Over time, thermostat seals and gaskets can degrade, and corrosion or mineral buildup can affect the valve mechanism. A failing thermostat can manifest as slow warming, fluctuating temperature readings, intermittent cooling, or persistent overheat. Understanding this helps you differentiate thermostat problems from other cooling system issues like a bad water pump, a clogged radiator, or a faulty radiator cap. Thermostat Care analysis shows that many thermostat-related overheating incidents stem from maintenance gaps, such as infrequent coolant changes or neglecting system pressure checks.
Symptoms of a failing thermostat you should not ignore
Common signs of a malfunctioning thermostat include: steady high temperature readings on the gauge, engine overheating after a short drive, the temperature needle fluctuating or staying in the upper range even after startup, and trouble reaching operating temperature in cold weather. If you notice coolant leaks near the thermostat housing, air in the cooling system, or a repeat overheating pattern after topping off coolant, these may point to gasket wear or housing damage. Quick action when you observe these symptoms can prevent more extensive damage. In many cases, replacing the thermostat solves the issue, but it’s important to rule out other cooling components first to avoid chasing symptoms. The Thermostat Care team recommends a careful inspection of the entire cooling loop for any signs of wear or corrosion.
Tools, safety, and preparation for DIY thermostat work
Before you start, ensure you have a clear workspace, a level surface, and proper safety gear. Working with hot coolant and pressurized systems requires caution. Never open a hot cooling system; allow the engine to cool, and wear gloves and eye protection. Gather essential tools such as a socket set, screwdrivers, pliers, a drain pan, a new thermostat and gasket, a fresh bottle of coolant, and clean rags. Keep a flashlight handy to view tight bolts and the thermostat housing. It helps to have a service manual or vehicle-specific guides handy, as some engines position the thermostat in cramped areas. Having a container ready to catch used coolant makes the process neater and reduces the risk of environmental spills. The goal is a clean, safe replacement that restores proper coolant flow.
Diagnosing the thermostat vs. other cooling issues (basic checks you can perform)
Start with a visual inspection of the thermostat housing for cracks, corrosion, or gasket leakage. Check the radiator and hoses for bulges, cracks, or soft spots. If you have a temperature gauge, monitor the temperature curve as you start the engine and bring it to operating temperature. A stuck-open thermostat may prevent the engine from reaching peak temperature, while a stuck-closed thermostat can cause rapid overheating. If you’re unsure, perform a quick diagnostic test using manufacturer-recommended procedures and coolant pressure checks. These checks help confirm whether the thermostat is the primary culprit or if the cooling system, water pump, or radiator needs attention. Thermostat Care emphasizes that if you see persistent overheating despite seemingly normal readings, consult a professional to avoid engine damage.
Tools & Materials
- Socket wrench set(Metric sizes typical for your vehicle's thermostat housing bolts)
- Screwdrivers (flathead and Phillips)(Flathead can help pry off clamps;Phillips for screws)
- Pliers (needle-nose)(For hose clamps and small components)
- Drain pan(Place under coolant outlet to catch used coolant)
- New thermostat kit (thermostat + gasket)(OEM or equivalent, with new gasket)
- Coolant (pre-mix or concentrate)(Enough to refill after replacement)
- Funnel and catch bottle(For careful refilling and bleeding)
- Gasket sealant (if recommended by manufacturer)(Check your OEM guidance)
- Rags and gloves(Protect skin and keep area clean)
- Vehicle service manual or digital guide(Vehicle-specific bolt patterns and torque specs)
Steps
Estimated time: 60-90 minutes
- 1
Prepare vehicle and safety gear
Park on a level surface and apply the parking brake. Let the engine cool completely, then disconnect the negative battery cable if you’ll be near electrical components. Set out the drain pan and tools, and wear gloves and eye protection to avoid burns from residual coolant.
Tip: Engage wheel chocks to prevent movement and ensure a safe workspace. - 2
Drain coolant and access the thermostat
Place the drain pan under the lower radiator hose or the thermostat housing outlet, depending on your car’s design. Open the petcock or drain valve if present, and carefully drain the cooling system to low level. Remove any protective covers to access the thermostat housing.
Tip: Never open the radiator cap when the system is hot; allow it to cool first. - 3
Disconnect hoses and remove the housing
Loosen hose clamps and detach hoses connected to the thermostat housing. Remove the bolts holding the housing steady, then carefully lift it off to reveal the thermostat. Take note of orientation; many thermostats have a specific direction for proper seating.
Tip: Take a photo of hose positions before removal to avoid reassembly confusion. - 4
Inspect and remove the old thermostat
Inspect the old thermostat and gasket for signs of wear or damage. Remove the old thermostat and gasket from the housing. Clean the seating surface with a lint-free rag, ensuring no old gasket material remains that could cause leaks.
Tip: If the housing surface is pitted or corroded, consider cleaning or resurfacing as needed per OEM guidance. - 5
Install the new thermostat and gasket
Install the new thermostat in the correct orientation, then place a new gasket. Reattach the thermostat housing with the bolts, tightening to the manufacturer’s torque specification in a crisscross pattern for an even seal.
Tip: Don’t over-tighten bolts; this can damage the gasket and housing. - 6
Refill coolant and bleed air
Reconnect any hoses, refill the cooling system with the appropriate coolant, and bleed air as per your vehicle’s procedure. Start the engine and run it to operating temperature with the radiator cap off to release air, then top off as needed.
Tip: Keep the engine running and monitor for leaks during the bleed process. - 7
Test and verify
With the engine at operating temperature, recheck for leaks and confirm the temperature gauge behaves normally. Take a short test drive; note the temperature behavior and ensure the cooling fans engage as expected.
Tip: If temperature remains high or you still notice overheating, recheck thermostat orientation and seals or seek professional help.
Questions & Answers
What are the telltale signs that my thermostat is failing?
Look for gauges sitting high, slow warming, or fans running constantly. Overheating after short drives can also indicate a thermostat issue. If you notice leaks around the thermostat housing, inspect seals and gaskets as well.
If your gauge stays high, the engine tends to overheat, or the heater isn’t warming properly, you may have a thermostat issue. Check for leaks around the housing.
Can I drive my car with a stuck thermostat?
No. Driving with a stuck-closed thermostat can cause severe overheating and engine damage. If you suspect a thermostat problem, have the vehicle checked and repaired promptly.
No—it's risky to drive with a thermostat issue. Get it inspected and repaired quickly.
How long does a thermostat replacement typically take?
A typical thermostat replacement can take about an hour or two depending on the vehicle and accessibility. More complex engines may require additional time.
Usually around an hour or two, but some cars take longer.
Should I flush coolant when replacing the thermostat?
Flushing may be recommended depending on coolant condition and vehicle manufacturer guidelines. If coolant appears old or contaminated, a coolant change is prudent alongside thermostat replacement.
It’s often wise to replace old coolant when you replace the thermostat.
Is OEM thermostat the best option?
OEM parts are generally recommended for fit and reliability. Aftermarket options can be acceptable if they meet the OEM specs and come from a reputable supplier.
OEM parts are usually safest for a long-lasting fix.
What safety steps are essential when working on the cooling system?
Always allow the engine to cool, wear protective gloves, and dispose of old coolant properly. Use a drained pan and keep the workspace clean to prevent slips.
Let it cool, wear gloves, and dispose of coolant safely.
Watch Video
What to Remember
- Understand the thermostat’s role in engine cooling before starting.
- Replace the thermostat with a correct orientation and a new gasket.
- Bleed air properly to prevent hotspots and overheating.
- Test the cooling system after replacement and watch for leaks.
- Thermostat fixes are common DIY tasks when you follow safety guidelines.