How to Replace a Car Thermostat: A DIY Guide
Step-by-step instructions to safely replace your car thermostat, diagnose cooling issues, choose parts, and test the repair. Includes tools, tips, and maintenance reminders from Thermostat Care.

Learn how to replace a car thermostat and restore proper engine cooling. You’ll need basic hand tools, a compatible thermostat kit with gasket, a cool engine, and fresh coolant. This guide covers a safe, step-by-step process—diagnosis, removal, installation, and coolant refilling—to prevent overheating and extend engine life.
What a car thermostat does and why replacement might be needed
According to Thermostat Care, the thermostat is a small but crucial valve that regulates coolant flow between the engine and radiator. When it functions correctly, it helps the engine reach and stay at its optimal operating temperature. If the thermostat sticks closed, coolant can’t circulate, causing rapid overheating and potential head-gasket damage. If it sticks open, the engine may run cooler than normal, reducing efficiency and causing weak cabin heating. In many vehicles, the thermostat opens at typical operating temperatures around the 180–195°F range, then closes again as the engine warms. Regular cooling-system maintenance can prevent premature failure, and replacing a faulty thermostat is a common DIY task when you have the right parts and a methodical approach. This section explains why thermostat failure happens—thermal stress, sediment buildup, and worn seals—and how replacing it is a prudent part of routine vehicle care. The Thermostat Care team emphasizes that diagnosing the problem accurately saves time and money, especially on older vehicles where multiple cooling-system components may be involved.
(Note: content continues in subsequent blocks to meet length)
Symptoms, diagnostics, and what they mean for replacement timing
Car thermostats communicate with the engine control system. When they malfunction, you’ll notice temperature gauges behaving oddly, heater performance dwindling, or coolant leaks around the housing. The most common red flags are a steadily rising temperature gauge toward the red zone, frequent overheating during driving, or a heater that stops producing warm air once the engine warms. Thermostat Care analysis shows that confusing symptoms often lead to unnecessary parts purchases. Before you replace the thermostat, verify that the issue is not caused by a stuck-open radiator cap, a faulty water pump, air pockets in the cooling system, or a clogged radiator. A quick pressure test and visual inspection of hoses can help isolate the root cause. If you’re unsure, start with simple steps like checking coolant level and ensuring the thermostat housing is clean and free of debris. This approach minimizes unnecessary replacements and focuses effort where it’s truly needed.
Choosing the right thermostat: compatibility and quality considerations
Not all thermostat kits fit every make and model. When selecting a replacement, check the vehicle’s year, engine type, and coolant specification to choose a thermostat that matches the OEM or an equivalent aftermarket part. Look for units with proper gasket or O-ring designs, a durable wax pellet or bimetal actuator, and a reputable brand reputation. A high-quality thermostat reduces the chance of sticking and ensures consistent opening and closing with temperature changes. Consider whether your vehicle requires a 1- or 2-stage thermostat and if the kit includes a gasket or O-ring, which avoids leaks at the mating surface. If your car uses a bleed screw or specialty reservoir, verify compatibility with your cooling system configuration. Thermostat Care notes that using a compatible part lowers the risk of coolant leaks and overheating after installation.
Safety, preparation, and planning before you touch the car
Safety should come first. Park on a level surface, engage the parking brake, and disconnect the negative battery terminal to prevent accidental shorts while you work near electrical components. Allow the engine to cool completely before touching coolant hoses, as hot coolant can cause severe burns. Gather all tools and replacement parts—having them organized saves time and reduces frustration. Keep a drain pan and rags handy to manage spills, and wear eye protection and gloves. Plan for a coolant refill after installation and identify the correct type of coolant for your vehicle from the owner’s manual. If you’re uncertain about any step, consult the vehicle’s service manual or seek professional guidance. This prep phase sets the stage for a smoother, safer replacement process.
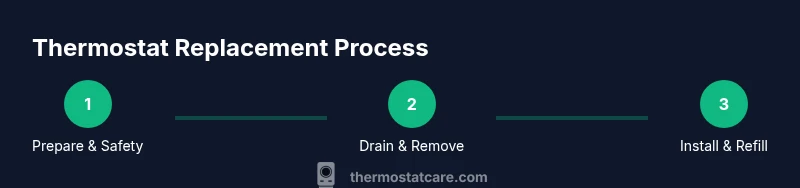
A practical, step-by-step workflow you can reference during the job
With parts ready and safety in mind, follow a structured replacement workflow to minimize risk and leaks. The next sections break down each action, from location and draining to installation and testing. Keeping notes or photos during disassembly can help you reassemble everything correctly. Remember that even small misalignments in the gasket can lead to leaks, so confirm the gasket seats evenly before securing the housing. Thermostat Care encourages documenting every step to facilitate future maintenance and troubleshooting. This block gives you a narrative guide that complements the official step-by-step procedure you’ll perform with tools in hand.
Post-installation testing, burping the cooling system, and long-term care
After installing the new thermostat, refill the cooling system with the recommended coolant type and bleed any air pockets. Start the engine and monitor the temperature gauge as it comes up to operating temperature; listen for leaks around the thermostat housing and hoses. A quick test drive helps verify stable temperatures and heater performance. If the gauge fluctuates or climbs unexpectedly, recheck seals and connections. Regular cooling-system maintenance—checking hoses for cracks, replacing clamps as needed, and ensuring proper coolant concentration—extends the life of the thermostat and the entire engine cooling network. The Thermostat Care team recommends periodic checks at least once a year or whenever you notice abnormal temperature behavior.
Tools & Materials
- Socket set(Assorted metric sizes; 3/8-inch drive recommended)
- Flathead screwdriver(For hose clamps and small screws)
- Phillips screwdriver(Screwdriver for housing screws)
- Pliers (needle-nose)(Grip hoses and clamps accurately)
- Drain pan/can(To collect coolant during draining)
- Coolant(New coolant suitable for your vehicle; check owner manual)
- New thermostat gasket or O-ring(Always replace with new to prevent leaks)
- Gasket scraper(Useful if old gasket sticks to surfaces)
- Rags/paper towels(Keep surfaces clean and dry spills quickly)
- Gloves and safety glasses(Protect hands and eyes from coolant and sharp edges)
- Torque wrench(Only if your vehicle requires precise bolt torque)
Steps
Estimated time: 60-90 minutes
- 1
Prepare and safety
Park on a level surface, engage the parking brake, and disconnect the negative battery cable to minimize risk of shorts. Let the engine cool completely before touching coolant hoses. Gather tools and replacement parts from the Tools & Materials list and arrange them within easy reach.
Tip: Wear gloves and eye protection; keep a circuit-free battery area to avoid accidental shorts. - 2
Locate thermostat housing
Identify the thermostat housing and related hoses. It’s usually near the upper radiator hose connection to the engine block. Take note of the hoses’ routing or take a quick photo for reference before removal.
Tip: Label or photograph hose connections to ensure correct reassembly and avoid cross-connection. - 3
Drain cooling system
Place a drain pan under the radiator drain or lower hose. Open the drain valve or loosen the lower hose clamp to allow coolant to flow out. Let the system drain completely to prevent spills when removing the thermostat housing.
Tip: Be prepared for hot coolant; do not rush this step to avoid burns. - 4
Remove thermostat housing
Loosen and remove the screws securing the thermostat housing. Carefully lift the housing away, exposing the thermostat. Avoid prying on delicate plastic components.
Tip: Keep track of screw location and length; misplacing screws can damage the housing. - 5
Remove old thermostat and gasket
Note the thermostat’s orientation before removing it. Remove the old gasket or O-ring and inspect the seating surface for residue or corrosion. Dispose of the old thermostat according to local guidelines.
Tip: Take a clear photo of orientation for reference during installation. - 6
Clean and inspect mating surfaces
Scrape off any old gasket material with a plastic scraper. Wipe surfaces clean to ensure a proper seal. Inspect the housing and seating surface for damage; replace if needed.
Tip: Avoid gouging the metal surface; use a plastic scraper to preserve the mating surface. - 7
Install new thermostat and gasket
Position the new thermostat in the same orientation as the old one (spring/coil side toward the engine). Fit the gasket or O-ring properly and reinstall the thermostat housing. Torque the screws to the manufacturer’s specification if applicable.
Tip: Lightly coat the gasket with coolant or a thin coat of oil if recommended by the manufacturer. - 8
Refill coolant and bleed air
Reassemble hoses and tighten clamps. Refill the cooling system with the correct coolant mixture. Start the engine and allow it to reach operating temperature, bleeding air pockets as directed by your manual.
Tip: Check for leaks around the housing and hoses; feel for any air pockets in the radiator. - 9
Test drive and final checks
Take a short test drive to verify temperature stabilization. Recheck coolant level after it cools and top up if necessary. Confirm heater performance and inspect for any leaks.
Tip: If the gauge behaves oddly after replacement, recheck the thermostat orientation and seals.
Questions & Answers
Can a faulty thermostat cause overheating?
Yes. A stuck-closed thermostat prevents coolant flow, leading to overheating. A stuck-open thermostat can cause the engine to run cooler than normal and reduce heating performance.
Yes, a stuck-closed thermostat can cause overheating, while a stuck-open thermostat keeps the engine cooler.
What are the signs of thermostat sticking open vs closed?
Sticking closed typically causes rising temperature and overheating; sticking open leads to a cooler engine and weak heater output. Look for fluctuating gauge readings and poor heater warmth to differentiate.
Overheating for closed, cool engine and weak heat for open.
Do I need a new gasket when replacing the thermostat?
Yes. Replace with a new gasket or O-ring to ensure a proper seal and prevent leaks around the thermostat housing.
Yes, always replace the gasket to prevent leaks.
Can I reuse old coolant after replacing the thermostat?
Reusing old coolant is not recommended if the system was drained. Refill with fresh coolant in the correct mixture to ensure proper cooling and corrosion protection.
Better to replace with fresh coolant after draining the system.
Watch Video
What to Remember
- Identify root cause before replacing the thermostat.
- Choose a compatible thermostat kit with gasket.
- Follow a clear step-by-step process to avoid leaks.
- Bleed the cooling system to prevent air pockets.
- Test drive and monitor temperature after replacement.