Replacing a Coolant Thermostat: Car DIY Guide
Learn how to replace a coolant thermostat in your car with a step-by-step, safety-focused guide. Identify symptoms, choose the right gasket, bleed the cooling system, and test for leaks to prevent overheating.

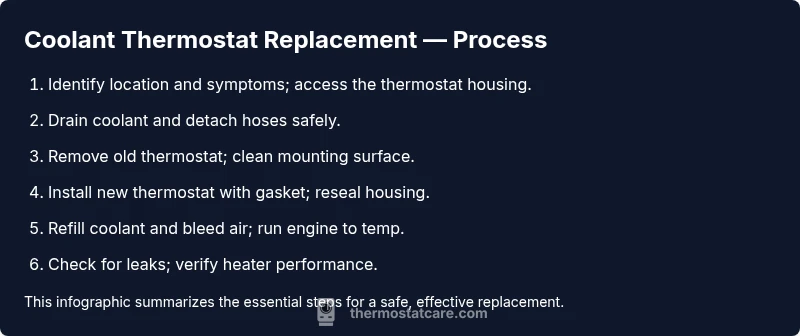
Goal: Replacing coolant thermostat in your car to prevent overheating, restore heater performance, and maintain optimal engine temperature. You'll need a replacement thermostat kit with gasket, fresh coolant, and common hand tools. This guide covers symptoms, parts selection, safety precautions, precise disassembly, and proper refilling, bleeding, and test procedures to verify a successful installation. Following these steps reduces the risk of airlocks and future leaks, and aligns with Thermostat Care's recommendations.
Understanding the coolant thermostat and its symptoms
The coolant thermostat is a small valve that regulates how coolant flows between the engine and radiator. When it functions correctly, it opens and closes as the engine warms, keeping operating temperature steady. Common failure modes include a thermostat that sticks closed, causing overheating, or one that sticks open, resulting in a persistently cool engine and weak heater performance. Detecting the issue early saves time and money. According to Thermostat Care, symptoms of a failing coolant thermostat often include rising temperature gauges, overheating warnings, and an unusually warm radiator hose when the engine should be cool. If you notice heater performance deteriorating as temperatures drop, that can also indicate the thermostat is not maintaining proper flow. This quick symptom check helps you decide if a replacement is warranted before you start the teardown.
Preparing for replacement
Before you dive in, gather the right parts and tools, and plan the work so you can complete it in one session. Start by confirming your vehicle needs a thermostat replacement (check the owner’s manual or repair database for your exact year/make/model). Obtain a compatible thermostat and gasket, plus fresh coolant that matches your vehicle’s specification. Have a drain pan, rags, and a flashlight ready. You’ll also want a torque wrench for precise bolt tightening and a gasket scraper to clean the mounting surface. Safety gear—gloves and eye protection—adds a necessary layer of protection. Thermostat replacement can cause coolant spills and burns if the engine is hot, so always work on a cool engine and dispose of old coolant following local regulations.
Choosing the right thermostat and gasket
Not all thermostats are created equal. Vehicle-specific thermostats vary by temperature rating and housing design. Check the fitment with your exact year/make/model and verify the gasket type included in the kit. Many kits include a new gasket and O-rings, which helps ensure a proper seal. If your vehicle specifies a dual-seal design or a specific gasket material, use that exact combination. A poor seal can cause leaks or air pockets, which defeats the replacement’s purpose. When in doubt, consult the vehicle’s service manual or Thermostat Care’s troubleshooting resources for part compatibility guidance.
Removing the old thermostat and installing the new one
With the old thermostat accessively freed, remove it and inspect the mounting surface for corrosion or old gasket residue. Clean the surface thoroughly with a gasket scraper or plastic scraper to avoid gasket failure. Install the new thermostat with the correct orientation (the thermostat’s jig or a small notch often indicates flow direction). Place the new gasket carefully and align it with the housing. Reinstall the housing bolts to the manufacturer’s torque specification, and reconnect any hoses. Take care not to overtighten, which can crack the housing. This step is critical: incorrect orientation or a damaged gasket will lead to leaks or poor temperature control. See the included diagrams for orientation cues and referenced torque specs.
Refill coolant and bleed the cooling system
After reinstalling the thermostat and housing, refill the cooling system with the appropriate coolant type and mixture. It’s essential to remove any air trapped in the system, which can cause overheating or hot spots. Start by filling slowly through the radiator cap opening or the reservoir, depending on your vehicle, and then bleed air via the correct bleed valve if your car includes one. Run the engine with the cap off until the thermostat opens and the thermostat housing and radiator hoses show steady flow. Recheck coolant level and top up as needed. Remember that different vehicles require different bleed procedures; consult the service manual for exact steps and any required steps for heater core bleeding.
Run the engine, test for leaks, and verify operating temperature
With the system bled, bring the engine to operating temperature and monitor the temperature gauge for a stable reading near the manufacturer’s spec. Inspect for leaks around the thermostat housing and hoses. Recheck the coolant level after the engine cools, and top off if necessary. On initial test drive, observe heater performance and overall engine temperature. A properly replaced thermostat will provide consistent temperature control, solid heat output, and no coolant seepage. If you notice rising temperatures or leaks, recheck the gasket seating and hose clamps, and tighten as needed.
Tools & Materials
- New coolant thermostat with gasket(Ensure correct model for your vehicle.)
- Coolant (engine coolant)(Use the type and mix ratio recommended by the vehicle manufacturer.)
- Drain pan(Place underneath the engine bay to catch coolant.)
- Socket set and ratchet (including deep sockets)(To remove housing bolts.)
- Flat-head and Phillips screwdrivers(For hose clamps and fasteners.)
- Gasket scraper or plastic putty knife(Clean the mounting surface without gouging metal.)
- Torque wrench(Torques per vehicle spec.)
- Pliers(Grip hose clamps and hoses safely.)
- Funnel(Helpful for refilling without spills.)
- Shop towels or rags(Contain spills and clean surfaces.)
- Gloves and eye protection(Protect hands and eyes from coolant.)
- Coolant bleed kit (if applicable)(Some cars have special bleed fittings.)
Steps
Estimated time: 2-3 hours
- 1
Identify symptoms and locate thermostat housing
Confirm overheating or heater performance issues and locate the thermostat housing near the upper radiator hose or engine block. Use your service manual as a map if needed, and check the thermostat orientation before removing anything.
Tip: Take a photo of hose and housing connections before removal to aid reassembly. - 2
Safety: let engine cool and disconnect any power if required
Allow the engine to cool completely to avoid scalding hot coolant. If your vehicle's system is wired for diagnostics or cooling fans, disconnect the battery to prevent accidental short circuits while you work.
Tip: Never open coolant system when hot; hot coolant can cause severe burns. - 3
Drain coolant and prepare workspace
Place a drain pan under the valve or lower radiator hose and drain excess coolant according to the service manual. Cap or close the reservoir to prevent spills, and wear gloves to avoid contact with old coolant.
Tip: Keep a record of coolant type and amount you drained for replacement accuracy. - 4
Disconnect hoses and remove the thermostat housing
Loosen and remove the hose clamps from the thermostat housing and detach hoses. Unbolt the housing and carefully lift it away from the engine to expose the old thermostat.
Tip: Use a gasket scraper to remove old gasket material without scratching the surface. - 5
Remove old thermostat and clean the mount
Take out the old thermostat and inspect the housing seating surface for corrosion. Clean the surface thoroughly, ensuring the new thermostat seats flat and seals properly.
Tip: Inspect the thermostat orientation marker to install the new unit correctly. - 6
Install new thermostat and gasket, then reseal housing
Place the new thermostat in the correct orientation and install the new gasket. Reattach the housing and tighten bolts to the manufacturer’s torque specification.
Tip: Hand-tighten bolts first, then finish with torque wrench to avoid cross-threading. - 7
Refill coolant and bleed the system
Refill with the recommended coolant and bleed air using the method specified by your vehicle (bleed valve, reservoir, etc.). Run the engine with the cap off until there are steady flows and temperature stabilizes.
Tip: Do not overfill; monitor coolant level as the system expels air. - 8
Test, check for leaks, and finalize
Run the engine to operating temperature, watch for leaks around the housing, and verify heater output. Recheck coolant level after cooling and top up if necessary.
Tip: Take a short test drive and recheck for any signs of leakage or overheat.
Questions & Answers
What are the signs that my coolant thermostat needs replacement?
Common signs include engine overheating, a rising or fluctuating temperature gauge, poor heater performance, or coolant leaks around the thermostat housing. If you notice these symptoms, inspect the thermostat and related seals. Replacing the thermostat is often a straightforward fix that restores proper cooling flow.
Common signs are overheating, fluctuating temperature, and weak heater performance. If you see these, inspect the thermostat area and seals.
Can I drive with a faulty thermostat?
Driving with a faulty thermostat is not recommended. A stuck closed thermostat can overheat the engine, while a stuck open thermostat may cause poor temperature control and reduced efficiency. Schedule replacement promptly to prevent damage.
No, avoid driving long with a bad thermostat. It can lead to overheating or poor engine efficiency.
Should I replace the gasket or just the thermostat?
It's best to replace both the thermostat and the gasket to ensure a reliable seal and to prevent future leaks. Some kits include both parts, making the replacement easier and cleaner.
Usually replace both to ensure a proper seal and avoid leaks.
How do I know which thermostat fits my car?
Check the vehicle's year, make, and model in the owner’s manual or a trusted parts catalog. Use the exact part number listed for your engine to ensure compatibility.
Look up your car’s exact specs and parts catalog to order the correct thermostat.
Is thermostat replacement a difficult job?
It’s an intermediate DIY task that requires basic tools and careful handling of cooling system fluids. If you’re comfortable with basic mechanical work and follow the steps, you can complete it safely.
It’s doable for a confident DIYer with basic tools; follow the steps closely.
How long does it take to replace a coolant thermostat?
Most installations take about 2-3 hours, depending on vehicle design and accessibility. Complex layouts or stubborn fasteners can extend the timeline.
Plan for a couple of hours; some cars take longer if space is tight.
Watch Video
What to Remember
- Identify accurate thermostat symptoms before replacement.
- Prepare parts and tools in advance to avoid mid-task trips.
- Bleed the cooling system to prevent air pockets and hot spots.
- Verify a leak-free seal after reassembly.
- Document maintenance actions for future reference.