How to Change a Car Thermostat: A DIY Guide
Learn how to change thermostat car safely with a clear, step-by-step approach. This Thermostat Care guide covers tools, safety, and troubleshooting to keep your engine cooling on track.

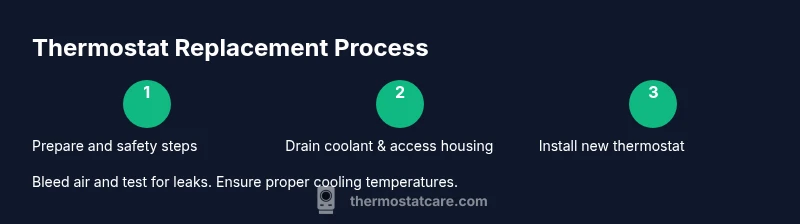
To change thermostat car repairs involve draining coolant, removing the thermostat housing, replacing the old thermostat with a correctly oriented new unit, and resealing the housing. Refill coolant and bleed air, then start the engine to verify the temperature and check for leaks. This home DIY task typically takes about 60–120 minutes with basic tools.
What is a car thermostat and why replace it?
The car thermostat is a small valve that regulates coolant flow between the engine and the radiator. When it fails, the engine can overheat or run too cool, reducing efficiency and risking long-term damage. A worn or sticking thermostat is a common cause of overheating in many vehicles. If you’re facing frequent temperature swings, or if the gauge climbs quickly and then drops, you may be dealing with a thermostat issue. According to Thermostat Care, understanding how the cooling system works helps DIYers make better decisions about when to replace components. The goal of a thermostat replacement is to restore proper coolant flow, stabilize engine temperature, and prevent overheating events that can compromise head gaskets and performance. By knowing the role of this valve, you’ll be able to evaluate symptoms and plan a safe, effective change thermostat car procedure while protecting other cooling components.
How a failing thermostat affects engine temperature and performance
A stuck-closed thermostat keeps coolant from circulating, causing the engine to overheat and potentially trigger warning lights. A stuck-open thermostat prevents the engine from reaching its optimum operating temperature, reducing fuel efficiency and increasing emissions. In both scenarios, you may notice reduced heater output, erratic temperature readings, or a fluctuating temperature gauge. Replacing the thermostat is often a straightforward fix, but it must be done with the right part for your vehicle and an understanding of the cooling system layout. The Thermostat Care team emphasizes matching the replacement part to vehicle make, model, and engine, and ensuring the gasket or O-ring seals properly to prevent leaks.
Symptoms that signal a thermostat problem
Look for a high-temperature gauge spike, inconsistent heater performance, cooling system leaks, or coolant puddles near the thermostat housing. Some vehicles show a check engine light if the thermostat is malfunctioning, while others reveal abnormal temperature cycling on the dashboard display. Before assuming a thermostat fault, consider the cooling system’s condition: low coolant, a clogged radiator, a failing water pump, or a stuck radiator cap can mimic thermostat symptoms. Keeping a log of temperatures and symptoms helps you determine if a change thermostat car replacement is warranted.
Tools, parts, and safety basics
Before you start, collect a basic toolkit, a new thermostat kit with gasket, coolant suitable for your vehicle, and a drain pan. You’ll also need protective gloves, safety glasses, and a clean workspace with good lighting. Safety comes first: disconnect the negative battery terminal to reduce the risk of short circuits while working near electrical connectors and hot coolant. Ensure the engine and cooling system are cooled down before you touch any components. Thermostat replacement requires proper torque on fasteners, clean mounting surfaces, and correct orientation of the new thermostat for reliable operation.
Step-by-step: prep and safety before you start
Plan the procedure around the vehicle’s cooling system layout. Park on a flat surface, engage the parking brake, and assess whether you’ll need to raise the vehicle for better access to the thermostat housing. Remove the required engine covers if necessary. Check the service manual for the exact thermostat part number and gasket type. It’s important to verify the coolant type and compatibility with your vehicle. If the radiator cap has a pressure rating, avoid removing it while the system is hot.
Step-by-step: locate the thermostat and access the housing
Most cars place the thermostat near the upper radiator hose or under the thermostat housing on the engine block. Locate the housing by following the upper radiator hose to the engine and identify the two bolts or clamps that secure the housing. Take photos before disassembly to help with reassembly. Label hoses or use masking tape to keep track of their positions. This step is critical for an accurate and clean reassembly and helps prevent cross-connection errors during the change thermostat car process.
Step-by-step: remove the old thermostat and inspect the housing
Carefully loosen and remove the housing bolts; keep track of their position for reassembly. Gently lift the housing to expose the thermostat and gasket. If the thermostat is stuck or hard to remove, apply a small amount of penetrating oil and let it sit briefly. Inspect the housing surface for warping, cracks, or gasket residues. Replace any damaged components and clean the mounting surface thoroughly to ensure a good seal for the new thermostat.
Step-by-step: install the new thermostat and reseal the housing
Install the new thermostat with the correct orientation—usually the spring side faces the engine. Place a new gasket or O-ring in the housing groove, then reseal the housing onto the engine. Reinstall the mounting bolts and tighten to the manufacturer’s torque specification. Reconnect any hoses or electrical connectors that were removed. Take care not to overtighten, which can warp the housing.
Step-by-step: refill coolant, bleed air, and test
Refill the cooling system with the appropriate coolant as specified in your owner’s manual. Some vehicles require a careful bleed procedure to remove air pockets; check for a specific procedure in the service manual. Start the engine and bring it to operating temperature with the radiator cap off to release trapped air, then replace the cap once the bubbles subside. Monitor the temperature gauge and look for leaks around the new gasket. If you notice ongoing leaks, recheck the gasket seating and mounting bolts.
Troubleshooting post-replacement issues
If the gauge still shows abnormal temperatures after replacement, verify coolant level and air bleed status. Check for leftover air pockets, damaged hoses, or a malfunctioning water pump. A partially blocked radiator or clogged coolant passages can mimic thermostat symptoms. If uncertain, consult a professional to verify the repair and avoid overheating that could damage the engine.
Tools & Materials
- New thermostat kit with gasket(Part must match vehicle make/model and engine)
- Socket set with metric sizes(For housing bolts)
- Ratchet wrench and extension(Access tight spaces)
- Flathead and Phillips screwdrivers(For hose clamps and covers)
- Drain pan(To catch coolant safely)
- Funnel and coolant (correct type)(Check owner manual for specification)
- Gasket scraper or razor blade(Clean gasket residue without gouging metal)
- Torque wrench(Use manufacturer torque specs)
- Safety gloves and glasses(Protect hands and eyes)
- Shop towels or rags(Clean spills and wipe surfaces)
- Coolant hose lubricant (optional)(Helps hoses slide on easier)
Steps
Estimated time: 60-120 minutes
- 1
Gather tools and part
Collect the new thermostat, gasket, coolant compatible with your vehicle, and basic hand tools. Confirm the part matches your car’s make, model, and engine to ensure a proper seal and correct operation after installation.
Tip: Double-check the thermostat orientation before opening the housing to prevent an incomplete seal. - 2
Safety and prepare the vehicle
Park on a flat surface, set parking brake, and disconnect the negative battery terminal. Allow the engine to cool completely to avoid burns from hot coolant and components.
Tip: Label any removed hoses and clips to simplify reassembly. - 3
Drain coolant and access housing
Place a drain pan under the engine and open the radiator drain plug or the lower radiator hose to drain coolant into the pan. Remove any engine covers or shields needed to access the thermostat housing.
Tip: Do not loosen the thermostat bolts while the system is pressurized—drain first, then remove. - 4
Detach hoses and remove housing
Loosen hose clamps and detach hoses from the thermostat housing. Remove the housing bolts and carefully lift the housing away, exposing the old thermostat.
Tip: Take a photo of hose positions before removal in case hoses look similar. - 5
Inspect and prep mounting surface
Inspect the gasket surface for warping or damage. Clean any gasket material from the mating surface with a gasket scraper, ensuring a smooth, debris-free area for the new seal.
Tip: A smooth surface prevents leaks and ensures the new gasket seats properly. - 6
Install the new thermostat and gasket
Place the new thermostat in the correct orientation as specified by the product or manual. Install the gasket or O-ring in the groove and reseal the housing with the bolts, torquing to spec.
Tip: Hand-tighten bolts first to align the housing, then snug to final torque. - 7
Reconnect hoses and reassemble
Reconnect all hoses and clamps removed earlier. Reinstall any engine covers or shields, and connect the battery.
Tip: Ensure clamps are secure and hoses are seated fully to avoid leaks. - 8
Refill coolant and bleed air
Pour in the correct coolant type through the reservoir or radiator, then bleed air as required by your vehicle. Run the engine with the radiator cap off until steady bubbles stop, then replace the cap.
Tip: Why bleed? Air pockets cause hot spots and improper temperature regulation. - 9
Test and verify
With the engine at operating temperature, check for leaks around the housing and hoses. Monitor the temperature gauge and ensure the thermostat opens at the correct range. Take a short drive to confirm proper operation.
Tip: Carry extra coolant and a towel; be prepared to address any minor leaks immediately.
Questions & Answers
Can I use any thermostat in my car?
No. Use a thermostat that matches your vehicle’s year, make, model, and engine. An incorrect part can cause improper regulation, leaks, or overheating. Always check the OEM specifications or your owner’s manual.
Use only the recommended thermostat for your car to avoid overheating and leaks. Check your manual or OEM specs before buying.
Is this a job for beginners or should I call a mechanic?
If you have basic mechanical skills and the vehicle’s cooling system is accessible, you can perform a thermostat replacement. Complex engines or tight engine bays may require professional help. Always prioritize safety and follow the vehicle’s service manual.
Beginners can do it with care, but if in doubt about space or coolant safety, consider a mechanic.
What coolant type should I use after replacement?
Use the coolant type specified by your vehicle manufacturer. Mixing incompatible coolants can cause corrosion and reduced cooling efficiency. If unsure, consult the owner’s manual or a trusted mechanic.
Refer to the manual for the exact coolant type to avoid damage.
How long should the engine run after replacement to test?
Run the engine for 15-20 minutes at operating temperature, checking for leaks and stable temperature. If the gauge fluctuates, recheck the gasket seating and bleed procedure.
Let it run to operating temp and verify no leaks or temperature spikes.
What signs indicate I did not seal properly?
Common signs include active coolant leaks at the housing, low coolant level after topping up, or steam from the engine bay. Recheck gaskets and bolts, and reseat the housing if needed.
Leaks near the housing mean you should recheck the gasket and bolts.
Do I need to flush the cooling system after replacement?
Flushing is not always required; it depends on coolant condition and vehicle. If old coolant is dirty or contaminated, a flush followed by new coolant is advisable. Refer to the service manual for guidance.
A flush isn’t always required, but consider it if coolant is dirty or contaminated.
Watch Video
What to Remember
- Identify symptoms early to decide on replacement.
- Match the thermostat to your vehicle’s specs.
- Bleed air and test thoroughly to prevent overheating.
- Torque fasteners to spec to ensure a proper seal.
- Keep coolant level topped and monitor for leaks after replacement.