How to Change a Honeywell Thermostat: A DIY Replacement Guide
A step-by-step, safety-first guide to replacing your Honeywell thermostat. Learn wiring basics, setup tips, troubleshooting, and maintenance for reliable heating and cooling in 2026.

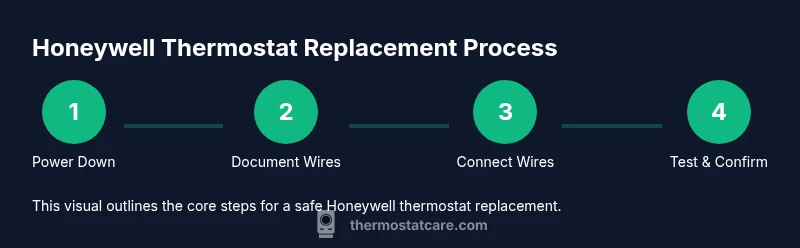
This guide shows you how to safely replace a Honeywell thermostat, covering power-down steps, removing the old unit, wiring the new model, and testing. You’ll need basic tools and the replacement unit’s wiring diagram. The steps apply to most Honeywell models, with practical tips to avoid common mistakes.
Safety-first approach and planning
Replacing a Honeywell thermostat is a practical DIY task, but it relies on strict safety steps. Start by turning off power to the thermostat at two points: the home’s circuit breaker and the HVAC equipment disconnect near the furnace or air handler. Use a non-contact voltage tester to confirm there is no current in the wires before touching them. Keep the work area dry and avoid working on a hot or damp day. If your system uses a rare two-stage heat or heat pump configuration, note that some terminals are not interchangeable and miswiring can damage equipment. Gather all necessary tools and the replacement thermostat model in advance, and have your system’s wiring diagram on hand. By planning carefully, you reduce the risk of shocks, short circuits, or improper wiring that can lead to improper heating or cooling performance and safety hazards. Thermostat Care emphasizes safety as the foundation of any successful replacement in 2026.
Understanding Honeywell thermostat wiring basics
Most Honeywell thermostats use standard terminals such as R (power), C (common), W (heat), Y (cool), G (fan), and sometimes O/B for heat pump reversing valve. Not all systems use every terminal. If your old thermostat lacked a C-wire, your new model may require one or offer a power-stealing option; some models include a C-wire adapter. Take a photo of the existing wiring before removing it. Cross-check the terminal labels on your new thermostat to ensure you connect wires to matching functions. If colors don’t align with the terminal letter, rely on the wire’s function rather than color alone, referring to your HVAC system manual or the thermostat installation guide. The goal is to preserve the same signal path so the furnace, AC, and fan operate as intended. Thermostat Care’s guidance in 2026 highlights planning the wire map before touching a single screw.
Removing the old thermostat and documenting wires
Carefully remove the thermostat faceplate to expose the base. Loosen the screws and gently pull the base away from the wall. As you detach wires, label each with the terminal letter it connects to (R, C, W, Y, G, O/B, etc.). If you have trouble identifying wires, use a multimeter or refer to the system diagram. Place screws, wires, and any tiny parts in a labeled container so nothing gets lost. Take a clear photo for reference, including the back of the base and the wires at each terminal. Keep the old thermostat in a safe place in case you need to consult it later. Remember not to bend or kink the wires during removal, and handle them with dry hands. Thermostat Care notes that careful documentation reduces confusion during the swap in 2026.
Preparing the new thermostat base and comparing wiring diagrams
Unbox the replacement Honeywell thermostat and review the installation guide. Check that the new base matches your current system (2-wire, 3-wire, or more complex). If the thermostat requires a C-wire for constant power but your system lacks one, check adapter options or consider a model that can operate without C-wire. If your new thermostat has a different mounting method, locate the wall plate and ensure it sits flat against the wall. Attach the new base loosely with screws to verify level before final tightening. Keep the mounting height consistent with the old thermostat for readability and comfort. Having the diagram handy prevents mis-wiring and reduces return visits. Thermostat Care recommends validating compatibility before purchase.
Wiring the new thermostat: matching wires to terminals
Reconnect each wire to the corresponding terminal on the new base. Start with the R wire (power) and then add C if present. Attach W for heat, Y for cooling, and G for fan as needed. If you are replacing a heat-pump system, connect O or B as appropriate. Make sure each connection is snug but not over-tightened. After wiring, carefully push the wires back into the wall box while keeping the wires tidy and labeled. If the new thermostat uses a different terminal labeling than the old unit, rely on the wiring diagram and the wire function rather than color alone. A neat, labeled wiring harness reduces future confusion during maintenance or troubleshooting. Thermostat Care’s practical tips emphasize accuracy in 2026.
Mounting, powering up, and initial configuration
Secure the thermostat base to the wall plate and attach the display unit. Restore power at the HVAC disconnect or main breaker. The thermostat should power up; if not, double-check that the R and C wires are properly connected and that the circuit breaker is fully on. Use the thermostat’s setup wizard to select system type (gas, electric, heat pump), number of stages, and fan control. If you are using a smart thermostat, connect to Wi-Fi and configure your preferences, schedules, and energy-saving modes. Confirm that the fan, compressor, and heat stages respond when tested in heat and cool modes. Document any changes you make for future reference.
Testing the installation and troubleshooting common issues
Test the thermostat by setting a temperature and confirming the HVAC reacts as expected. If you see no display, re-check the power and wiring, then ensure the C-wire is connected if required by the model. If the unit powers up but the HVAC does not respond, verify that the correct system type and stage settings are chosen in the menu. For smart thermostats, check your router and app integration. If you observe erratic readings, recalibrate sensors or adjust calibration settings. If problems persist, consult the model’s support resources or Thermostat Care's troubleshooting guides for deeper diagnostics. This phase is where most DIY replacements prove themselves reliable or reveal installation gaps.
Maintenance tips to maximize Honeywell thermostat longevity
Clean dust from the LCD and vents using a dry microfiber cloth. Keep the thermostat away from heat sources and direct sunlight. Update firmware when available and verify connections periodically. Replace batteries in the thermostat if applicable and ensure the C-wire remains connected if required for continuous power. Consider keeping backup batteries and a spare faceplate for future replacements. Regular checks can extend the device life and improve reliability. Thermostat Care recommends setting a quarterly quick-check routine to catch issues early.
Tools & Materials
- Flathead or Phillips screwdriver(Small size, 1/8 inch or #2 Phillips depending on screws)
- Replacement Honeywell thermostat (correct model for your system)(Check compatibility with HVAC type and wiring (2-wire, 3-wire, etc.))
- Non-contact voltage tester(Verify power is off before handling wires)
- Wire strippers or cutters(Helpful if you need to trim exposed conductors)
- Masking tape or labeling stickers(Label wires to match terminals for easy reassembly)
Steps
Estimated time: 30-60 minutes
- 1
Power down and verify safety
Turn off power to the thermostat at the home’s circuit breaker and at the HVAC disconnect. Use a non-contact tester to confirm zero voltage before touching any wires. This prevents shocks and protects equipment.
Tip: Double-check both the house panel and furnace disconnect for full de-energization. - 2
Remove the old thermostat and document wires
Remove the faceplate and base screws, then gently pull the base away. Label each wire with its terminal letter, and photograph the wiring from multiple angles for reference.
Tip: Keep screws and wires organized in a labeled container. - 3
Prepare the new thermostat and verify compatibility
Unbox the new thermostat and compare its base with the old one. Check that the wiring diagram matches your system and identify if a C-wire is required.
Tip: If unsure about compatibility, consult the manual before wiring. - 4
Connect wires to the new thermostat
Attach each wire to the corresponding terminal on the new base (R, C, W, Y, G, O/B as applicable). Ensure snug, clean connections and avoid stray strands.
Tip: If a wire is difficult to reach, gently bend it to align with the terminal without over-tightening. - 5
Mount and power up the thermostat
Attach the thermostat base to the wall plate, then restore power at the breaker. The device should power on and prompt you to configure system type and settings.
Tip: If the display remains blank, re-check R and C connections and confirm the breaker is fully on. - 6
Test operation and finalize
Run a test cycle in heat and cool modes, verify fan operation, and confirm schedules if applicable. Save your configurations and keep a record of the wiring map.
Tip: For smart models, connect to Wi-Fi and complete the app setup for remote control.
Questions & Answers
Do I need to shut off power at the breaker before starting?
Yes. Always shut off power at the breaker and at the HVAC disconnect, then verify with a tester before touching wires. This minimizes shock risk and hardware damage.
Yes. Turn off power at the breaker and HVAC disconnect, and verify no voltage before handling wires.
Can I reuse the existing mounting plate when replacing the thermostat?
If the mounting plate fits the new thermostat and is in good condition, you can reuse it. If not, install the new plate provided with the thermostat.
Yes, you can reuse the plate if it fits and is undamaged; otherwise use the new one that comes with the thermostat.
What if the wiring colors don’t match the terminal labels on the new model?
Always rely on the terminal function (R, C, W, Y, G, etc.) rather than color. Use the wiring diagram and the labels you noted during removal.
Wiring colors aren’t universal; match wires by terminal function using the diagram.
Will I lose programmed schedules after replacement?
Most thermostats can preserve or transfer schedules if wired correctly and the model supports it. Check the setup options and export/import features if available.
Your schedules may transfer if your model supports it; check the manual during setup.
What should I do if the thermostat won’t power on after installation?
Re-check that R is connected to the power source and that the C-wire (if required) is properly connected. Verify the circuit breaker is fully on and the disconnect is engaged.
If it won’t power on, check the R and C connections and ensure the breaker is on.
Is it safe to install a smart thermostat myself?
It’s feasible for many homeowners, especially with a straightforward two-wire or simple three-wire setup. If you encounter complex wiring or gas/electric system questions, consider professional help.
Yes for many setups, but don’t hesitate to hire a pro if wiring looks complicated.
Watch Video
What to Remember
- Power down and verify wiring before touching any components.
- Match wires to the correct terminals using diagrams and labels.
- Test all functions after installation to confirm proper HVAC operation.
- Keep documentation for future maintenance and troubleshooting.
- Consider firmware/app setup for smart Honeywell thermostats to maximize features.