How to Remove a Honeywell Thermostat: A Step-by-Step DIY Guide
Learn how to safely remove a Honeywell thermostat for replacement or maintenance. This comprehensive guide covers tools, safety, step-by-step removal, post-removal options, and common pitfalls.

To remove a Honeywell thermostat, first shut off power at the breaker, then note and label each wire. Remove the thermostat from the wall plate, disconnect wires from the terminals, and detach the backplate. If you’re replacing, remove the mounting screws and safely disconnect the wire bundle. Store screws and plate for reinstallation or replacement.
Why Removing a Honeywell Thermostat Might Be Necessary
If you’re looking for guidance on how to remove a Honeywell thermostat, you’re in the right place. This portion of the Thermostat Care guide explains common scenarios that require removal, including upgrading to a smarter model, performing wiring checks, repairing a faulty unit, or relocating the thermostat to a new wall. According to Thermostat Care, planned removal helps protect your wall finish, reduces the risk of electrical mishaps, and makes future upgrades smoother. Understanding the reasons for removal also helps you decide whether you should proceed yourself or call a licensed technician. For DIY homeowners, knowing the exact steps reduces guesswork and speeds up the process while keeping safety at the forefront.
Beyond the mechanical concerns, removing a thermostat is often a prep step for system maintenance, calibration checks, or a change in zoning that requires reconfiguration of wiring at the furnace/air-handler. Thermostat Care emphasizes documenting the current setup with photos and labels so that reinstallation or replacement is straightforward. This foundational knowledge sets the stage for a clean, organized removal that minimizes damage to your wall and avoids confusion when reconnecting the wires later.
Safety First: Power Down and Prep
Before any physical work, safety must come first. Power down the HVAC circuit at the main breaker and, if possible, at the furnace or air handler disconnect. An additional precaution is to verify there is no voltage present on the thermostat wires using a non-contact voltage tester, even if you believe power is off. According to Thermostat Care, the most common risk during removal is accidental contact with live wires or arcing at the terminal screws. Work with dry hands, stand on a dry surface, and keep metal tools away from exposed conductors. This prep reduces the chance of shocks, sparks, or damaging the control board. If your home has multiple power sources or unusual wiring, consider turning off the entire house power to be extra safe. Remember to re-check power before touching any wires.
Tools and Materials You’ll Need
Gathering the right tools ahead of time makes removal smoother and safer. The essentials include a small Phillips and a flathead screwdriver, masking tape and a marker for labeling, a camera or smartphone for photos, and small containers or bags to store screws. Optional but helpful items include a voltage tester and wire caps if you need to terminate exposed ends. Thermostat Care recommends labeling wires as you go and keeping a dedicated labeled bag for screws and backplates to keep everything organized during the process. Having these items ready minimizes delays and helps you maintain a clean workspace.
- Flathead screwdriver (essential for certain model plates) – note if the screws are recessed, you may need a magnetized screwdriver
- Phillips screwdriver (PH1 or PH2 depending on screws) – useful for mounting screws on backplates
- Masking tape and marker – for wire labeling and quick notes
- Camera or smartphone – to document wire color and terminal positions
- Small bag or container for screws – prevents loss while you work
- Optional: Voltage tester – confirms there is no live voltage on wires before handling
- Optional: Wire nuts/caps – for safely terminating exposed wires if you’re leaving them disconnected
Preparing for Removal: Documentation and Labeling
A successful removal relies on keeping track of where each wire goes. Start by taking clear photos of the thermostat wiring from multiple angles, including where each wire connects to the thermostat terminals. Next, label each wire with its terminal designation (for example, R, W, Y, G, C) using masking tape and a marker. If the thermostat uses color-coded wires, use a legend on the wall or in your photos to help you with future reinstallation. Thermostat Care emphasizes labeling as the most reliable way to avoid mismatches later, especially if you plan to upgrade to a smart thermostat and need to map old connections to new terminals. After labeling, gently untwist or bend back any wires that might be pinched, but do not disconnect them yet. This step ensures you have a clear view of the wires and prevents accidental confusion when you remove the unit.
Disconnecting the Thermostat Wires
With the power off and wires labeled, carefully loosen each terminal screw on the thermostat and slip the wire ends out. Do not pull on the wires themselves; instead, twist or lift each wire free from the terminal using the appropriate tool. If a wire is stubborn, gently wiggle the terminal clamp or use small pliers to aid removal, taking care not to nick the conductor insulation. Once all wires are removed, place the wires back into the wall cavity or into a labeled wire bundle so they don’t dangle and cause accidental contact. A clean separation of the thermostat and wall wiring reduces the risk of accidental re-energizing the system when you are not ready to reassemble. Thermostat Care notes that a methodical approach minimizes reattachment errors and makes replacement faster.
Removing the Backplate and Thermostat
Next, remove the mounting screws from the backplate that secures the thermostat to the wall. Gently pull the backplate away, keeping the thermostat connected to the wall unless you’re replacing the entire unit. If the backplate has integrated wiring or a bridging plate, disconnect any remaining connections with care. Place all screws in a labeled container and set the backplate aside. If your model requires you to separate the thermostat from the backplate, follow the manufacturer’s instructions for unmounting the device from its mounting bracket. Keeping the backplate and mounting screws organized prevents damage to the drywall and makes the reinstallation easier for the future. Thermostat Care reminds readers that many backplates are reusable, but if they show wear or cracks, replace them with the new model’s mounting hardware.
Post-Removal Steps: What Comes Next
Once the thermostat is removed, assess the wall opening and mounting hardware. If you are replacing the thermostat with a newer Honeywell model or a different brand, inspect the wall box and bracket to ensure compatibility. If the wall plate is damaged or stained, you may want to replace it to achieve a clean finish and better heat transfer around the opening. Store all removed components in a labeled bag until you decide on the replacement plan. For upgrades, Thermostat Care recommends taking measurements and reading the installation manual for the new device, then following the wiring map to avoid mistakes. Proper storage and careful planning reduce delays during reinstallation and prevent mixing up terminals when you attach a new device.
Troubleshooting Common Issues During Removal
During removal you may encounter challenges such as stubborn screws, brittle wall plates, or wires that are hard to reach. If screws are stripped, try a rubber band for extra grip or use a screw extractor with caution. For cemented or aged backplates, avoid forcing the fixture, which could damage the drywall. If you’re unsure about any step, pause and reassess. Thermostat Care emphasizes safety first, and recommends considering a professional if your wiring is unusual or if you feel uncertain about de-energizing the system. This is especially true for multi-stage HVAC systems or older homes with complex wiring.
- When in doubt, consult a professional to prevent damage to the HVAC system or wall.
Maintenance and Future-Proofing: When to Upgrade
Removal is often the first step toward a more efficient thermostat setup. If you’re upgrading to a smart thermostat, ensure the new device is compatible with your HVAC system and wiring (for example, whether a C-wire is required). Consider upgrading the wall plate or backplate to accommodate new mounting standards and improve aesthetics. Take this opportunity to inspect the wall cavity for any signs of wear, moisture, or damage, and repair as needed before installing a new device. Thermostat Care suggests documenting your current setup and the steps you plan to take for a smoother upgrade. A well-planned removal and upgrade path can save time and reduce the risk of miswiring when you install the new thermostat.
Tools & Materials
- Flathead screwdriver(For recessed screws on some wall plates)
- Phillips screwdriver(Size PH1 or PH2 depending on screws)
- Masking tape and marker(Label wires and terminal names)
- Camera or smartphone(Document wiring before removal)
- Small bag or container for screws(Keep screws organized and labeled)
- Voltage tester(Optional; verify no live voltage on wires)
- Wire caps or wire nuts(Cap exposed ends if needed)
Steps
Estimated time: 20-40 minutes
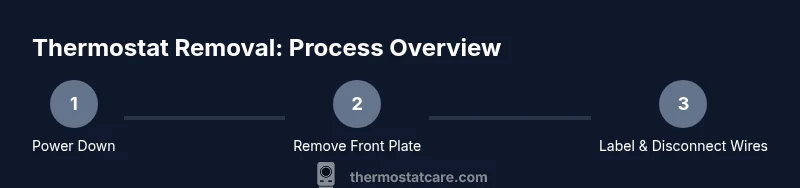
- 1
Power down and verify
Shut off the HVAC circuit at the main breaker and at the furnace/air handler disconnect if possible. Use a non-contact tester to confirm no voltage on thermostat wires before touching them.
Tip: Double-check the breaker label; some systems split power between the thermostat and the equipment. - 2
Remove the front plate screws
Use the appropriate screwdriver to remove the screws holding the faceplate. Gently pull the plate away from the wall to expose the wiring and backplate.
Tip: If screws resist, apply gentle pressure and ensure you’re not stripping the screw head. - 3
Label and photograph wiring
Label each wire with its terminal letter and take a photo for reference. This ensures you know where each wire goes when installing a new thermostat.
Tip: Include a close-up of the terminal block so you can see color and position clearly. - 4
Disconnect thermostat wires
Loosen each terminal screw and carefully remove the wire ends from the thermostat. Do not tug on the wires directly; keep the conductors intact.
Tip: If a wire is stubborn, use needle-nose pliers gently; avoid bending the conductor. - 5
Remove backplate and thermostat
Unscrew the mounting screws from the backplate and gently pull the thermostat away from the wall. Store screws in a labeled bag and set backplate aside if reusable.
Tip: Keep all hardware in one place to simplify reinstallation or replacement. - 6
Inspect and plan next steps
Check the wall opening for damage and note whether you’ll reuse the backplate or install a new one with the replacement thermostat.
Tip: Take measurements and review the new device’s installation guide before proceeding.
Questions & Answers
Is it safe to remove a Honeywell thermostat myself?
Yes, it’s generally safe if you power down the system and follow label-and-document steps. If you’re unsure at any point, consult a professional to avoid damaging wiring or the HVAC system.
Yes, you can remove it yourself if you power down first and label the wires; if you’re unsure, hire a pro.
Do I need to disconnect the C-wire before removal?
Typically you detach wires from the thermostat terminals one by one; the wall wiring stays in place if you’re not removing the backbox. Label and tuck wires safely.
Usually you just detach the wires from the thermostat and label them; the wall wires stay put.
What should I do with wires after removal?
Keep wires labeled and secured. If you’re not immediately installing a new thermostat, cap exposed ends and store the wires away from metal objects.
Label and secure the wires; cap exposed ends if you aren’t installing the new thermostat right away.
Can I reuse the old backplate?
Reuse is possible if the backplate is in good condition and compatible with your new device. If it’s worn or damaged, replace it for a secure install.
Yes, if it’s in good shape; otherwise replace it.
Will removing the thermostat affect HVAC operation?
Removal itself does not affect how the HVAC system operates. Ensure the system is powered down before work to prevent shorts or arcing.
No, removing the stat won’t affect your furnace or AC when power is off.
What if my thermostat uses a C-wire and common power?
If your system uses a C-wire, make sure it’s properly insulated and not left bare. Label the wire so you can reconnect correctly to a future thermostat.
Make sure the C-wire is insulated and reconnected correctly when you install the new device.
What to Remember
- Power down before handling wiring
- Label wires and photograph arrangements
- Keep all hardware organized for easy reassembly
- Plan for replacement or upgrading before removal
- Dispose or store removed components responsibly