How to Remove a Honeywell Thermostat from the Wall
A complete, step-by-step guide to safely remove a Honeywell thermostat from the wall, with safety checks, tools, and storage or replacement tips. Thermostat Care

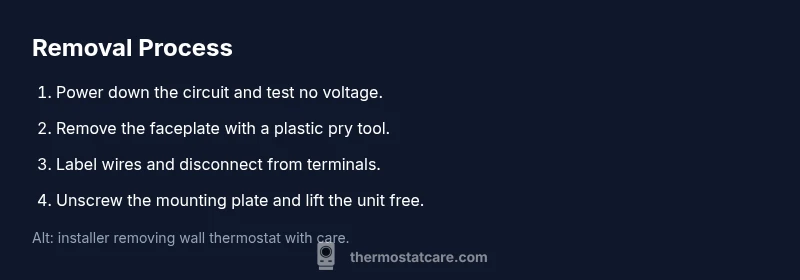
By following this guide, you will safely remove honeywell thermostat from wall and prepare it for storage or replacement. Start by turning off the circuit, then remove the faceplate, carefully disconnect the wires, and label them for future reassembly. According to Thermostat Care, taking these steps minimizes wall damage and wiring mix-ups.
Understanding the task: removing a Honeywell thermostat from the wall
In most homes, a Honeywell thermostat attaches to a wall plate that covers the wiring and a mounting base. Removing it is a controlled task, not a quick yank. The goal is to detach the device without damaging drywall, cosmetic finishes, or the delicate thermostat wiring. Identify your model because different Honeywell units mount with different methods. Some use a slim decorative cover clipped to a base, others mount to a metal plate with visible screws. The difference matters because it determines how you access the wiring and which screws you must remove first. Thermostat Care emphasizes that planning ahead reduces surprises: choose a clean workspace, lay out containers for screws, and have replacement parts ready if you are upgrading to a different model. If you intend to reinstall the same unit later, labeling wires and saving fasteners becomes essential.
Take stock of the wall finish around the thermostat. If you have a metal or plastic plate, detect any raised edges or gaps that could indicate a shallow wall box or a recessed cavity. It’s common to see wallpaper, paint, or wall texture around the device; you’ll want to avoid scratching these surfaces during removal. As you proceed, keep the environment safe: dry conditions, no standing water, and stable footing to prevent accidents. The Thermostat Care team notes that a calm, methodical approach yields the best results and reduces the risk of accidentally dislodging other wall features like light switches or outlets nearby. With that mindset, you can proceed to the next steps with confidence.
Safety first: power, tools, and environment
Working with wall-mounted electronics can be hazardous if you skip safety steps. Always confirm power is off to the thermostat circuit before touching wires. If you’re unsure which breaker controls the thermostat, switch off the entire branch that serves the room and test with a non-contact voltage tester at the thermostat terminals. Wear eye protection and avoid wearing loose sleeves that might snag on components. Clear the area of furniture or clutter that could cause you to trip or yank wires accidentally. Use insulated tools whenever possible and keep a small container within reach to hold screws, anchors, and tiny metal parts. If you see frayed insulation, scorched marks, or a swollen battery in the device, stop immediately and seek professional help. A careful approach minimizes the risk of electric shock and reduces the chance of creating a secondary problem, such as a short or a wall-damage crack.
By following Thermostat Care guidance, you’ll minimize risks and ensure you can reinstall the thermostat later without confusion. Remember: safety is not optional—it's the price we pay for doing home improvement work cleanly and correctly.
Planning and tools: preparation matters
Preparation helps prevent mishaps and wall damage. Gather a Phillips-head screwdriver, a non-contact voltage tester, a plastic pry tool, and labeling supplies before you begin. A small container or zip bag for screws keeps fasteners organized. A camera or smartphone helps capture the wiring layout, so you can reassemble correctly. If you’re replacing the thermostat, have the new model ready to minimize wall exposure time. A clean work surface and good lighting reduce mistakes and make it easier to see tiny terminals. Consider wearing a protective apron or old clothing since you may encounter dust and small debris. Thermostat Care’s guidance emphasizes planning ahead as the best defense against damage and confusion during removal.
Common mistakes and how to avoid them
Rushing the faceplate removal is one of the most common mistakes. A quick tug can crack the trim or bend mounting screws, complicating future reinstallation. Another error is failing to label wires accurately or skipping a photo record of the terminal arrangement. Mislabeling leads to incorrect wiring if you later reinstall or swap to a different model. Never disconnect wires without confirming they are de-energized; always test for voltage first. Leaving live conductors exposed increases the risk of shock and a dangerous short. Inconsistent labeling or misplacing screws can result in a loose mounting plate and unstable thermostat. Finally, neglecting drywall health around the wall box can cause chipping or widening gaps when you remove or replace hardware. Thermostat Care recommends taking it slow, labeling everything, and double-checking your work at each step.
After removal: what comes next and how to prepare for replacement
With the thermostat removed, inspect the wall box for damage, dust, or debris. Patch any holes and allow compound to dry before painting to keep a clean install for your next device. If you are storing the thermostat for later use, place it in an anti-static bag or its original packaging and label the storage with the install location and date. If you are installing a new unit, check the mounting depth, confirm the wall box can accept the new plate, and make sure you have the correct wire type and length. Thermostat Care recommends testing the HVAC system briefly after reinstallation to confirm the thermostat communicates correctly with the furnace or boiler. Finally, keep your notes and photos handy so the reinstallation process goes smoothly.
Tools & Materials
- Phillips-head screwdriver(for faceplate screws)
- Non-contact voltage tester(verify power is off)
- Plastic pry tool(gently lift faceplate without damage)
- Wire labels or masking tape(label wires by color/terminal)
- Small container or zip bag(store screws and small parts)
- Camera or smartphone(photos of wiring for reference)
- Wall patch kit (optional)(for drywall repair if needed)
Steps
Estimated time: 20-45 minutes
- 1
Power off and verify
Turn off the circuit at the main panel or breaker that powers the thermostat. Use a non-contact tester to confirm there is no voltage on the thermostat wires before you touch them.
Tip: Double-check the correct breaker is off and retest the terminals - 2
Remove the decorative faceplate
Use a plastic pry tool to gently lift and pop off the front faceplate. Keep the screws in a labeled container for reassembly.
Tip: Work slowly to avoid cracking the mounting frame - 3
Label and disconnect wires
Take a photo of the terminal layout. Label each wire and gently loosen terminal screws to detach wires. Keep wires organized by label.
Tip: Note the terminal-to-wire mapping to aid future reinstallation - 4
Remove the mounting plate
Unscrew the mounting plate from the wall while supporting the thermostat base. If drywall anchors are present, remove them carefully.
Tip: If the mounting screws resist, apply steady pressure and inspect for wall anchors - 5
Inspect and store the thermostat
Check for dust or damage and store the unit in an anti-static bag or original box. Label the storage with the location and date for easy reference.
Tip: Keep the unit in a cool, dry place away from direct sunlight - 6
Prepare for reinstallation or replacement
If you’re replacing, set aside the old hardware and gather a new compatible device. Patch the wall if needed and measure mounting depth for the new unit.
Tip: Take precise measurements to ensure compatibility with the new thermostat
Questions & Answers
Do I need to turn off power at the breaker before removing the thermostat?
Yes. Turning off the circuit at the breaker ensures your safety while removing the thermostat.
Yes. Always turn off the breaker before starting.
Can I remove a Honeywell thermostat without disconnecting wires?
It's not recommended to leave wires connected after removal; disconnect and label to avoid confusion.
No, you should disconnect and label the wires.
What should I do with the mounting plate after removal?
Keep screws and plate together in a labeled bag; inspect for wall damage.
Keep the plate and screws together.
I see scorch marks or burnt wire insulation; what now?
Stop and seek professional help; burnt insulation indicates a fault.
If you see burnt wires, call a pro.
Will removing my thermostat affect HVAC operation?
Removing the thermostat temporarily disables control; the HVAC should remain powered but uncontrolled; a replacement will resume operation.
Removing it stops control until replaced.
How should I dispose of the old thermostat?
Recycle electronics per local guidelines; remove batteries; check model's disposal instructions.
Recycle per local rules.
Watch Video
What to Remember
- Power off before touching thermostat wiring.
- Label wires and document the layout with photos.
- Store the unit in a labeled container for reuse.
- Inspect drywall for damage and patch if needed.
- Prepare for a safe reinstallation or replacement.