How to Attach a Thermostat to a Wall: A DIY Guide
Learn step-by-step how to securely mount a thermostat on a wall, verify wiring, and test operation. Thermostat Care provides expert guidance for homeowners troubleshooting thermostat mounting.

By following these steps, you’ll securely attach a thermostat to the wall, align with the mounting plate, install anchors, and connect the wiring safely. Start by selecting a location away from direct heat, drafts, and sunlight, then gather the right screws and anchors for your wall type. This quick guide outlines the essential actions and safety checks.
Understanding thermostat mounting basics
How is a thermostat attached to the wall? The short answer is: with a mounting plate secured to a solid surface, then the thermostat snaps or screws onto that plate. The longer answer influences performance, energy use, and safety. According to Thermostat Care, choosing the right location is as important as the wiring itself. Mounting the thermostat in a spot that’s shaded from direct sun, away from heat vents, and not in a drafty doorway helps keep readings stable and the display readable. The device should be reachable without stretching, usually around shoulder height for comfortable operation. If you’re mounting a touchscreen model, ensure you have a flat, clean surface that can support its footprint. Wall material matters: drywall needs anchors; brick or concrete needs masonry bits and plugs; hollow-core doors or thin paneling may require thicker screws or a backbox. Another consideration is clearance: keep at least 2-3 inches of clearance above and below the unit to avoid misreads. Finally, verify compatibility with your HVAC system and any smart-home hub you plan to use; compatibility reduces the risk of post-install errors.
Tools and materials you’ll need
Before you touch the wall, assemble a small toolkit with the essentials. Having the right tools reduces mistakes and speeds up mounting. The list below covers what you’ll need for most standard drywall installations; brick or concrete backings may require different anchors. You will also want to have spare screws and anchors in the appropriate size for your mounting plate. A stud finder helps locate solid wood anchors behind drywall, while a level ensures the plate sits perfectly straight. A pencil marks your holes, and masking tape can protect the wall and help with alignment. For wiring, a small flashlight helps you see behind the plate, and wire strippers or needle-nose pliers assist in getting the conductors ready for connection. If your thermostat requires a C-wire, have extra wire ends ready. Finally, a voltage tester is recommended to confirm power is off before you touch any live connections. Keeping these tools handy makes the installation safer and smoother, and reduces the chance of rework.
Safety considerations before you start
Safety comes first when mounting a thermostat. Power should be turned off to the HVAC circuit before you touch any wiring, and you should use a voltage tester to confirm there is no live voltage at the terminal strip. If you are mounting on drywall, choose anchors rated for your wall type and avoid oversized holes that could compromise support. For brick or concrete walls, use masonry bits and proper plugs to prevent the plate from loosening over time. Wear eye protection when drilling, and keep the area free of dust and debris. If you are working near air ducts or ventilation sources, be mindful of airflow that can affect mounting stability and readings. Throughout the process, keep your hands dry and avoid pinching wires. This section intentionally emphasizes caution so you can proceed with confidence and minimize the risk of a damaged wall or improper connections.
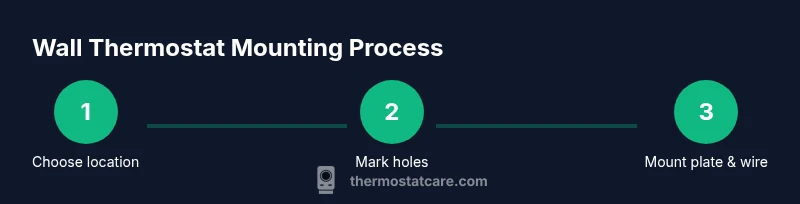
Step-by-step mounting guide
Mounting a thermostat is a straightforward task when you break it into a few clear actions. Start by confirming the mounting location and ensuring the surface is clean and flat. Align the mounting plate so that the studs (where present) are behind the plate or use the appropriate backbox for your wall type. Mark the screw positions with a pencil, then drill pilot holes and insert the wall anchors suitable for your wall material. Attach the mounting plate securely with screws, making sure it sits level. Finally, connect the thermostat body to the backplate and secure any wiring behind the plate cover, verifying that the wires match the terminal labels. If your model supports a C-wire, ensure the conductor is properly stripped and inserted as instructed. After mounting, gently attach the thermostat and restore power to test operation. This sequence helps ensure a clean, secure installation that stands up to daily use.
Wiring basics and options
Wiring is the heart of a properly mounted thermostat. When wiring, always follow the model’s wiring diagram and turn off the power to the HVAC system before touching any conductors. Common terminals include R (power), W (heat), Y (cool), G (fan), and C (common). The presence of a C-wire often improves power stability for smart thermostats; if your wall lacks a C-wire, you may be able to use a power extender kit, a C-wire adapter, or a battery-powered model, depending on compatibility. Some systems use a heat-only configuration or have specialized terminals for dual-fuel setups. If you see corroded wires or insulation damage, do not reuse the old conductors—replacing them is safer and more reliable. Double-check that each wire is secure under its terminal screw and that there are no stray strands that could short. After wiring, recheck all connections and test using the thermostat's setup wizard to confirm the system responds to temperature changes.
Common mounting mistakes and how to avoid them
A few mistakes are common when mounting a thermostat, but they’re easy to prevent with a quick check. Avoid mounting on uneven surfaces; always use a level and ensure the mounting plate is straight. Do not skip wall anchors on drywall, as loose anchors are a leading cause of wobble and eventual failure. Mismatching screws can strip the mounting holes, so select the correct diameter and length for your wall type. Do not force wires into terminals; over-tightening can damage the terminal block, while loose connections cause intermittent behavior. Ensure the device is not placed directly over heat sources or in direct sunlight, which can distort readings. Finally, neglecting to label wires or document the wiring order can lead to confusion later if you remove or replace the thermostat. By paying attention to these details, you’ll avoid common pitfalls and enjoy stable operation.
Aftercare: testing and calibration
Once the thermostat is mounted and wired, it’s time to test and calibrate. Power up the system and verify the thermostat displays correctly and communicates with the HVAC controller. Run through a basic sequence: set to heat, confirm the furnace triggers; set to cool, verify the air conditioner engages; and observe the readings on the display for accuracy. Some models offer calibration options to fine-tune temperature offsets; if your room feels consistently warmer or cooler than the displayed setting, perform the calibration as directed in the manual. If readings drift or the system fails to respond, recheck all wiring and connections, paying close attention to the C-wire and terminal blocks. Thermostat Care notes that a precise installation yields better energy efficiency and more reliable comfort control, especially in extreme weather.
When to call a pro
In many homes, mounting a thermostat is a manageable DIY task, but some situations warrant professional help. If your wall requires substantial demolition to reach wiring, if you encounter damaged insulation or corroded terminals, or if your HVAC system uses a nonstandard wiring scheme, consulting a licensed technician is prudent. For smart thermostat installations that require a power change or a new C-wire run, professional installation can prevent miswiring and potential warranty issues. If you’re unsure about your ability to power down the system safely or to make clean, code-compliant connections, it’s wise to hire a pro. The Thermostat Care team recommends prioritizing safety and system integrity over speed when wiring, especially in older homes with uncertain electrical backgrounds.
Compatibility with smart thermostats
Smart thermostats add features like remote control and learning capabilities, but they often demand a robust wiring setup. In addition to the standard R and C wires, many models benefit from a dedicated G and Y circuit for reliable operation. If your current wiring is minimal or mismatched, consider upgrading the backplate or panel to support the extra loads. Some smart thermostats offer power-extender options if a C-wire is unavailable, but not all models support this solution. Verify the thermostat’s compatibility with your HVAC system and control hub, and ensure the firmware and app are updated to the latest version. A secure mounting provides a stable platform for the device’s sensors and touchscreen and helps maintain consistent connectivity with your smart home ecosystem. Thermostat Care’s guidance emphasizes matching the mounting height and orientation to the model’s sensor placement for optimal performance.
Troubleshooting if the thermostat won’t attach
If the thermostat will not attach to the wall, recheck the mounting plate alignment and ensure the wall surface is clean and flat. Confirm that all screws are tightened to spec and that the plate is level. If the device refuses to stay mounted, inspect the backbox or anchors for looseness and replace as needed. For wiring issues, ensure the terminal screws are secure and that there are no stray strands touching adjacent terminals. If you see error codes on the display after powering up, consult the model’s manual and verify that the wiring conforms to the color codes and terminal designations. External factors such as low battery on a smart thermostat or a failed HVAC control board can also prevent proper operation. By methodically checking mounting, wiring, and power, you’ll identify the cause and restore reliable control.
Final notes and conclusion
Mounting a thermostat properly is a blend of careful location selection, sturdy hardware, and correct wiring. A well-mounted thermostat delivers accurate readings, reliable control of your HVAC system, and a longer device lifespan. Throughout the process, take your time, double-check connections, and test the setup thoroughly before concluding the job. If you encounter uncertainty at any stage, revisiting the mounting plate, wall type, or wiring diagram can prevent costly mistakes. With careful preparation and attention to safety, you can complete the task as a confident DIY project backed by practical guidance from Thermostat Care.
Tools & Materials
- drill with appropriate bit(Choose bit size for wall anchors and screws)
- screwdriver set(Phillips head #2 for most mounting plates)
- stud finder(Locate solid backing behind drywall)
- level(Ensure mounting plate is square)
- pencil or marker(Mark hole positions precisely)
- wall anchors and screws(Choose anchors suitable for wall type (drywall, brick, or concrete))
- masking tape(Protect wall surface and help with alignment)
- voltage tester(Confirm power is off before wiring)
- wire strippers/pliers(Prepare conductors for terminal insertion)
Steps
Estimated time: 45-75 minutes
- 1
Prepare the mounting area
Select a location that is accessible, away from sun, drafts, and heat sources. Clear the wall and inspect for flatness. Confirm you have the correct mounting plate and backbox for your model.
Tip: Use a stud finder to identify solid backing and avoid hollow spots. - 2
Mark mounting holes
Hold the mounting plate against the wall and use a level to ensure it is straight. Mark the screw holes with a pencil, adjusting for any wall irregularities. Double-check clearance around the plate for wires and access.
Tip: Place small pieces of masking tape over the marks to keep the area clean while drilling. - 3
Drill holes and install anchors
Drill pilot holes at the marked positions, then insert the appropriate wall anchors for your wall type. Do not force anchors; they should sit flush with the wall surface.
Tip: Choose anchors rated for the wall material and weight of the mounting plate. - 4
Attach the mounting plate
Screw the mounting plate to the wall using the screws provided. Ensure the plate sits level and is firmly secured without over-tightening.
Tip: If the plate has a backbox, mount it first and then attach the plate to avoid wobble. - 5
Prepare wiring connections
Power down the HVAC circuit and verify no voltage at the terminal strip. Strip wire ends as needed and insert into the correct terminals following the thermostat's wiring diagram.
Tip: Label wires if you are disconnecting multiple conduits to avoid miswiring later. - 6
Mount the thermostat and test
Attach the thermostat body to the wall plate and re-power the system. Run the setup wizard, test heating and cooling commands, and verify readings align with actual room temperature.
Tip: Leave access to the control for immediate testing after installation.
Questions & Answers
Do I need a professional to mount a thermostat?
Most homeowners can mount a standard thermostat safely, but complex wiring or integrations may require a licensed technician.
Most people can mount a basic thermostat, but for complicated wiring, hire a pro.
Can I mount a thermostat on any wall?
Choose a dry, flat wall surface away from direct heat, sun, and drafts. Avoid damp areas and ensure enough clearance for the display.
Yes, but pick a dry, flat surface away from heat and sun.
What if there is no C-wire in the wall?
If there’s no C-wire, you may need a power adapter, a C-wire kit, or a battery-powered thermostat, depending on model compatibility.
If there’s no C-wire, you might need an adapter or a battery-powered model.
What if existing wiring is old or damaged?
Inspect insulation and replace damaged wires before mounting. Old or frayed wiring can cause safety hazards and malfunction.
If wiring is old, consider replacement or professional inspection.
Is mounting different for smart thermostats?
Smart thermostats often require a C-wire and reliable power; ensure compatibility with your HVAC system and app setup.
Smart thermostats usually need a C-wire and app setup.
What tools do I need to mount securely?
You’ll need a stud finder, level, drill, appropriate anchors, and screwdriver. Have wire tools handy for clean connections.
Essential tools are stud finder, level, drill, anchors, and screwdriver.
Watch Video
What to Remember
- Choose a dry, flat mounting spot with stable access.
- Use proper wall anchors for your wall type.
- Follow wiring diagrams exactly for safe, reliable operation.
- Test thoroughly after mounting before finalizing.
- When in doubt, consult a professional to protect safety and warranty.