How Do You Set a Thermostat? A Homeowner's Guide
Learn step-by-step how to set your thermostat for comfort and energy savings. This guide covers basic, digital, and smart models with practical tips from Thermostat Care.

According to Thermostat Care, to set a thermostat, first identify your model and power source, then set your preferred temperature schedule and mode (cooling, heating, or auto). For basic thermostats, start by adjusting the current temperature and saving a simple daily routine. Digital and smart models let you program time blocks, enable eco modes, and connect to apps. If unsure, consult your manual or Thermostat Care's troubleshooting guide.
Understanding Why You Set a Thermostat\n\nAt its core, a thermostat is a control device that tells your heating and cooling system when to run. The goal of setting a thermostat is to balance comfort with energy efficiency, while maintaining safe temperatures for occupants and equipment. For homeowners just starting out, the most important concept is that a thermostat isn't just a number on a dial—it reflects a schedule, occupancy, and the specifics of your home. According to Thermostat Care, the main reasons people adjust settings are to keep rooms comfortable during the day, reduce energy waste when no one is home, and protect sensitive equipment from extreme temperatures. When you know why you’re adjusting, you can choose an approach that fits your lifestyle—and your budget. This section lays the groundwork by explaining the relationship between setpoints (the temperatures you choose), modes (heat, cool, auto), and the time-based routines that govern how your system responds to weather and occupancy. It’s worth noting that every home has unique needs; even two houses in the same ZIP code can require different schedules. Start by listing the rooms that matter most, then map a basic plan for each zone.
How Thermostat Settings Impact Comfort, Energy, and Costs\n\nYour comfort level depends on how well your thermostat communicates with your HVAC system. When you set appropriate hold temperatures and schedule transitions, rooms stay stable without sudden temperature swings. Thermostat Care analysis shows that aligning setpoints with occupancy and weather reduces energy use relative to ad-hoc adjustments. Modern systems benefit from using auto mode, eco or energy-saving features, and consistent nighttime temperatures. The goal is to create predictable changes that match your daily routine, so your system runs only when needed. This section outlines how to think about temperature targets, modes, and schedules, and how those choices translate into real-world comfort and energy performance.
Common Thermostat Types: Analog, Digital, and Smart\n\nThermostats come in several fundamental formats, and understanding the differences helps you choose and set them correctly. Analog or mechanical thermostats use a simple dial, and they rely on the HVAC system responding to a nearby sensor. Digital thermostats replace the dial with a digital display and a more precise control algorithm, often offering programmable schedules. Smart thermostats go further by learning patterns, connecting to Wi‑Fi, and integrating with mobile apps and voice assistants. Each type has distinct setup quirks: analog units may require manual mode switching; digital models often include hold and program settings; smart models enable routines, geofencing, and remote adjustment. Knowing which type you own helps you follow the right steps and avoid common misconfigurations. Thermostat Care recommends starting with a quick model check—confirm the display, power source, and any labeling on the wiring terminals before you begin programming.
Step-by-Step: Interpreting Your Thermostat's Interface\n\nWhen you first look at a thermostat, the layout can feel different from one model to another. The goal of this section is to orient you quickly so you can translate your plan into a concrete set of actions. Start by locating the main controls: the mode selector (heat, cool, auto), the current temperature display, and the program or schedule button. Next, identify whether your unit uses a built-in touchscreen, physical dials, or a combination. If there are battery indicators, note whether they are fresh and properly seated. Finally, locate the confirmation options such as “save,” “hold,” or “set.” Understanding these elements helps you move smoothly into actual programming and avoids repetitive trips to the manual. For a stepwise path, refer to the formal STEP-BY-STEP guide in the dedicated section.
Programming Basics: Basic vs Smart Thermostats\n\nThis section compares the workflow for basic programmable thermostats and modern smart models. Basic programmable thermostats typically support daily and weekday/weekend schedules, a hold temperature, and standard mode changes. You program a sequence of temperature settings for different times of day, then rely on the unit to switch automatically. Smart thermostats usually offer more intuitive interfaces, learning capabilities, and mobile apps. They can adapt to your patterns, adjust based on occupancy, and push notifications when filters or maintenance is needed. The setup process often begins with connecting to Wi-Fi, installing the manufacturer’s app, and creating an account. From there, you can configure routines, geofencing, and energy-saving features. Thermostat Care emphasizes that you should verify compatibility with your HVAC system, including the presence of a C-wire for power in some smart models.
Energy-Saving Strategies When Setting Your Thermostat\n\nEnergy savings come not only from the target temperatures but also from how you use modes, schedules, and responses to weather. Start with a comfortable baseline and then reduce the cooling or heating setpoints in small increments when you’re away or asleep. Enable auto mode so the system switches between cooling and heating as needed rather than running continuously. Use eco or energy-saving modes when appropriate, and set nighttime temperatures to be slightly cooler or warmer than daytime to reduce operation time. If your home has zoning, program different setpoints for living areas, bedrooms, and basements to minimize energy waste. Consistency matters: gradual, planned changes outperform frequent, drastic adjustments. Thermostat Care notes that well-tuned programs consistently outperform manual, continuous tweaking in terms of overall comfort and efficiency.
Troubleshooting Common Issues When Setting a Thermostat\n\nEven with a clear plan, you may encounter problems. First verify power is restored after any wiring work and check the thermostat display for error codes. If the screen is blank, check the battery (if applicable), power to the device, and the fuse or breaker. If the HVAC system doesn’t respond to setpoints, re-check wiring connections and confirm the thermostat is correctly communicating with the control board. Moisture, dust, or loose terminals can cause intermittent operation or inaccurate readings. For smart models, ensure the app is connected and that the device is on the correct network. If problems persist, consult the manual, search Thermostat Care’s troubleshooting guide, or contact a qualified technician.
Maintenance and Safety Considerations\n\nRegular maintenance helps your thermostat stay accurate and reliable. Keep the area around the thermostat clean and free of dust, as debris can affect sensors and temperature readings. If you notice frequent false readings, recalibrate if supported, or replace batteries where applicable. Safety first: if you are opening the main HVAC panel, shut off power at the breaker and follow lockout-tagout procedures when required. For gas-fired systems, avoid interfering with the furnace controls; rely on the thermostat to regulate temperature while the gas valve remains under professional supervision. Finally, keep documentation with model numbers, wiring diagrams, and any changes to the schedule so you can reproduce a setup if you move or service the home.
Tools, Apps, and Resources for Setting a Thermostat\n\nTo set a thermostat effectively, you’ll need the right tools and reliable sources. Gather a screwdriver, the thermostat’s user manual, and fresh batteries if your model requires them. A smartphone is helpful for smart thermostats to install apps and update firmware; ensure you have the latest app version and a stable internet connection. Use the official manufacturer support pages for model-specific instructions, and keep a printed or digital copy of the wiring diagram. For further learning, consult reputable sources such as government or university extension sites and major HVAC publications. Thermostat Care also offers practical, model-specific guidance to help homeowners troubleshoot issues quickly and safely.
Authority Sources and Further Reading\n\nFor authoritative guidance on energy efficiency and thermostat best practices, consult trusted sources such as:
- https://www.energy.gov/energysaver\n- https://www.energy.gov/eere/buildings\n- https://www.epa.gov/iaq
Tools & Materials
- Screwdriver set(Phillips head #2 or slotted as needed)
- Thermostat user manual(Model-specific wiring diagram)
- Batteries (if required)(Check type specified in manual)
- Low-voltage tester (optional)(For verifying wiring if needed)
- Smartphone with thermostat app(Useful for smart models)
Steps
Estimated time: 20-30 minutes
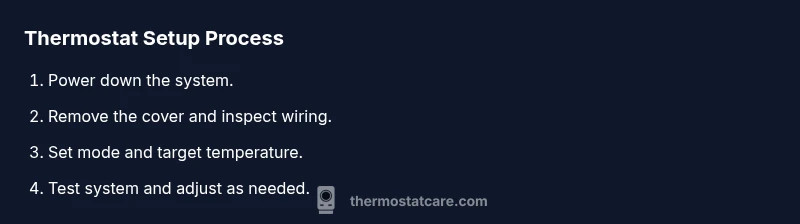
- 1
Power down the system
Turn off power at the circuit breaker or service panel to avoid shocks. Confirm you can safely access the thermostat wiring.
Tip: Double-check that the breaker is fully off before touching wires. - 2
Remove the thermostat cover
Gently detach the outer faceplate to expose wiring terminals. Do not pull on wires.
Tip: Lay the cover in a safe place to avoid losing screws. - 3
Document wiring connections
Note where each wire attaches, or take a photo for reference. This helps prevent miswiring later.
Tip: Use color-coded labels if available. - 4
Set target temperature and mode
Choose the desired setpoint and select heat, cool, or auto mode based on your current needs.
Tip: Start with a conservative setpoint and adjust after testing. - 5
Restore power and mount the cover
Reconnect power at the breaker and reattach the thermostat faceplate.
Tip: Ensure the wiring is not pinched when closing the unit. - 6
Test system operation
Turn on heating or cooling to verify response and listen for any unusual noises.
Tip: If system doesn't respond, re-check wiring and breaker. - 7
Save settings and test scheduling
If your model supports programming, save hold settings and test a basic schedule.
Tip: Document the final schedule for future reference.
Questions & Answers
What is the first step to set a thermostat?
Power down the system at the breaker before touching wiring. This reduces shock risk and protects components.
First, turn off power at the breaker to avoid shocks, then remove the cover.
Can I program a thermostat without internet?
Many basic thermostats work offline with manual controls. Smart models may require internet for remote features.
Yes, most basic thermostats work offline with manual controls; smart models may need internet for remote features.
Do thermostats really save energy?
Setting schedules and appropriate hold temperatures reduces energy use relative to ad-hoc adjustments.
Yes, using schedules and eco modes typically saves energy while keeping you comfortable.
How long should a thermostat last?
Most thermostats last 10-15 years with proper maintenance. Replacements may be needed as technology evolves.
Most thermostats last 10-15 years with proper care.
What if my thermostat won’t hold a temperature?
Check the temperature calibration, battery (if applicable), and confirm the HVAC system responds to setpoints.
If it won't hold temperature, check calibration and wiring, and ensure the HVAC responds to setpoints.
Should I hire a pro for thermostat installation?
If you’re comfortable with basic wiring and follow safety steps, many homeowners can install standard models; complex wiring or gas furnaces may require a pro.
For basic setups, you can do it yourself; for gas furnaces or complicated wiring, seek a pro.
Watch Video
What to Remember
- Identify your thermostat type and power needs.
- Program hold settings and daily schedules for comfort.
- Use eco modes and auto to maximize efficiency.
- Test the system after changes and adjust as needed.
- Prioritize safety and document changes for future reference.