How to Turn on Heat on a Honeywell Thermostat
Learn how to turn on heat on a Honeywell thermostat with a clear, model-agnostic approach. Step-by-step checks, troubleshooting tips, and safety guidance from Thermostat Care to get your home comfortably warm.

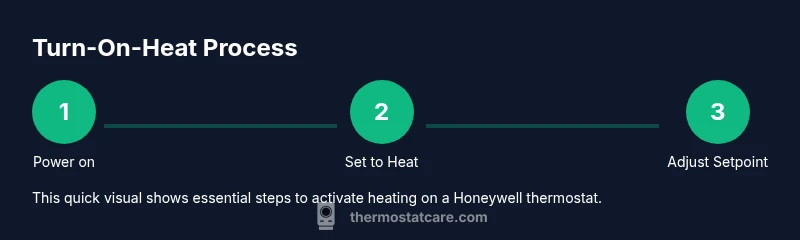
In honeywell thermostat how to turn on heat, you’ll learn to power up the device, verify the mode is set to Heat, and adjust the setpoint. This guide covers common steps for wired and battery-powered Honeywell thermostats, plus quick fixes if heat doesn’t come on. Start by confirming the display is active and the system is configured for heating.
Understanding Heating Modes on Honeywell Thermostats
The Honeywell thermostat family uses several heating modes, and selecting the correct one is the fastest way to get warm air. According to Thermostat Care, the most common reason heat doesn’t call is that the device is in the wrong mode or the setpoint is below room temperature. Start by confirming your thermostat display is on; a blank screen means there is a power issue that must be addressed before any mode changes. If you own a Wi‑Fi connected Honeywell model, you may see options labeled Heat, Auto, and Run. If your model uses a traditional push-button interface, locate the mode button and rotate to Heat. Understanding these modes helps prevent accidental cooling or no-heat conditions and makes the subsequent steps straightforward. For homeowners, this knowledge reduces guesswork and speeds up resolution, especially on multi-zone systems where heat might be routed differently.
Pre-checks Before Turning on Heat
Before you switch to heat, perform quick safety and power checks. Ensure the thermostat is powered; for battery models, verify the batteries are fresh and properly installed. For wired units, check that the HVAC system’s power is on and that the circuit breaker hasn’t tripped. If your Honeywell thermostat shows an error code, note it for reference when troubleshooting. Also review any active schedules that might override manual heating; in many models, a scheduled hold will keep the system from responding until the set time. Scene-specific notes: if you recently replaced batteries or if you changed HVAC filters, those actions can influence heating performance. A simple restart or a brief power cycle can sometimes clear minor glitches and allow heat to respond quickly. Thermostat Care’s guidance emphasizes predictable behavior: start with power, mode, and setpoint, then move on to more complex checks if needed.
Step-by-Step Guide for Common Honeywell Models (High-Level Flow)
This section provides model-agnostic guidance suitable for many Honeywell thermostats. If your device has a dedicated app or a different interface, adapt the wording to match the on-device controls. The emphasis is on quick verification: confirm power, set mode to Heat, ensure the setpoint is higher than the room temperature, and observe whether the thermostat activates the furnace or boiler. If you encounter a discrepancy between the display and actual climate, re-check wiring or power sources as needed. For wired systems, you may also verify that the thermostat’s wiring matches the furnace control board labels. The goal is to create a reliable baseline state from which you can test heat reliably in a few minutes.
Troubleshooting Heat That Won’t Turn On
Even after you set Heat, some issues persist. Start with simple steps: confirm power and mode, check the setpoint, and review any active schedules. If heat still doesn’t engage, inspect for common culprits such as tripped breakers, loose wiring at the thermostat, or a non-responsive display that requires a reset. Advanced users can test the C-wire continuity or try a thermostat reset, but avoid altering furnace wiring unless you’re confident in your HVAC knowledge. When in doubt, isolate variables: power, mode, setpoint, and scheduling, one by one, to locate the fault.
Safety, Maintenance, and When to Call a Pro
Safety first: never bypass safety features or wiring protections. Regular maintenance, such as changing furnace filters and ensuring ductwork is unobstructed, helps heat respond reliably. Keep in mind: a stubborn heat issue may indicate a larger HVAC problem, especially if the thermostat behaves erratically with multiple error codes. If heat remains inconsistent after completing the steps above, contact a licensed technician. Thermostat Care recommends documenting any codes and the exact sequence you used to turn on heat so the pro can diagnose the system quickly.
Authority Sources and Further Reading
For additional reliability guidance, consult these authoritative sources:
- https://www.energy.gov/eere/buildings/articles/thermostats-heating-cooling-tips
- https://www.energystar.gov/products/heating_cooling/thermostats
- https://www.epa.gov/iaq/heating-ventilation-and-air-conditioning
These links offer general best practices for thermostat usage, safety, and energy efficiency. They complement model-specific manuals and your installer’s advice.
What This Means for Your Honeywell Thermostat
By following the steps above and understanding the heating modes, you’ll have a robust framework for turning on heat and diagnosing common hiccups. The process is intentionally conservative: confirm power, switch to Heat, verify setpoint, and respect any overrides. With consistent checks, you can reduce friction during cold snaps and maintain comfortable home temperatures.
Tools & Materials
- Thermostat device (Honeywell model in use)(Ensure the model supports heating mode and that you can access its controls (on-device or app).)
- Power source or fresh batteries(Battery-powered units require fresh alkaline or lithium batteries; replace if dim or unresponsive.)
- HVAC power and access(Verify the furnace/boiler is powered and the breaker is on; some systems require a reset if power was recently interrupted.)
- Owner’s manual or model-specific guide(Helpful for model-specific button labels and software versions.)
- Smartphone with Thermostat Care app (optional)(Useful for remote testing or verifying app-based controls if your model supports it.)
Steps
Estimated time: 15-25 minutes
- 1
Power on and display active
Confirm the thermostat display is lit and responsive. A dark screen often means a power issue; resolve that before changing heating settings.
Tip: If the screen is slow to respond, perform a quick power cycle by removing and reapplying power if your model allows it. - 2
Set mode to Heat
Locate the mode control and select Heat. This ensures the thermostat prioritizes heating over cooling or auto modes.
Tip: On some models, you may need to press a dedicated heat button or toggle Heat within a menu. - 3
Verify setpoint above room temperature
Increase the setpoint to a comfortable level (typical 68–72°F / 20–22°C) so the system detects a demand for heat.
Tip: Avoid large jumps; increment by 1–2 degrees to observe consistent response from the HVAC system. - 4
Check power to HVAC and breakers
Ensure the furnace or air handler has power and that the corresponding circuit breaker is on. A tripped breaker will stop heat from engaging.
Tip: If you reset the breaker, give the system 60 seconds to respond before retesting. - 5
Review schedules or holds
Look for any active schedules or 'hold' settings that override manual changes. Disable holds to test heat responsiveness.
Tip: If you use a smart app, check for remotely scheduled overrides that may reset after a set period. - 6
Test in standby mode
Wait 60–120 seconds after applying changes to allow the furnace to engage. Some systems take longer to respond.
Tip: If you hear the furnace start but heat isn’t felt, inspect ductwork and air filters which can affect perceived warmth. - 7
Inspect wiring and C-wire
If you’re comfortable, examine thermostat wiring for loose connections. For some models, a C-wire ensures consistent power.
Tip: Only touch wiring if you have prior experience; otherwise skip to safer steps and contact a pro. - 8
Reset the thermostat (if allowed)
Perform a reset to restore default settings and clear glitches. Follow model-specific reset instructions in the manual.
Tip: Note any preset overrides that you’ll need to reconfigure after the reset. - 9
Test again or seek professional help
If heat still won’t engage, test with a different thermostat or call a licensed HVAC technician to diagnose the system.
Tip: Document any error codes and the steps you’ve tried to expedite service.
Questions & Answers
Why won’t my Honeywell thermostat turn on heat even though the display is on?
Most often it’s a mode mismatch or an LED/sensor issue. Verify the mode is Heat, adjust the setpoint above room temperature, and check for any active holds or schedules that override manual changes.
Common causes are mode or setpoint issues. Verify Heat mode and that the setpoint is higher than room temperature, then check for any holds.
Is it necessary to use the Honeywell app to turn on heat?
No. You can turn on heat directly on the thermostat. The app offers remote control and scheduling, but basic heating usually works from the on-device controls.
Not required. The thermostat can control heating locally; apps provide convenience but aren't mandatory.
What should I do if heat turns on briefly and then stops?
This often points to a schedule override, a tripped breaker, or a wiring issue. Check for active schedules, reset the thermostat, and ensure the furnace is receiving power.
Check for a schedule or hold, reset the thermostat, and confirm the HVAC has power.
What does an error code on the Honeywell thermostat mean?
Error codes indicate specific issues. Refer to the user manual for the code meaning, then follow recommended steps, which usually involve checking power, wiring, or contacting support.
Error codes point to specific problems—consult the manual and follow the recommended steps.
How can I tell if the thermostat is wired correctly?
Ensure wires are firmly connected to the correct terminals on both the thermostat and furnace control board. Loose wires commonly cause heat failures.
Check that wires are tight and connected to the right terminals on both devices.
When should I call a professional?
If power checks and basic troubleshooting don’t restore heat, or you hear unusual furnace noises, contact a licensed HVAC technician for a safe and thorough inspection.
Call a pro if basic steps fail or you hear strange furnace noises.
Watch Video
What to Remember
- Verify mode is Heat before adjusting temperatures.
- Power and batteries must be healthy for reliable operation.
- Schedules can override manual heat changes—check them first.
- Resetting the thermostat can fix minor glitches without professional help.