Honeywell Thermostat Blank Screen Reset: Quick Troubleshooting Guide
Urgent, practical guide to reset a Honeywell thermostat with a blank screen. Learn power checks, battery replacement, safe resets, and wiring verification for fast restoration.

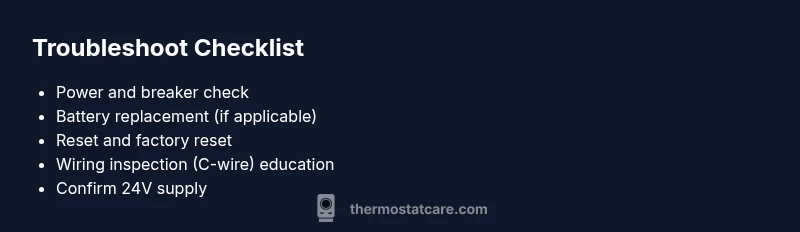
The most likely reason for a blank Honeywell thermostat screen is a power issue or a drained battery. Quick fix: switch off power to the thermostat at the breaker, reseat or replace the battery if present, wait 60 seconds, then restore power. If the screen stays blank, perform a reset and verify wiring and the 24V supply.
Quick Diagnosis: Honeywell Thermostat Blank Screen Reset
When you encounter a honeywell thermostat blank screen reset, power issues and battery health are the most common culprits. The Thermostat Care team emphasizes that a simple power cycle, battery check, or wiring reseat often resolves the problem quickly. This is especially true for models that depend on a constant 24V supply or a replaceable battery. Acting fast minimizes temperature disruption and keeps your home comfortable while you troubleshoot.
Common Causes of a Blank Screen
- Power loss: Tripped breaker, blown fuse, or loose wiring can cut power to the thermostat and cause a blank display.
- Dead or weak battery: Battery-operated Honeywell thermostats will go blank when the battery can no longer sustain operation.
- Loose or damaged wiring: A loose C-wire or terminal corrosion can interrupt the control signal to the display.
- Firmware glitch or display fault: Rare, but an internal fault or software glitch can produce a blank screen that won’t respond to basic resets.
- External heat or EMI: Excessive heat near the unit or strong electromagnetic interference can affect display stability.
Diagnostic Flow: From Symptom to Diagnosis
- Start with power: verify the breaker is ON and the thermostat has 24V supply. If there’s no power, fix the circuit or replace the fuse.
- Check the battery: if your model uses batteries, replace with a fresh alkaline battery and reseat the compartment.
- Inspect wiring: ensure the C-wire and other terminals are firmly connected and free of corrosion.
- Test resets: perform a basic reset, then a factory reset if available, and observe if the display returns.
- If unresolved: verify HVAC connections and consider hardware fault if none of the above fixes work.
Step-by-Step Fixes for the Most Likely Cause
- Power cycle the system: Turn off the circuit breaker feeding the thermostat, wait 60 seconds, then turn it back on. This clears minor power glitches. Tip: Use a spare breaker slot to label the circuit for easy future access.
- Battery replacement (if applicable): Remove and replace the battery with a fresh one, ensuring proper orientation. Tip: Handle batteries with dry hands and avoid touching terminals.
- Reset the thermostat: Perform a standard reset, then a factory reset if the device supports it. Note that a factory reset may erase schedules.
- Re-seat wiring: Power off, open the stat cover, re-seat R, C, W, Y, G terminals, and ensure no loose strands. Tip: Do not over-tighten terminal screws to avoid damage.
- Check the 24V supply: Use a multimeter to confirm 24V between R and C. If absent, contact an HVAC pro as wiring may be upstream.
- Test after reassembly: Reconnect power, wait for boot, and verify the display comes to life. If not, escalate to a professional for a potential hardware fault.
Safety Tips & Warnings
- Always cut power at the breaker before opening the thermostat to avoid electric shock.
- Do not attempt 24V voltage testing unless you’re trained; miswiring can damage the unit or HVAC system.
- Use only the specified batteries for your model and dispose of old batteries safely.
- If you smell burning or see scorch marks, stop and seek professional help immediately.
Prevention: Keeping Your Honeywell Thermostat Stable
- Schedule routine checks of the thermostat power and wiring during seasonal HVAC maintenance.
- Replace batteries proactively on battery-powered units—do not wait for a warning indicator.
- Keep the thermostat away from heat sources and strong EMI to minimize display issues.
- Maintain a basic reset knowledge so you can quickly restore operation without unnecessary service calls.
Steps
Estimated time: 30-45 minutes
- 1
Power down and back up
Turn off the thermostat’s circuit at the breaker, wait 60 seconds, then restore power. This clears minor boot issues and restores basic operation. Pro tip: label the breaker for future quick access.
Tip: Power cycling is often the fastest way to recover from a blank screen. - 2
Check or replace batteries
If your Honeywell model uses batteries, replace with a fresh battery and reseat the compartment securely. This can eliminate a drained power source causing the display to go dark.
Tip: Keep a spare CR2032 battery on hand for quick swaps. - 3
Reset the thermostat
Perform a standard reset, and if available, a factory reset. Note that a factory reset will erase saved schedules and settings.
Tip: Backup your schedules if your model allows exporting them. - 4
Inspect wiring and C-wire
With power off, open the stat and verify all wire connections are secure, especially the C-wire. Look for loose strands or corrosion and reseat terminals.
Tip: Ensure you’re using the correct C-wire for your model. - 5
Verify 24V supply
If the screen remains blank, test for 24V across the R and C terminals. If you don’t see 24V, the issue may be upstream from the thermostat.
Tip: If unsure, stop and call a professional rather than risking damage. - 6
Test after reassembly
Power the system back on and observe whether the display boots and shows the home screen. If not, the thermostat or control board may require replacement.
Tip: Document the steps you took to help with future support.
Diagnosis: Honeywell thermostat screen won’t turn on or remains blank
Possible Causes
- highPower issue (outlet, circuit breaker, or supply to thermostat)
- mediumDead or weak battery (for battery-powered units)
- lowLoose or damaged wiring at the thermostat or C-wire
- lowFirmware/glitch requiring reset
Fixes
- easyCheck the thermostat’s power source at the breaker; ensure the circuit is on and fuses are intact
- easyIf battery powered, replace with a fresh battery and reseat
- easyDisconnect power, inspect terminal connections, re-seat wires, and verify the C-wire is secure
- easyPerform a factory reset or software update if available
Questions & Answers
What should I do first if my Honeywell thermostat screen is blank?
Begin with power checks: ensure the circuit is on and inspect the breaker. If the thermostat uses batteries, replace them. Then attempt a simple reset before progressing to wiring checks.
First, check power and batteries, then try a reset.
Can a blank screen indicate a faulty display?
Yes, a persistent blank screen after power and battery checks may indicate a hardware display fault or motherboard issue requiring professional service.
A blank screen can mean the display hardware is failing; consider professional help if basic steps don’t work.
Is a factory reset safe for all Honeywell models?
Factory resets are generally safe but erase saved schedules and settings. Backup where possible and reconfigure after reset.
Factory reset is safe but will wipe settings; you’ll need to reprogram afterward.
When should I call a professional?
If power and battery checks don’t restore the Display or if you’re uncomfortable handling 24V wiring, a licensed HVAC technician should assess the system.
Call a professional if power and battery checks don’t fix it or if you’re unsure about wiring.
Will replacing the thermostat fix a blank screen?
Often not necessary. A blank display is usually resolved with power, battery, or wiring fixes. Replacement is only needed if hardware is defective after troubleshooting.
Usually not needed; try power, battery, and wiring fixes first, then consider replacement if unresolved.
What about software updates?
Some models offer firmware updates that can fix display issues. Check the Honeywell app or device settings for available updates.
Check for firmware updates in the app; they can address display problems.
Watch Video
What to Remember
- Power cycle first to clear temporary faults
- Replace batteries if applicable
- Check and reseat wiring/C-wire
- If unresolved, avoid DIY wiring fixes and contact a pro