Fix Thermostat: A Practical DIY Troubleshooting Guide
Learn how to fix thermostat issues with a practical, safety-first approach. This Thermostat Care guide covers power checks, battery replacement, wiring verification, and when to call a pro for reliable, lasting results.

This guide shows you how to diagnose and fix a non-responsive thermostat, restore proper temperature control, and prevent future outages. You’ll follow a safe diagnostic flow, confirm power and wiring basics, replace batteries if needed, and reset or reconfigure settings. It emphasizes safety and knowing when to call a professional for complex issues.
Why thermostats stop responding and common culprits
According to Thermostat Care, the most common, fixable thermostat issues fall into three buckets: power supply problems, battery or power source failures, and wiring or connection faults. A modern thermostat relies on steady electrical power or a fresh battery, plus clean contact with the HVAC system’s control circuitry. When any of these fail, you may see a blank or frozen display, inaccurate temperature readings, or unresponsive heating and cooling cycles. Thermostat Care analysis shows that many outages are avoidable with routine maintenance and careful inspections. In most homes, the culprits are simple: a tripped breaker, a dead battery, loose wire connections, or a misconfigured setting. Understanding these root causes helps you decide whether to DIY or involve a professional.
Understanding the diagnostic flow: a methodical approach
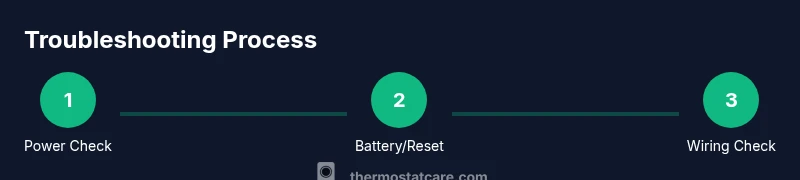
A systematic diagnostic flow helps you avoid guessing and makes the repair faster and safer. Start with the simplest checks and progress to more involved steps. This approach aligns with best practices used by home improvement professionals and is endorsed by the Thermostat Care Team. Begin by confirming power at the thermostat and in the furnace/air handler. If the display is blank, you’re likely dealing with power or battery issues. If the display works but the HVAC doesn’t respond, wiring, sensor faults, or control board issues may be at fault. Document any error codes and model specifics; these clues narrow down the likely fixes and prevent unnecessary disassembly.
Safety and foundational checks you should perform first
Safety is non-negotiable when dealing with electrical components. Always power down at the breaker before touching any thermostat wiring or HVAC equipment. Use a non-contact voltage tester to verify that circuits are de-energized before you remove any faceplate or cover. If you’re unsure about handling wiring, stop and seek professional help. This early safety step protects you and preserves your equipment. While you’re at it, take a few photos of the existing wiring configuration, note the thermostat model, and have the user manual handy for model-specific instructions. These prep steps speed up diagnosis and reduce the risk of accidental miswiring.
Common fixes you can perform safely at home
Many thermostat problems respond to quick, non-invasive actions. If your display is dim or non-responsive, first replace dead batteries with the correct type. For wired thermostats, ensure the C-wire is secure and that any wire insulation isn’t damaged. If the thermostat supports a reset, perform a soft reset to clear minor firmware glitches. For smart thermostats, check the companion app for alerts or firmware updates. After each fix, re-test the system by returning power and letting the thermostat reinitialize. If you notice a fuse or breaker trips, address that issue first, as repeated trips indicate a larger electrical problem that may require a pro.
When to replace vs repair: evaluating costs and reliability
Not every thermostat issue is worth repairing, especially with older units or units that have frequent reliability problems. If your thermostat is several years old, has persistent sensor drift, or requires frequent re-wiring, replacement can be more cost-effective in the long run. Weigh the cost of parts, potential labor, and the value of energy savings from newer models. The Thermostat Care Team recommends comparing the total cost of repairs against the price and features of modern smart thermostats. A replacement may offer better efficiency, compatibility with your HVAC system, and longer warranty coverage.
Maintenance habits to reduce future outages
Preventive maintenance is your best defense against future thermostat woes. Schedule a quarterly check: confirm power indicators, test temperature readings against a known thermometer, inspect wiring for corrosion or looseness, and replace batteries as needed. Keep the thermostat and control panel dust-free to maintain accurate sensors, and update firmware when available to improve security and performance. Endurance comes from small, consistent steps that keep the system responsive and efficient. Establish a simple care routine and you’ll reduce the odds of unexpected outages.
Troubleshooting codes and how to read your model's manual
Many thermostats use error codes to signal specific issues. A clean, model-specific manual helps you translate codes into actionable fixes. If your unit prints a code such as an E, F, or C warning, note it down and search the model guide or Thermostat Care’s troubleshooting database for exact meanings and recommended steps. When in doubt, document the code, take a photo, and consult the manual before imposing fixes. Understanding codes accelerates diagnosis and reduces the risk of misdiagnosis or accidental hardware damage.
Tools & Materials
- Screwdriver set (Phillips and flat head)(Includes #0 to #2 sizes; used to remove the thermostat cover)
- Spare batteries (AA or AAA as required by your thermostat)(Check label on device or manual for correct type)
- Non-contact voltage tester(Safely verify power at thermostat wiring)
- Digital multimeter (optional)(Useful for voltage and continuity checks if you’re comfortable)
- Flashlight(Bright light for dark enclosure or panel area)
Steps
Estimated time: 45-60 minutes
- 1
Power down and protect yourself
Switch off the HVAC circuit at the main breaker and then disable power at the thermostat. This eliminates shock risk while you inspect wiring and components. Take a photo of the wiring before you disconnect anything so you can reassemble accurately.
Tip: If you’re unsure about any step, pause and seek help rather than continuing with powered components. - 2
Inspect the thermostat display and power source
Observe whether the display is blank, blinking, or showing odd characters. For battery-operated units, check the battery state and replace if necessary. For wired models, confirm the thermostat is drawing power from the furnace/air handler and that the control board is not indicating a fault.
Tip: A blank screen almost always points to power or battery issues rather than a broken display. - 3
Test or replace batteries
Remove old batteries and insert fresh ones of the correct type. Ensure contacts are clean and the battery orientation matches the plus/minus markings. Re-seat the cover firmly to restore contact pressure.
Tip: Use fresh batteries from a reliable brand; weak batteries often masquerade as a more complex fault. - 4
Check the C-wire and wiring connections
Turn power back on and gently inspect visible wiring behind the thermostat. Look for loose terminals, corroded connectors, or frayed insulation. If you’re comfortable, reseat the wires to secure terminals; do not force connections that don’t fit.
Tip: Only handle wiring with power off; if any insulation is damaged, replace the wire or call a pro. - 5
Reset or reconfigure the thermostat
For most models, you can perform a soft reset to clear firmware glitches. If your unit has a factory reset option, use it only after confirming you can re-enter settings (Wi-Fi network, schedules, preferences).
Tip: Document your settings before resetting so you can restore schedules and preferences quickly. - 6
Test the system and read error codes if present
Power the system back on and test heating and cooling in multiple modes. If an error code appears, consult the manual or Thermostat Care’s database for exact meaning and recommended actions. If the problem persists, compare the symptom to known issues before escalating.
Tip: Keep a log of symptoms and steps performed; this helps if you need to call a technician.
Questions & Answers
What are the most common reasons a thermostat stops working?
Most issues stem from power or battery problems, loose wiring, or control board glitches. A systematic check typically reveals the culprit without replacing the entire unit.
Most issues come from power, battery, or wiring problems. A step-by-step check usually finds the cause without needing a full replacement.
Can I fix a thermostat myself, or should I hire a pro?
Many fixes are suitable for DIY, especially battery changes, soft resets, and checking wiring with the power off. Complex wiring, error codes, or persistent trips warrant a licensed technician.
You can often fix simple issues yourself, but call a pro for complicated wiring or persistent breaker trips.
Why does my thermostat show no power or a blank display?
A blank display usually signals a power supply issue or dead batteries. Start by replacing batteries and verifying the breaker hasn’t tripped.
A blank screen usually means power or battery problems. Try new batteries and check the breaker.
How do I reset my thermostat?
Use the soft reset option in the settings to clear minor firmware glitches. If needed, perform a factory reset after saving your schedules and network details.
You can reset through the settings for a soft reset, or do a factory reset if needed and re-enter your network details.
Is it worth repairing a thermostat or should I replace it?
If the unit is old or has frequent faults, replacement with a newer model may offer better energy efficiency and reliability. Compare repair costs against the price of a newer thermostat with a warranty.
Consider replacement if repairs are frequent or the unit is old; newer models save energy and come with warranties.
Watch Video
What to Remember
- Identify power or battery issues first
- Follow a safe, methodical diagnostic flow
- Replace batteries and reset before complex fixes
- Know when to call a pro
- Maintain thermostat and wiring for reliability