How to Fix an AC Thermostat: A Step-by-Step Guide
Practical, beginner-friendly guide to fix AC thermostat issues at home. Learn power checks, wiring, battery replacement, and safe troubleshooting from Thermostat Care.

To fix an AC thermostat, begin with power, battery, and wiring checks, then verify sensor readings and current settings. If the display is blank or temps are off, reset, rewire, or replace the faulty module as needed. According to Thermostat Care, following a structured fault‑finding flow reduces guesswork and speeds up safe repairs.
Diagnosing common AC thermostat issues
If your AC thermostat is unresponsive, not displaying, or showing wrong temperatures, start with the basics: power, battery, and wiring. The Thermostat Care team notes that many fixes begin with a simple power check, battery replacement, or a loose wire. In this section we cover symptoms, probable causes, and a high-level decision tree to decide whether you can fix it yourself or if professional help is wise. By understanding the common failure modes, you’ll save time and avoid unnecessary part replacements. Practical experience from Thermostat Care Analysis, 2026, shows that power problems and sensor drift are the most frequent culprits. Use this guide to triage: blank screen, inaccurate temp, thermostat keeps rebooting, or won’t respond to settings. Each symptom points to a likely root cause and a corresponding fix. Throughout, aim to preserve safety and avoid touching live components. With calm, methodical steps, you can determine whether you should repair, replace, or escalate.
Safety and preparation
Before you touch any wiring, review basic safety. Working with electrical components in a home heating and cooling system can be dangerous if you skip steps. Start by turning off power at the furnace or air handler, and shut off the thermostat’s circuit breaker at the main panel. Do not rely on the thermostat's display to confirm power off; use a non-contact voltage tester to verify there is no live current on the wires you will handle. Wear safety glasses and keep water away from equipment. If your HVAC system uses high-voltage components or unfamiliar wiring colors, pause and consult a professional. This is also a good time to gather your model numbers and wiring diagrams for reference. Thermostat Care recommends documenting the setup before making changes so you can revert if needed.
Quick checks before you open the panel
If you’re comfortable, perform a few non-invasive checks first. Ensure the thermostat is not physically damaged and is securely mounted on the wall. Check the display for flickers or partial brightness, which can indicate a failing display or battery issue. For battery-powered units, replace the batteries with fresh alkaline cells of the correct size. For units that rely on a C-wire, inspect the connector block at the back of the thermostat and confirm all wires are seated fully. Do a quick room test by adjusting the setpoint and watching the HVAC respond. If nothing happens, move to more in-depth diagnostics. These quick checks save time and reduce the risk of unnecessary disassembly.
Step-by-step diagnostic workflow
This workflow is designed to be progressive and easy to follow. Start with the least invasive actions and move to hardware replacements only if needed. 1) Verify power to the thermostat and the HVAC unit. 2) Check the battery status (if applicable) and replace if low. 3) Inspect wire connections at the thermostat and at the furnace control board. 4) Confirm the R and C wires are continuous and not shorted. 5) Reset the thermostat to factory defaults and re-enter settings. 6) Reattach the faceplate and perform a test run across heating and cooling modes. 7) Observe for consistent cycling and accurate readings. 8) If issues persist, isolate whether the problem is the thermostat module or the HVAC components themselves. Tip: Take photos at each step so you can retrace your actions if needed.
Power supply and C-wire testing explained
Power supply checks verify that the thermostat is getting stable voltage. Use a multimeter to measure between R and C (or R and W, depending on your system) and look for a steady 24 VAC signal in typical homes. If you don’t see the expected voltage, re-seat wires or replace the C-wire adapter if you use one. A loose or damaged C-wire is a common cause of intermittent faults and incorrect readings. Remember: never measure live wires with a metal probe; use appropriate safety techniques and consult a pro if you’re unsure.
Battery and module considerations
Battery-powered thermostats rely on fresh cells; depleted batteries can cause slow responses or blank screens. Replace with the correct battery type and ensure the contacts are clean. If your thermostat uses a replaceable module or has a built-in rechargeable battery, follow the manufacturer’s instructions for safe replacement. After installing a new battery, perform a quick reset and re-test basic functions to confirm the new power source is stable.
Special cases: smart thermostats and connectivity
Smart thermostats add complexity with Wi‑Fi, apps, and cloud services. If a smart model won’t connect or reports weak network signals, check router settings, firmware versions, and the thermostat’s app permissions. Ensure the device has a solid power supply and is receiving a consistent 24 VAC. If the issue is app‑level rather than hardware, you may need to re-link the device, forget and re‑pair, or re-enter your account credentials. For a fix ac thermostat in a smart system, keep your router within range and avoid VPNs that block device discovery.
When to call a professional and warranty considerations
Sometimes problems exceed DIY scope. If you are uncomfortable with live electrical testing, notice burning smells, or if the thermostat continues to misread or fail after several resets, contact a licensed HVAC technician. A professional can diagnose whether the fault lies with the thermostat, the wiring, or the furnace control board. Check your warranty terms before replacing components; many devices are covered for a limited period, and unauthorized repairs can void coverage. Thermostat Care recommends documenting all steps and preserved wires for reference during service.
Tools & Materials
- Screwdriver set (Phillips and flathead)(Phillips #2 fits most faceplates)
- Non-contact voltage tester(Verify power without touching wires)
- Multimeter(Check 24 VAC between R and C; verify continuity)
- Replacement thermostat (same model or compatible)(If replacing defective unit; ensure HVAC compatibility)
- Electrical tape(Insulate exposed conductors)
- Wire labels or masking tape(Label wires to recall color codes)
- Camera or phone for wiring photos(Record wiring configuration before removal)
- Safety gloves(Protect hands while handling sharp metal or wires)
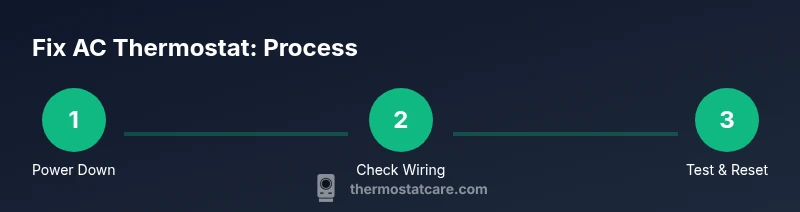
Steps
Estimated time: 60-90 minutes
- 1
Power down and verify safety
Turn off power at the furnace or air handler, then switch off the thermostat’s circuit breaker at the main panel. Use the non-contact tester to confirm there is no live voltage on the wires you’ll touch. This prevents shocks and arcing when you remove the faceplate.
Tip: Double-check multi-point power-off before touching any wires. - 2
Remove the thermostat faceplate and record wiring
Carefully detach the faceplate and take high‑quality photos of each wire connected to the terminals. Note wire colors and terminal labels. This creates a reliable reference if you need to reassemble exactly as it was.
Tip: A photo log saves time and reduces miswiring risk. - 3
Check battery status and replace if needed
If your model uses disposable batteries, replace them with fresh alkaline cells of the correct size. If no batteries are present, move on to wiring checks without delay. After replacement, power the unit back up to see if anything changes.
Tip: Clean battery contacts before reinserting to ensure a solid connection. - 4
Inspect wiring connections at thermostat and control board
Look for loose, corroded, or displaced wires at both ends. Tighten screws securely and reseat any suspect connectors. Loose connections are a common cause of intermittent or no‑response behavior.
Tip: Use the screwdriver to snug terminals without over-tightening. - 5
Test R and C continuity
With the system powered, measure continuity between R and C wires using a multimeter. A clean 24 VAC signal indicates healthy power delivery. If continuity is poor or there’s no voltage, re-seat connectors or replace the affected wire.
Tip: Avoid bending wires sharply; use gentle handling to prevent breaks. - 6
Reset to defaults and re-enter settings
Perform a factory reset if the manual supports it, then reconfigure date, time, and climate settings. After reset, re-attach the faceplate and run a quick heating and cooling test.
Tip: Keep a printed list of settings to reenter exactly. - 7
Reconnect and test system operation
Reattach the thermostat, restore power, and run a test cycle for heating and cooling. Check for accurate readings and stable operation over several minutes.
Tip: If readings drift, note the temperature margin and test again later. - 8
Evaluate results and plan next steps
If faults persist after steps 1–7, isolate whether the thermostat module or HVAC components are at fault. Decide whether to replace the thermostat or contact a professional for deeper diagnostics.
Tip: Document symptoms and actions for your service visit.
Questions & Answers
Why is my AC thermostat not responding to changes?
Most often the issue is power, battery, or wiring. Start with a power check, replace batteries if needed, and verify all connections at the thermostat and control board. If the problem persists, consider a reset or professional evaluation.
If your thermostat won’t respond, check power, batteries, and wiring first, then reset if needed.
What does a blank thermostat display mean?
A blank screen usually points to a dead battery, power supply issue, or display fault. Replace batteries if applicable, verify power, and consider resetting the unit. If the blank persists, you may need to replace the thermostat.
A blank display usually means battery or power problems; start with replacements and a reset.
How can I test the C-wire safely?
Use a multimeter to measure voltage between R and C to confirm a steady 24 VAC supply. If voltage is absent or unstable, inspect wire routing, reseat connectors, or replace the C-wire. If unsure, consult a pro.
Test the C-wire with a multimeter to ensure a steady 24 VAC signal.
Is DIY thermostat repair safe for everyone?
DIY repair is possible for basics like battery replacement and simple wiring checks, but avoid high‑voltage work or uncertain wiring—consult a professional if you’re unsure about safety or system compatibility.
Yes for small steps like battery changes, but get a pro if you’re unsure.
When should I replace rather than repair?
If faults recur, costs rise, or the unit is aging, replacement is often more economical and reliable. Compare the price of a new thermostat against ongoing service visits.
If it keeps failing or the unit is old, replacement is usually best.
Is it safe to work on electrical wiring around a thermostat?
Yes, with precautions: cut power, use testers, wear safety gear, and avoid repairing if you’re unsure. If the wiring looks damaged, stop and contact a pro.
Only work on wiring when you’re confident about safety; otherwise call a pro.
Watch Video
What to Remember
- Power down first to ensure safety
- Document wiring before touching anything
- Test R and C continuity to locate faults
- Reset settings before replacing hardware
- Call a professional if uncertainty remains