ecobee Thermostat Repair: DIY Troubleshooting Guide
Learn to diagnose and fix common ecobee thermostat issues with a step-by-step, homeowner-friendly approach. From power and wiring checks to Wi‑Fi and firmware resets, Thermostat Care provides practical repair guidance.

By following this guide, you will diagnose and repair common ecobee thermostat problems, such as unresponsive controls, Wi‑Fi dropouts, and power issues. Requirements include a basic multimeter, a C-wire tester, and access to the furnace/air handler. This step-by-step approach helps homeowners safely restore function without expensive service calls, using cautious, non-destructive troubleshooting.
Why ecobee repair matters
Every homeowner relies on a stable, accurately heated home, which starts with a reliable ecobee thermostat. When the device misbehaves—display freezes, sensors lag, or the Wi‑Fi drops—the whole HVAC system can drift out of sync. This is where a thoughtful, DIY repair approach pays off: you identify the root cause, apply safe fixes, and restore comfort without scheduling a service visit. According to Thermostat Care, most common ecobee issues stem from simple power, wiring, or network problems that are accessible to a careful homeowner. By learning the diagnostic flow in this guide, you reduce downtime and extend the device's life, while gaining confidence to handle future hiccups. You'll gain practical skills, safer fixes, and a clearer picture of when to call for professional help.
The guidance here is designed for homeowners and DIY enthusiasts troubleshooting thermostats, with safety and best-practice steps at the forefront. Thermostat Care emphasizes taking time to verify each subsystem before assuming a fault is hardware-related. This patient approach minimizes unnecessary replacements and helps you connect with more robust troubleshooting methods over time.
Common ecobee issues you may encounter
If your ecobee thermostat is not behaving, start by listing symptoms: unresponsive or flickering display, frequent Wi‑Fi disconnects, inaccurate temperature readings, or the device rebooting randomly. Thermostat Care analysis shows that these problems frequently arise from three areas: power supply to the thermostat, 24V control wiring (including C‑wire status), and network connectivity. A non‑responsive screen might be caused by a loose ribbon cable, a firmware hang, or low power from the HVAC board. Wi‑Fi dropouts often trace back to router compatibility, signal strength, or old firmware requiring an update. Finally, power loss can be due to a tripped circuit, a faulty C‑wire, or a defective transformer. By recognizing these patterns early, you can triage efficiently and avoid guessing games that waste time and energy.
Understanding these common fault domains helps you prioritize tests and prevents unnecessary rewiring or voltage checks that could risk damage to the thermostat or HVAC system.
Safety and prep before you start
Tackling thermostat repairs involves working with low voltage wiring and, in some cases, the furnace or air handler. Before touching anything, power down at least two sources: the thermostat's circuit on the breaker panel and, if possible, the HVAC equipment's disconnect. Wear eye protection and keep your hands dry. Do not disconnect wires if you are unsure which terminal they belong to; miswiring can damage the thermostat or HVAC controller. If you have a multimeter, verify there is approximately 24 volts between R and C when the system is powered. If not, stop and consult a pro. This section aims to reduce risk and ensure you can perform checks safely without harming equipment or yourself.
Diagnostic tools and essential materials
You will use a few basic tools to check ecobee thermostats and wiring. The essential items include a digital multimeter, a C-wire tester, a small screwdriver set (Phillips and flat), a wire label or masking tape, and a flashlight. A spare thermostat power source or a known-good C-wire adapter can help in tricky tests, but ecobee is built to operate from the HVAC control board. Having the furnace/air handler service manual or schematics handy lets you cross-check terminal designations. If you are documenting wiring changes, take clear photos before disconnecting anything so you can revert if needed. This foundation supports safe, repeatable checks and clear fault isolation.
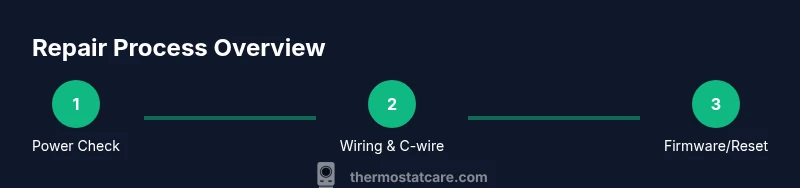
Step-by-step diagnostic flow
A logical diagnostic flow helps isolate issues quickly: check for 24V at the thermostat, inspect and reseat any loose wires, test from the HVAC control board if needed, verify network status and router settings, and perform a firmware reset if supported. Each step narrows the possible causes and prevents unnecessary replacements. Keep notes of voltages, wiring configurations, and any observed faults so you can compare before-and-after results.
Safe fixes you can try first
Begin with a controlled reboot of the thermostat and power cycle of the HVAC system: either use the ecobee reboot option (Settings > Reset > Restart) or power cycle at the R/C connections when safe. Next, re-seat all wires on the thermostat base and at the control board, especially the C-wire. Update the thermostat firmware if an update is available, then re-connect to Wi-Fi and test cloud services. If the display is still erratic, consider a factory reset as a last resort after backing up settings. These steps aim to recover most common faults without hardware replacement.
When to call a professional
If you encounter burnt wiring, buzzing sounds, a noticeable odor, damaged insulation, or you cannot confidently verify 24V power, stop and call a licensed technician. Electrical safety is paramount, and misdiagnosis can damage the thermostat or HVAC equipment. In cases of persistent network instability that resists standard router changes, a pro can inspect internal control boards, sensor harnesses, and terminal blocks with proper equipment and warranty awareness.
Authoritative sources and next steps
For further reading and verification, consult credible sources such as: https://www.energy.gov, https://www.energystar.gov, and https://www.nist.gov. These sites provide general guidance on home electrical safety, energy efficiency standards, and measurement best practices that underpin DIY thermostat work. Remember to cross-check any repair steps with the ecobee support resources and your HVAC manual to ensure compatibility and safety.
Tools & Materials
- Multimeter(Digital meter capable of reading 0-30V AC/DC common for 24V systems)
- C-wire tester(Checks presence and integrity of the C-wire connection)
- Screwdrivers(Phillips #2 and flat-head small sizes for thermostat and control board terminals)
- Wire labels or masking tape(Label each wire before disconnecting to ensure correct reattachment)
- Flashlight(Illumination for dark cabinets or furnace panels)
- Camera or notebook(Document wiring layouts before changes)
Steps
Estimated time: 30-45 minutes
- 1
Power down and safety check
Turn off the thermostat at Settings > Reset > Power Off (or restart). Then switch off the HVAC disconnect and any circuit breakers feeding the furnace/air handler if you will access the control board. Verify with a multimeter that you have 24V between R and C before touching wires.
Tip: Always double-check that power is fully removed at both the thermostat and the HVAC equipment. - 2
Inspect and reseat wiring
Carefully remove the thermostat faceplate and inspect wire terminals. Reseat each wire, especially the C-wire, ensuring solid contact. If a wire looks damaged, trim and re-strip as needed before reconnecting.
Tip: Loose wires are a common cause of intermittent faults; secure connections prevent future problems. - 3
Test power from the control board
If accessible, measure the voltage at the HVAC control board terminals for R and C. Confirm it is near 24V AC when the system is powered. If voltage is low or absent, there may be a transformer or wiring issue.
Tip: Do not touch live terminals; use proper safety equipment and avoid shorting terminals. - 4
Check network and firmware
With power restored, verify Wi‑Fi status on the ecobee. Run any available firmware update. A corrupt firmware or stale network credentials can cause instability or disconnects.
Tip: Always backup settings before performing a reset or firmware update. - 5
Reset and re‑pair if needed
If issues persist, perform a controlled reset of the ecobee to factory defaults (Settings > Reset > Reset All Settings) and reconfigure network and preferences. This clears lingering software faults that simple restarts cannot fix.
Tip: Use this as a last resort after confirming hardware integrity. - 6
Final validation
After repairs, re-test all symptoms: display responsiveness, temperature accuracy, and stable Wi‑Fi connection. Monitor for several cycles to ensure reliability before concluding the repair.
Tip: Document results to guide future troubleshooting.
Questions & Answers
Is ecobee repair safe for homeowners to perform themselves?
Homeowners can perform many basic checks if they follow proper safety steps and manufacturer guidance. If you encounter high voltage, burnt wires, or uncertain wiring, stop and seek a professional.
Yes, many fixes are doable, but avoid risky work like handling live high-voltage components.
What are the most common causes of ecobee not powering on?
Most power-on failures come from a loose or absent C-wire, a tripped circuit, or a failed transformer. Verifying 24V across R and C is a key first check.
Check the C-wire and the 24V supply first to identify power issues.
Do I need to reset my ecobee after a firmware update?
Usually not required, but some updates can cause temporary quirks. If you notice instability after an update, a restart or reset may help.
A restart often fixes post-update glitches.
Can a bad Wi-Fi connection affect thermostat performance?
Yes. Weak or unstable Wi‑Fi can prevent remote controls and cloud services from functioning properly. Reconnecting to a strong network often resolves issues.
A strong network connection is important for full ecobee functionality.
When should I call a professional for ecobee repair?
If you detect burnt wiring, buzzing, smells, or you cannot safely confirm 24V power, stop and contact a licensed HVAC technician.
If in doubt, it’s safer to bring in a pro.
Watch Video
What to Remember
- Power and wiring are the most frequent culprits.
- Safety first: power off before touching any wiring.
- Update firmware to resolve software glitches.
- Know when to call a pro for complex electrical issues.