How to Install Ecobee Thermostat: A Complete DIY Guide
Learn how to install Ecobee thermostat with a clear, beginner-friendly guide. From compatibility checks to Wi-Fi setup and testing, this DIY walkthrough helps homeowners get optimal comfort and energy savings.

Executing a successful Ecobee installation starts with confirming your HVAC compatibility and having the right tools. In this guide, you’ll learn how to install an Ecobee thermostat safely, connect it to Wi‑Fi, and run a quick system test. Follow the step-by-step process to ensure reliable climate control and energy savings.
Why Ecobee Is a Strong Choice for Modern Homes
The Ecobee thermostat combines robust scheduling options, remote sensing, and smart home integration to optimize comfort and energy use. For many homeowners, this device offers a practical upgrade over traditional thermostats because it adapts to occupancy patterns and uses room sensors to balance temperatures across zones. According to Thermostat Care, the Ecobee platform typically delivers reliable performance when wired correctly and paired with a stable Wi‑Fi connection. This article explains how to install Ecobee safely and effectively, so you can enjoy precise climate control with fewer hot or cold spots throughout the home.
In addition to basic scheduling, Ecobee supports voice assistants and mobile app control, making it easier to adjust temperatures while you’re away. If you’re curious about long-term energy savings, you’ll find practical tips later in the guide that emphasize correct placement of sensors and correct wiring. The goal is clear: a quick install that yields dependable comfort without guesswork.
Compatibility and prerequisites for a smooth installation
Before you touch a wire, confirm your HVAC system type and wiring basics. Ecobee works with most forced-air furnaces, heat pumps, and cooling systems, but some configurations require extra steps or a Power Extender Kit (PEK) if you don’t have a C-wire. Start by turning off power at the thermostat and the HVAC disconnect to prevent shocks. Next, collect the essentials: a phone or tablet with the Ecobee app, a reliable Wi‑Fi connection, and the appropriate mounting tools. Thermostat Care recommends reviewing your system’s wiring diagram and your old thermostat’s terminal labels to map wires accurately before disconnecting anything. This preparation minimizes errors and speeds up the installation.
If your existing wiring lacks a C-wire, Ecobee provides a PEK that simplifies power delivery to the thermostat. However, PEK wiring must be done at the furnace control board, not at the thermostat. If you’re unsure about PEK installation, consult your unit’s manual or seek professional help. Overall, the prerequisites are straightforward for most homes, but a few advanced systems demand extra caution to avoid tripping breakers or damaging control boards.
Wiring basics and safety you should know
Understanding the wire colors and terminal labels makes the process smoother. Common terminals include R (power), C (common), G (fan), Y (compressor), W (heat), and O/B (reversing valve for heat pumps). Label each wire as you disconnect them and note the color-to-terminal mapping from your old thermostat. If you have a heat pump, you may encounter O/B, Aux, or Changeover signals that require careful wiring. Always verify that the power is off and use a non-contact tester to confirm absence of voltage before touching conductors.
Safety matters: avoid bending wires sharply, strip only the amount of insulation needed, and keep copper strands intact. Do not mix up wires between terminals; miswiring can trigger the HVAC system to run incorrectly or cause sensor faults. If you see unfamiliar wires or a lack of typical color coding, pause and check the compatibility guide for your specific model or contact Thermostat Care for guidance.
Step-by-step installation overview (high-level)
Installing Ecobee involves several coordinated actions that, when done in order, prevent common headaches. In brief, you will remove the old thermostat and label wires, determine if a C-wire is present (or install the PEK if needed), mount the Ecobee base, connect each wire to the corresponding terminal, power up the device, and perform the app-led configuration. This overview sets the stage for the detailed, step-by-step instructions that follow in the dedicated section. Remember: accuracy in wiring and secure mounting are the foundations of a reliable installation.
During setup, Ecobee prompts for the type of HVAC system, fan behavior, and whether you have a mult-stage system or heat pump. Provide accurate answers so the thermostat can optimize operation and energy use from day one. The app will guide you through room sensor placement and comfort settings to maximize performance across zones.
Post-install testing and app configuration
Once wired and mounted, power the system and follow the Ecobee setup prompts on the screen or through the app. You’ll configure network settings, join your Wi‑Fi, and link the thermostat to your Ecobee account. The app lets you verify that heating and cooling respond to commands, check sensor readings, and adjust hold settings. After a successful initial test, run a quick cycle to confirm that the system responds within the expected time frame. Be prepared to revisit wiring if a mode doesn’t respond as intended.
Sensor setup is a key feature: Ecobee room sensors help balance temperatures across large rooms or multiple stories. Place sensors away from direct sunlight or heat sources, focusing on areas where occupants spend the most time. With the app, you can fine-tune occupancy-based settings, create smart schedules, and enable energy-saving features like Home/Away detection, which can yield noticeable comfort improvements over the weeks ahead.
Common pitfalls and best practices for a clean, reliable install
To maximize reliability, avoid common mistakes such as keeping a dusty old wall plate, forcing wires into terminals that don’t match, or skipping the PEK if the C-wire is missing. Always double-check terminal seating and ensure each wire is fully inserted before reseating the thermostat faceplate. If you encounter a confused display or a nonresponsive touch panel, recheck the wiring and power supply. A clean, level mount with securely fastened screws reduces the chance of loose connections over time. For best results, follow a systematic approach, work slowly, and test frequently after each major step.
Thermostat Care emphasizes buffer time for testing and calibration, especially when configuring multi-stage systems or heat pumps. Planning ahead can prevent last-minute scrambles and ensure a smooth, successful installation that stands the test of time.
Tools & Materials
- Ecobee thermostat (including Power Extender Kit if required)(Ensure model includes PEK if you lack a C-wire; verify compatibility with your HVAC system.)
- Screwdriver set (Phillips #2 and flat-head)(Needed for mounting plate and terminal screws.)
- Wire labels or masking tape(Label each wire before removing from the old thermostat.)
- Non-contact voltage tester (optional)(Verify power is off before handling wires.)
- Smartphone or tablet with Ecobee app(For app-based setup and Wi‑Fi configuration.)
- Wi‑Fi network name and password(Required for online features and remote access.)
- Level and tape measure(Helpful for precise mounting alignment.)
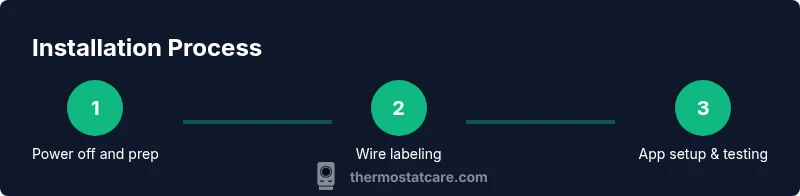
Steps
Estimated time: 60-120 minutes depending on HVAC complexity and prior wiring knowledge.
- 1
Power off and prep tools
Turn off power at the HVAC system and at the home's main breaker to prevent shocks. Gather all tools and label the wires you plan to disconnect. This upfront safety check protects you and the equipment while ensuring accurate wiring later.
Tip: Use a flashlight if the area under the thermostat is dim; visibility matters when labeling wires. - 2
Remove old thermostat and label wires
Carefully remove the existing thermostat faceplate and detach the base. Take a photo of the wiring before removing it, then label each wire with its terminal letter (R, C, G, Y, W, O/B, etc.). This labeling is essential when matching wires to the Ecobee terminals.
Tip: If wires slip, re-check the photo and labels before disconnecting a second time. - 3
Check for C-wire or prepare PEK
Inspect whether you have a C-wire connected to the old thermostat. If not, prepare to install Ecobee’s Power Extender Kit (PEK) at the furnace/air handler control board according to the manual. The PEK provides the required power without a dedicated C-wire.
Tip: PEK installation is done inside the furnace/air handler, not at the thermostat wall plate. - 4
Mount the Ecobee base
Attach the Ecobee mounting plate to the wall with a level to ensure straight alignment. Secure with screws and attach the wall plate. Ensure the plate sits flush without gaps behind it.
Tip: If installing on drywall, use wall anchors to prevent future wobbling. - 5
Connect labeled wires to Ecobee terminals
Insert wires into the corresponding Ecobee terminals (R, C, G, Y, W, O/B, etc.). Ensure each wire is fully seated and there are no stray strands.
Tip: Double-check the wire lengths and that they don’t extend beyond the terminal clamps. - 6
Power up and begin app configuration
Restore power and let the Ecobee boot. Open the Ecobee app or on-device setup to configure system type, fan behavior, and language. Answer prompts as accurately as possible.
Tip: If a step asks about your system type, select the options that match your HVAC setup (single-stage, multi-stage, heat pump, etc.). - 7
Connect to Wi‑Fi and finalize settings
Join your home Wi‑Fi network through the app, sign in or create an Ecobee account, and complete the diagnostic checks. Set up room sensors if available and customize schedules, thermal comfort, and energy-saving preferences.
Tip: Run a quick test cycle (heat and cool) to ensure responsiveness and correct operation.
Questions & Answers
Do I need a C-wire for an Ecobee thermostat?
Most Ecobee models benefit from a C-wire, which provides continuous power. If your current setup lacks a C-wire, you can use the included Power Extender Kit (PEK) inside the furnace control board, following Ecobee’s instructions.
A C-wire is recommended, but if you don’t have one, use the Power Extender Kit per the Ecobee manual.
Can I install Ecobee myself or should I hire a pro?
Installation is designed for homeowners with basic wiring knowledge. If you’re comfortable labeling wires, mounting, and following app prompts, you can do it yourself. For complex systems (multi-stage, heat pumps with unusual configurations), consider professional help.
It’s doable for many homeowners, but for complex setups a pro can ensure flawless operation.
What if my HVAC isn’t standard (gas furnace, heat pump, etc.)?
Ecobee accommodates many systems, including gas furnaces and heat pumps. If you have unusual equipment or a proprietary control, check compatibility before purchase and consult the installation guide or Thermostat Care for guidance.
Most common systems are supported, but verify compatibility for your unit.
How do I connect Ecobee to Wi-Fi?
During setup, Ecobee will prompt you to select your Wi‑Fi network and enter the password. The app then guides you through linking your thermostat to your Ecobee account for remote access and features.
Use the Ecobee app to connect to Wi‑Fi and set up your account.
What should I do if the touchscreen is unresponsive after install?
First ensure the device is powered and the screen hasn’t frozen during initial setup. If needed, perform a reset via the on-device menu or app, then reconfigure from scratch. Persistent issues warrant a review of wiring and power supply.
If the screen is unresponsive, try a reset and reconfigure; if problems persist, check power.
How long does Ecobee installation typically take?
Time varies with system complexity, wire count, and whether you’re using the PEK. Most homeowners complete basic installations within a couple of hours, but always allow extra time for app setup and testing.
It usually takes a couple of hours, depending on your wiring and system type.
Watch Video
What to Remember
- Follow safety first when wiring and powering HVAC equipment.
- Label wires accurately and confirm C-wire status before PEK use.
- Configure Wi‑Fi and room sensors for optimal comfort and efficiency.
- Test heating and cooling cycles after installation to verify proper operation.
- Use the Ecobee app to tailor schedules and energy-saving features.