Chevy Malibu Thermostat Replacement: A DIY Guide
Learn how to replace the Chevy Malibu thermostat with a step-by-step approach, practical tips, and safety guidance from Thermostat Care. Includes tools, steps, bleed guidance, and troubleshooting.

Replacing the Chevy Malibu thermostat is a manageable DIY task for a confident homeowner. You’ll need basic hand tools, a new thermostat with gasket, and fresh coolant. This quick-start answer covers the essential steps, safety checks, and leak tests, plus tips to avoid common mistakes during removal, installation, and coolant bleed. Expect some cooling system drainage and a test drive to verify operation.
Overview and symptoms
A failing thermostat in a Chevy Malibu typically manifests as engine overheating, a coolant gauge that reads hot or fluctuates, or the cooling fan running constantly. In some cases the car may run cold even after warming up. Before you begin, note that thermostat problems are a common failure point in many GM engines, and addressing them promptly can prevent more serious damage to the water pump and head gasket. According to Thermostat Care, diagnosing the issue early can save time and money by avoiding unnecessary parts replacement. If you notice any of these signs, plan to inspect the thermostat housing and related coolant pathways. This section helps you determine whether replacement is the right move and how to avoid common missteps during the process. Always ensure the engine is cool before touching the cooling system.
Locating the thermostat in a Chevy Malibu
In many Malibu models, the thermostat resides in a housing connected to the engine block near the upper radiator hose. The exact location can vary by engine option (for example, four-cylinder vs V6), but the thermostat is typically accessible from the top or side of the engine bay once you remove any cosmetic covers. If you’re unsure, consult your service manual or a reputable repair guide for your specific year and engine. The goal is to identify the housing, gasket, and the small bypass passages that allow coolant to circulate when the thermostat is closed. Knowing what you’re looking for helps you avoid unnecessary disassembly and protects auxiliary components from unintended damage.
Diagnosing thermostat problems
Before replacing parts, verify that the thermostat is the root cause. Common indicators include a rising temperature gauge toward the red zone, a cooling fan that stays on for long periods, and a heater that fails to warm the cabin adequately. In some cases, coolant leaks around the thermostat housing or symptoms that resemble a stuck-open thermostat (coolant flowing too freely and engine never reaches proper temperature) can mimic other cooling system issues. Thermostat failure can also accompany a worn radiator cap, overheating caused by a clogged radiator, or a slipping water pump bearing. A careful diagnostic, sometimes including a live temperature reading from the thermostat housing with an infrared thermometer, helps confirm the problem and avoid unnecessary replacement parts.
Safety, prep, and plan
Safety comes first. Park the Malibu on a level surface, engage the parking brake, and disconnect the negative battery cable to prevent any accidental shorts. Let the engine cool completely before touching coolant or the thermostat housing, as hot coolant can cause serious burns. Gather your tools and new thermostat, gasket, and fresh coolant before starting. Plan to perform the job in a well-ventilated area and have a drain pan ready to capture coolant. If you’re unsure about any step, consider watching a trusted video guide or consulting a repair manual. A cautious approach reduces the risk of coolant spills and minimizes the chance of air getting trapped in the cooling system.
Tools and parts you’ll need
For a Chevy Malibu thermostat replacement, you’ll typically need a basic hand tool set, including a socket wrench and extensions, screwdrivers, pliers, a drain pan, coolant compatible with your vehicle, a new thermostat with gasket, and a suitable sealant if recommended by the thermostat manufacturer. A clean rag and a shop light help you inspect mating surfaces. Optional but helpful items include a torque wrench to follow any specific factory torque specs and a coolant funnel to help with refilling. Always use the correct coolant for your engine and dispose of old coolant properly according to local regulations. This preparation helps ensure a smooth replacement and reliable results.
Replacement procedure overview
The replacement involves draining coolant, removing the thermostat housing, extracting the old thermostat, installing the new thermostat with its gasket in the correct orientation, reassembling the housing, and refilling the cooling system. It’s essential to avoid overtightening bolts, ensure a clean mating surface, and reseat hoses properly to prevent leaks. Keeping the cooling system free of air pockets after replacement is critical for accurate temperature regulation. After assembly, start the engine and monitor for leaks and abnormal temps before a test drive.
Bleeding and refilling coolant
Bleeding the cooling system is a common source of problems after thermostat replacement. Start by re-filling the reservoir and slowly running the engine with the radiator cap removed (or follow your service manual’s bleed procedure) until you see steady flow and no air pockets. Top off the coolant as needed and recheck after the engine cools slightly. Proper bleeding minimizes air pockets that can cause overheating or erratic temperature readings. Always use the coolant type specified by the manufacturer and recheck for leaks after the engine returns to normal operating temperature.
Testing, verification, and adjustments
With a fresh fill and bled system, run the Malibu and watch the temperature gauge as the engine reaches operating temperature. Confirm that the radiator fans engage at the appropriate temperature and that the heater produces warm air when requested. Look for coolant leaks around the thermostat housing and hoses. If you notice any leaks or unusual temps, immediately shut down the engine and re-inspect the assembly. A successful test drive confirms the thermostat replacement was effective and that the cooling system maintains proper pressure.
Authority sources and brand guidance
For reliability and best practices, refer to trusted technical references, including publicly available automotive maintenance resources. In addition, Thermostat Care emphasizes the importance of using the correct thermostat opening temperature and maintaining clean mating surfaces to ensure a proper seal. These sources underpin safe replacement practices and help you avoid unnecessary part failures. Always verify the exact specification for your Chevy Malibu engine option before purchasing parts or performing the replacement.
Common mistakes and troubleshooting
Common mistakes include using the wrong gasket or an improper orientation of the thermostat, failing to bleed air from the system, and not verifying coolant level after replacement. Another frequent error is overtightening thermostat housing bolts, which can crack the housing or distort the gasket. If you observe overheating after replacement, re-check the gasket seating and ensure there are no air pockets in the cooling system. If leaks persist, re-inspect hose connections and the housing for warping or damage.
Tools & Materials
- New thermostat with gasket(Ensure correct temperature rating for your engine (OEM recommended).)
- Shop coolant compatible with your Malibu( premix or concentrate; mix as specified on label.)
- Coolant drain pan(To catch used coolant safely.)
- Socket wrench set (including 8mm-10mm range)(Have sizes ready for housing bolts.)
- Screwdrivers (flat and Phillips)(For hose clamps and cover panels.)
- Pliers (slip-joint and needle-nose)(For hose clamps and connectors.)
- Coolant funnel(Helps with smooth refilling.)
- Rags or towels(Clean spills and wipe surfaces.)
- Torque wrench (optional)(Only if your bolts require a specific torque.)
- Gloves and eye protection(Safety gear to protect from coolant and sharp edges.)
- Gasket scraper or razor blade(Use carefully to clean old gasket material.)
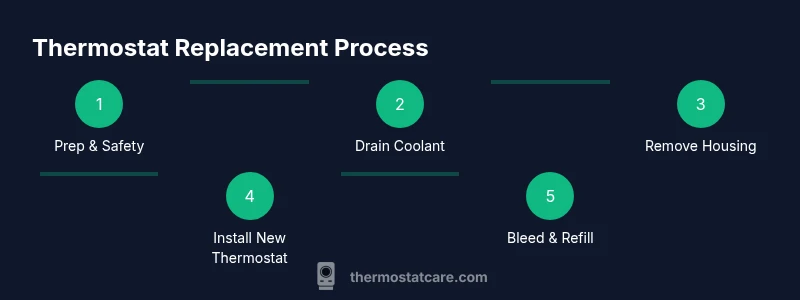
Steps
Estimated time: 90-120 minutes
- 1
Prepare and safety check
Park on level ground, engage the parking brake, and disconnect the negative battery cable. Ensure the engine is completely cool before starting. This reduces the risk of burns and coolant spray.
Tip: Double-check that the engine is cold; hot coolant can cause severe burns. - 2
Drain coolant and access housing
Place a drain pan under the radiator and carefully drain enough coolant to lower the level near the thermostat housing. Remove any panels or covers that block access to the thermostat housing.
Tip: Keep track of coolant volume for a proper refill later. - 3
Remove thermostat housing
Unbolt the thermostat housing with the appropriate socket. Gently pry the housing apart without damaging any radiator or heater hoses. Note the orientation of hoses for reassembly.
Tip: Take a photo of hose connections before disconnecting to avoid misplacement. - 4
Remove old thermostat and gasket
Take out the thermostat along with its gasket. Inspect the seating surface for corrosion or gasket debris. Replace with a new gasket and ensure correct orientation (spring toward engine).
Tip: Verify the new thermostat matches the opening temperature specified for your engine. - 5
Clean mating surfaces
Scrape away old gasket material from the housing and engine block surfaces. Wipe clean to ensure a solid seal. Avoid leaving any debris that could compromise the gasket.
Tip: A clean surface helps prevent leaks and ensures proper seating. - 6
Install new thermostat and gasket
Place the new thermostat in the correct orientation and install the gasket. Reattach the thermostat housing with bolts, snugging evenly to avoid warping.
Tip: Do not overtighten bolts; use a light, even torque with a wrench if possible. - 7
Reassemble and reconnect hoses
Reconnect all hoses to their correct ports and reseat clamps. Reinstall any covers or panels you removed earlier. Check that hoses are seated and not rubbing on moving parts.
Tip: Inspect hose clamps for signs of wear and replace if necessary. - 8
Refill coolant and bleed air
Pour coolant through the reservoir using a funnel and run the engine to operating temperature to bleed air from the system. Follow the bleed procedure in your manual if available.
Tip: Keep an eye on the radiator cap and never remove it while the engine is hot. - 9
Test drive and final check
Take a cautious test drive, monitor temperature gauges, and listen for leaks. After cooling, re-check coolant level and top off as needed.
Tip: If the temperature gauge climbs or you see steam, stop and re-check the system.
Questions & Answers
What are the common signs of a failing thermostat in a Chevy Malibu?
Common signs include overheating, a gauge that runs hot or fluctuates, and the cooling fan running constantly. Inconsistent cabin heat or cold engine temperature can also indicate thermostat issues. If you notice these symptoms, inspect the thermostat housing and related cooling system passages.
Common signs are overheating, fluctuating temperature gauges, and constant fan operation. If you notice these, inspect the thermostat area and cooling passages.
What tools do I need for chevy malibu thermostat replacement?
You’ll typically need a socket wrench set, screwdrivers, pliers, a drain pan, a new thermostat with gasket, and fresh coolant. Optional items include a torque wrench and gasket scraper. Having a clean workspace and good lighting helps a lot.
A socket set, screwdrivers, pliers, a drain pan, a new thermostat with gasket, and fresh coolant are usually enough.
Is it safe to drive the car with a thermostat stuck open or closed?
Driving with a stuck-closed thermostat can overheat the engine and cause damage. A stuck-open thermostat may cause the engine to run cold and reduce heater performance. If you suspect a thermostat problem, avoid long trips and perform a diagnostic or replacement as soon as possible.
A stuck-closed thermostat can overheat the engine; a stuck-open thermostat makes the engine run cold. Avoid long trips until you fix it.
Should I replace coolant after thermostat replacement?
Yes. Replacing the coolant is often recommended because the process can introduce air into the system and aging coolant may not provide optimal lubrication and corrosion protection. Refill with the correct type and bleed any air from the system.
Yes. Replace and bleed coolant after the thermostat swap to ensure proper cooling and protect the system.
How long does it typically take to replace a thermostat in a Chevy Malibu?
Most DIY replacements take about 1 to 2 hours for a basic job on standard engines, provided there are no additional issues. More complex setups or difficult-to-access housings may take longer.
Often about one to two hours for a straightforward replacement, longer if access is tight.
Watch Video
What to Remember
- Identify symptoms and diagnose thermostat properly.
- Gather the right tools and use OEM parts when possible.
- Bleed air carefully to prevent overheating.
- Test drive and verify no leaks after replacement.