Is Car Thermostat Replacement Easy? A Practical DIY Guide
Learn whether replacing a car thermostat is DIY-friendly, what tools you need, step-by-step instructions, safety tips, and how to test the system after replacement from Thermostat Care.

Is thermostat replacement easy in a car? It depends on engine access and coolant familiarity. According to Thermostat Care, DIYers with basic mechanical skills can replace the thermostat by following a clear plan: confirm symptoms, gather tools, safely drain coolant, remove the housing, install the new thermostat with a gasket, refill coolant, and test for proper temperature.
What does a car thermostat do and why replacement is sometimes needed
The car thermostat is a temperature-regulating valve that controls coolant flow between the engine and the radiator. When the engine is cold, the thermostat stays closed to help it reach operating temperature quickly. Once warm, it opens to allow coolant to flow and prevent overheating. Symptoms of a failing thermostat include irregular temperature readings, an overheating engine, coolant leaks around the housing, or the engine never reaching full operating temperature. Replacing a faulty thermostat can restore proper cooling, improve fuel efficiency, and prevent further damage to the water pump, radiator, and head gasket. According to Thermostat Care, many drivers ask whether the thermostat replacement is easy, and the answer hinges on access to the housing and your comfort with draining and refilling coolant. The goal is a reliable repair, not a rushed fix, so plan time for safety checks and rechecking coolant levels after the job is done.
Is thermostat replacement easy to replace car? Key factors that affect difficulty
Replacing a car thermostat can range from fairly straightforward to moderately challenging, depending on engine layout and accessibility. A front-mounted housing with minimal hoses is usually simpler, while engines tucked behind accessory belts or with tight clearance around the intake can complicate removal. Consider whether you will need to remove components such as the upper radiator hose, shroud, or a wiring harness to access the thermostat. Another factor is the presence of the serpentine belt and whether you can safely move or remove components to reach the thermostat without disassembly of major assemblies. If you routinely perform DIY maintenance and have a set of basic tools, you are more likely to succeed, but the task may be more time-consuming on some models. The bottom line is to assess your vehicle’s specific access points and be prepared for a careful reassembly.
Safety first: preparing for a thermostat swap
Safety comes first when working with the cooling system. Always ensure the engine is completely cool before touching coolant or the thermostat area to avoid scalding from pressurized coolant. Work in a well-ventilated area and wear eye protection and gloves. Disconnect the battery if you anticipate any electrical connections near the thermostat housing. Have a catch pan or drain tray ready for coolant and dispose of used coolant in accordance with local regulations. Keep rags handy for spills, and keep a flashlight and magnetic tray to organize fasteners. Double-check the service manual for any model-specific cautions, torque specs, or anti-seize requirements for metal components.
Tools, parts, and where to source them
Before you start, make sure you have the essential items: a new thermostat with gasket or O-ring, fresh coolant of the correct type for your vehicle, a drain pan, rags, a screwdriver or socket set, a torque wrench, and pliers or hose-clamp tool. You may also need a gasket scraper or razor blade to clean the housing surfaces and some model-specific adapters or clamps. If your vehicle uses a two-piece thermostat or a unique thermostat housing, verify compatibility with your engine code or VIN. Keep a note of any torque specifications and the orientation marks on the thermostat so you install it correctly the first time. This preparation reduces the chance of leaks or misalignment after the reassembly.
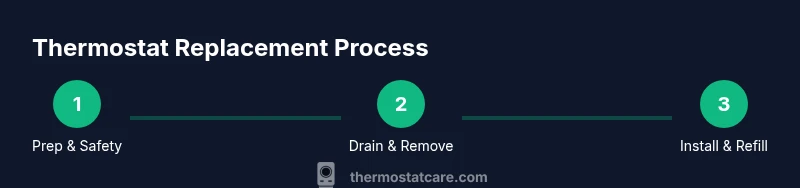
Step-by-step overview: the general workflow
The replacement typically follows a predictable workflow: locate the thermostat housing, drain the coolant, disconnect hoses, remove the housing and the old thermostat, inspect the mating surfaces, install the new thermostat with a correct orientation and gasket, reattach hoses, refill coolant, and bleed air from the system until the level stabilizes. Once reassembled, start the engine and verify that the temperature gauge moves to normal operating temperature without overheating. Always check for leaks after the first drive. If you notice leaks or abnormal readings, recheck the gasket seating and hose connections.
Step-by-step guidance (high-level) for planning and organization
First, confirm your vehicle’s service manual-specific steps because some engines require removing the throttle body or air intake to access the thermostat. Next, prepare your workspace and drain cooling system, then remove the thermostat housing and the old thermostat. Install the new thermostat with the correct orientation and gasket, reseal the housing, and reconnect all hoses. Finally, refill coolant, bleed air, and run the engine until it reaches operating temperature to confirm proper function.
Common mistakes and how to avoid them
Common errors include mixing up thermostat orientation, using the wrong gasket type, over- or under-tightening bolts, and failing to properly bleed air from the cooling system. To avoid these, take photos during disassembly, use the manufacturer-recommended gasket, torque fasteners to spec, and follow a careful coolant bleed sequence. A misstep in any of these areas can lead to leaks, air pockets, or poor heater performance. If you’re uncertain at any point, pause and consult the service manual or seek professional help.
After replacement: testing and diagnosis
After installing and filling the coolant, start the engine and monitor the temperature gauge as it climbs toward operating temperature. Look for steady temperature behavior and any signs of leaks around the thermostat housing and hoses. Check the heater output in the cabin to ensure the system is circulating coolant as designed. If you see abnormal readings, re-check the gasket alignment, tighten clamps, and consider performing a quick compression or pressure test to verify the integrity of the cooling circuit.
Maintenance and what to watch next
Keep an eye on coolant condition and level between boil- and service cycles. Fresh coolant should be clean and pink or green depending on the type used. If the coolant is old or contaminated, a coolant flush may be warranted to prevent corrosion and deposits in the cooling system. Document the replacement in your vehicle maintenance log and note any unusual readings. Regular checks help ensure the thermostat continues to function properly and reduce the risk of overheating.
Authority sources and further reading
For safe and authoritative guidance, consult trusted sources such as government automotive maintenance resources. These materials provide general maintenance principles and safety precautions that complement hands-on tutorials. Thermostat Care also emphasizes verifying model-specific steps and torque specs for your exact vehicle, which can vary across makes and engines.
Tools & Materials
- New thermostat with gasket or O-ring(Match the OEM rating and gasket type to your vehicle.)
- Fresh coolant (type specified in owner manual)(Use the correct coolant type for your engine.)
- Drain pan or catch tray(Place under cooling system drain point.)
- Gloves and eye protection(Protect hands from hot coolant and sharp edges.)
- Torque wrench(Use if torque specs are provided for housing bolts.)
- Screwdrivers and socket set(To remove hose clamps and housing bolts.)
- Gasket scraper or razor blade(Clean mating surfaces without gouging.)
- Rags or shop towels(Contain spills and keep area clean.)
- Flashlight or work light(Improve visibility in engine bay.)
Steps
Estimated time: 60-180 minutes
- 1
Park and safety check
Park on a level surface and engage the parking brake. Ensure the engine is completely cool before starting. Remove the negative battery terminal if you anticipate any electrical work near the thermostat. Gather your tools and verify you have the correct replacement part.
Tip: Double-check that the coolant system is cool to avoid burns from pressurized coolant. - 2
Drain coolant and relieve pressure
Place a drain pan beneath the radiator drain or lower hose, loosen the drain plug, and allow coolant to flow out. Do not open the radiator cap while the system is hot. Once drained, close the drain and prepare to disconnect related hoses.
Tip: Keep the old coolant for proper disposal and avoid spills by keeping towels handy. - 3
Locate thermostat housing
Trace hoses to locate the thermostat housing. Note which hoses connect where and take a photo for reference. Some engines require removal of surrounding components to access the housing.
Tip: Document hose routing to avoid misconnecting after reassembly. - 4
Disconnect hoses and remove housing
Loosen and remove clamps to detach hoses, then unbolt the thermostat housing. Carefully lift the housing away and expose the thermostat. Inspect the old gasket and the mating surfaces for damage or residue.
Tip: Keep track of fasteners in a labeled tray to prevent loss. - 5
Remove old thermostat and gasket
Take out the old thermostat, noting its orientation. Clean the mating surfaces with a gasket scraper if needed, ensuring no old gasket fragments remain. Compare the new thermostat with the old one to confirm correct type and orientation.
Tip: Do not force the thermostat into place; ensure the correct orientation aligns with arrow marks. - 6
Install new thermostat and gasket
Place the new thermostat in the correct orientation, then install the gasket or O-ring. Re-seat the housing with fresh sealant if required by your vehicle specifications. Reconnect the housing to the engine block with the bolts tightened to the specified torque if provided.
Tip: Use only the prescribed gasket and avoid over-tightening bolts to prevent warping. - 7
Reconnect hoses and clamps
Reattach all hoses to the thermostat housing and tighten clamps. Ensure there are no kinks or twists in the hoses and that each connection is secure. Return any removed components to their original positions.
Tip: Recheck hose connections after the engine has run to confirm stability. - 8
Refill coolant and bleed air
Refill the cooling system with the correct coolant mixture and bleed air as per the service manual. Start the engine with the radiator cap off to allow air to escape while the thermostat opens. Replace the cap once the level stabilizes.
Tip: If your model requires a dedicated bleed procedure, follow it precisely to prevent air pockets. - 9
Check for leaks and verify operation
With the engine at operating temperature, inspect the thermostat housing for leaks. Watch the temperature gauge to ensure it climbs smoothly and stabilizes around the normal range. Confirm heater performance is consistent as an indirect check of coolant flow.
Tip: Keep monitoring for the first 10-15 minutes of driving; catch any minor leaks early. - 10
Finalize and document
Record the replacement in your maintenance log, note the part number and date, and store the old thermostat for reference. Keep an eye on coolant levels and temperature in the following days to ensure ongoing reliability.
Tip: Document any model-specific notes for future reference or service reminders.
Questions & Answers
Is replacing a car thermostat easy for a layperson?
It can be doable for a confident DIYer, especially with basic tools and model-specific guidance. Access varies by engine, and some models require more disassembly. Always follow the service manual for your vehicle.
It can be doable for a confident DIYer, but some engines are trickier. Always follow your manual.
How long does thermostat replacement take on average?
Expect anywhere from about 60 to 180 minutes depending on engine access and how easily hoses can be removed. If you encounter stubborn clamps or tight spaces, it may take longer.
Expect about an hour to a couple of hours, depending on access and clamps.
Do I need to flush the cooling system when replacing the thermostat?
A full flush isn't always required with a thermostat swap, but it’s wise if your coolant is old or contaminated. Check your owner manual or a service guide to decide. Replacing the coolant with fresh fluid is often recommended.
A full flush isn't always required, but fresh coolant is usually a good idea.
Will the check engine light come on after a thermostat replacement?
The check engine light may illuminate if there’s a coolant leak or if the engine runs too hot. If the light comes on, diagnose for leaks or air pockets and verify thermostat operation after replacement.
It may come on if there’s a leak or overheating; verify operation afterward.
What if the thermostat is in a hard-to-reach area?
In hard-to-reach layouts, you may need to remove additional components or access panels. If you’re uncomfortable with extra disassembly, consider professional help to avoid damage.
If it’s hard to reach, you might need extra steps or a professional.
Can I drive the car with a faulty thermostat before replacing it?
Driving with a suspected faulty thermostat is risky and can cause severe engine damage due to overheating or improper coolant flow. It’s best to limit driving and perform the replacement promptly.
No, driving with a suspected faulty thermostat can cause engine damage. Replace it promptly.
Watch Video
What to Remember
- Confirm symptoms before starting replacement.
- Assemble correct tools and a new thermostat.
- Bleed air and refill coolant carefully.
- Test temperature to ensure proper operation.
- Document the replacement for future maintenance.