How to Install a Thermostat in a Car: A Step-by-Step Guide
Learn how to replace your car's thermostat safely with a clear, practical process. This guide covers diagnosis, removal, replacement, coolant bleeding, and testing to prevent overheating and engine damage.

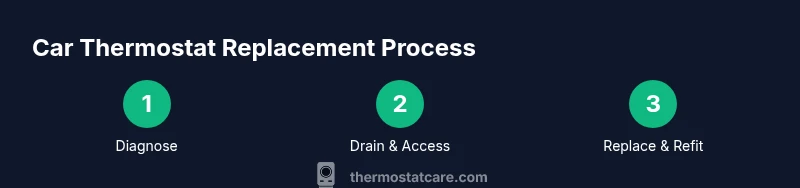
You’ll learn how to put a thermostat in a car by diagnosing a faulty unit, safely draining coolant, removing the old thermostat, installing a new one with the correct orientation, refilling and bleeding the cooling system, and testing for leaks and proper opening. Gather basic hand tools, replacement thermostat, new gasket or O‑ring, coolant, and a catch pan.
The role of a thermostat in a car's cooling system
In every internal combustion engine, the thermostat acts as a gatekeeper for coolant flow. When the engine is cold, the thermostat remains closed to help the engine reach its optimal operating temperature quickly. Once the coolant reaches the designed temperature, the thermostat opens to allow coolant to circulate through the radiator, maintaining a stable engine temperature and preventing overheating. A thermostat that sticks closed can cause rapid overheating, while a thermostat that sticks open can prevent the engine from reaching its efficient operating temperature, leading to reduced fuel economy and performance. According to Thermostat Care, understanding this component is essential for diagnosing cooling issues and planning a safe replacement. By knowing how the thermostat influences flow, you can better interpret overheating warnings, inconsistent temperature readings, and heat-on-off cycling in your vehicle.
If you notice symptoms such as an overheating gauge rising quickly, a heater that produces weak warmth, or coolant loss without a clear leak, the thermostat is a plausible culprit. These signs should be evaluated alongside other cooling system components such as the water pump, radiator, and fans. A proper replacement requires attention to orientation and a good gasket seal to prevent leaks and air ingress.
A properly functioning thermostat helps your engine maintain a steady temperature, improves fuel efficiency, and extends engine life. Treat thermostat replacement as a maintenance task that contributes to overall reliability, especially in regions with extreme temperatures where cooling system demands are higher.
Brand note: The Thermostat Care team emphasizes that while DIY replacement is feasible for many car owners, following the vehicle’s service manual ensures correct torque values, gasket seating, and thermostat orientation.
Safety first: prerequisites and environment
Working on cooling systems involves hot fluids and pressurized channels. Before you touch anything, ensure you are in a well-ventilated area with the engine cool. Park on a level surface, engage the parking brake, and disconnect the negative battery terminal to minimize electrical hazards and accidental starting during work. Wear protective gloves and eye protection to guard against coolant contact, which can be irritating. Have a coolant catch pan ready, as draining can release hot liquid that may burn skin. Dispose of old coolant following local hazardous-waste guidelines; never pour it down the drain. Keep children and pets away from the work area, and avoid attempting this repair if you are unsure about the vehicle’s cooling system. Safety first helps prevent burns, injuries, and environmental contamination.
Diagnosing thermostat problems: when to replace
Before you begin replacing the thermostat, confirm that the thermostat is the root cause rather than another cooling component. Occasional overheating, erratic temperature readings, or a heater that fails to warm up can indicate a thermostat issue, but these symptoms can also arise from water pumps, low coolant levels, or a clogged radiator. Check for proper radiator fan operation—if the fan isn’t engaging when the engine warms up, cooling performance may be insufficient even with a good thermostat. A test for the thermostat’s function commonly involves checking whether the coolant flow is restricted when the engine is warm. If the thermostat remains closed at normal operating temperatures, the engine can overheat quickly. If it opens too early, the engine may run cooler than optimal, reducing heater performance and efficiency. Document symptoms and test results so you can assess whether replacement is the right course.
Note that service manuals provide specific test procedures and service bulletins for thermostat design variations across makes and models. When in doubt, consult the vehicle’s manual or a trusted technician.
What you will need: tools, parts, and replacements
Having the right tools and replacement parts on hand makes the process smoother and reduces the risk of damaging components. Essential items include a basic socket and wrench set, screwdrivers, pliers, a coolant catch pan, a new thermostat, a new gasket or O-ring, and the appropriate coolant mix for your vehicle. Depending on the engine layout, you may also need a torque wrench, funnel, anti-seize compound for threads, and a clean shop rag. Always verify the exact thermostat type for your year, make, and model, as there are variations in orientation and gasket design.
A common mistake is choosing the wrong thermostat or gasket, which can lead to leaks or improper opening. Check the part number with your parts supplier or manufacturer specifications. If your vehicle uses a specific coolant type, prepare the correct mix (usually 50/50 with distilled water) before refilling.
Planning the replacement: approach and steps
Approach your replacement methodically. Start by locating the thermostat housing, which is typically connected to the upper radiator hose or mounted near the engine block. Ensure you have adequate space to work and a clean bin for old gasket debris. Do not rush the process; small missteps—such as using excessive force on clamps or hoses—can damage components and create leaks. Take photos or notes as you go so reassembly is straightforward. Keep a running checklist: confirm you have the correct thermostat, prepare tools, drain coolant, remove the housing, replace the thermostat while noting orientation, reseal the housing, refill coolant, and bleed air until the system is free of air pockets. A thoughtful plan reduces the risk of leaks and helps you finish with a reliable, long-lasting repair. Thermostat orientation matters: many thermostats have a small tab or nipple alignment that must face the engine block or a specific direction; refer to your vehicle’s service manual for the exact orientation.
Step 1: Drain coolant and open the system
With the engine cool, place a drain pan beneath the thermostat housing or coolant drain valve. Loosen the drain plug or radiator drain valve to release coolant into the pan. After draining, carefully remove the lower radiator hose or the portion of the housing that remains attached, being mindful of residual pressure. This step reduces the risk of coolant spray when disconnecting components. Keep the coolant for reuse if it’s clean, or dispose of it according to local guidelines.
Step 2: Remove thermostat housing and old thermostat
Remove the bolts holding the thermostat housing in place and gently separate the housing from the engine. Disconnect any hoses routed to the housing, being careful not to damage hose clamps. Remove the old thermostat and gasket, inspecting the housing mating surfaces for any gasket debris or scale. Clean the surfaces with a soft scraper or plastic putty knife, keeping metal surfaces free of gouges. If a preload or spring assembly is present, set it aside carefully to avoid misplacement.
Step 3: Install the new thermostat and gasket
Align the new thermostat in the same orientation as the old unit, ensuring correct seating against the block. Install the new gasket or O-ring, applying a light coat of gasket sealant only if recommended by the thermostat manufacturer. Reinstall the thermostat housing, tightening bolts to the vehicle’s specified torque in a crisscross pattern to ensure even sealing. Reconnect any hoses that were removed and confirm clamps are snug but not over-tightened. A properly seated thermostat with a fresh gasket prevents leaks and ensures reliable operation.
Step 4: Refill coolant, bleed air, and test
Refill the cooling system with the recommended coolant mix until the reservoir is full. Start the engine and allow it to reach operating temperature while keeping the radiator cap off or using the bleed valves if your vehicle has them; this helps air escape. Monitor the temperature gauge and watch for coolant leaks around the housing and hoses. When the engine reaches normal temperature and the thermostat cycles open, top off the coolant to the proper level and reinstall the reservoir cap. Check for leaks after a short drive and recheck the level once cooled.
Final checks and maintenance tips
After completing the replacement, perform a short test drive in a safe area to confirm consistent temperature behavior and heater performance. Check for coolant leaks around the housing, hoses, and clamps. If you notice white steam or a sweet smell indicating coolant loss, stop and re-examine the connections and seals. Maintain regular coolant replacement according to your vehicle’s maintenance schedule and inspect hoses for wear. Keeping the cooling system clean and properly filled helps protect the engine from overheating and supports long-term reliability.
Tools & Materials
- Socket set with metric sizes(18mm/19mm commonly used on thermostat housing bolts; verify by vehicle model.)
- Screwdrivers (flat-head and Phillips)(Flat-head for prying; Phillips for removing clamps.)
- Pliers (slip-joint or needle-nose)(Useful for hose clamps and stubborn hoses.)
- Coolant catch pan(Capable of holding several liters; catch spills safely.)
- New thermostat(Match OEM or equivalent replacement for your vehicle.)
- New gasket or O-ring(New gasket ensures a proper seal.)
- Coolant(Prepare the correct coolant type and mixture for your vehicle.)
- Torque wrench(Optional but helpful to meet service specs.)
- Rags and degreaser(Clean surfaces and wipe spills.)
Steps
Estimated time: 90-180 minutes
- 1
Prepare workspace and safety
Ensure engine is cold, disconnect the negative battery, and gather all required tools. Set up your drain pan and have a plan to handle hot coolant safely. This initial preparation minimizes missteps during the repair.
Tip: Double-check vehicle-specific procedures in the service manual before starting. - 2
Drain coolant and access housing
Place the drain pan beneath the thermostat housing area, open the drain valve or remove the lower hose to drain coolant. This reduces pressure and makes disassembly cleaner.
Tip: Reserve some coolant in a clean container if you plan to reuse it. - 3
Remove thermostat housing
Unbolt the housing and detach any hoses to expose the thermostat. Inspect for debris or gasket remnants.
Tip: Keep track of bolts and hoses; use a labeled tray to avoid mix-ups. - 4
Extract old thermostat and gasket
Carefully remove the old thermostat and gasket. Inspect the housing and surfaces for damage or warping before installing the new part.
Tip: Take a photo for reference if the arrangement is complex. - 5
Install new thermostat and gasket
Position the new thermostat in the correct orientation and seat the gasket or O-ring. Reinstall the housing and tighten to the manufacturer’s torque spec.
Tip: Ensure the thermostat’s reference tab aligns with the engine block if required by your model. - 6
Reconnect hoses and seals
Reconnect any hoses, clamps, and sensors. Verify clamps are snug but not overtightened to avoid hose damage.
Tip: Check for mismatched hoses during reassembly. - 7
Refill cooling system and bleed air
Fill with the correct coolant mix, then bleed air using the free bleed path or radiator cap method per your manual. Watch for steady flow with no air pockets.
Tip: Keep the reservoir at proper level during bleeding. - 8
Test run and final checks
Start the engine, let it reach operating temperature, and confirm the thermostat opens and closes as designed. Check for leaks and top off coolant if needed after cooling.
Tip: Monitor temperature gauge and heater performance; address any leaks promptly.
Questions & Answers
What are common signs of a failing car thermostat?
Common signs include overheating, erratic temperature gauges, heater temperature loss, and coolant leaks near the thermostat housing. These symptoms can also be caused by other cooling components, so verify with a systematic check.
Look for overheating, fluctuating temperature gauges, or poor heater performance. If these occur, inspect the thermostat and surrounding cooling components.
Can I drive a car with a thermostat stuck closed?
Driving with a stuck-closed thermostat can cause rapid overheating and severe engine damage. If you suspect this, stop driving and seek professional help to prevent costly repairs.
No. If you suspect the thermostat is stuck closed, stop driving and have the vehicle checked.
Do I need to flush the cooling system when replacing the thermostat?
Flushing is not always required for thermostat replacement, but it can help remove debris and improve cooling efficiency in some cases. Follow your vehicle’s service manual to decide if flushing is appropriate.
Flushing may be needed in some cases; check your manual and follow recommended steps.
How do I know the thermostat is opening correctly after replacement?
You should see the thermostat opening as the engine warms up to its normal operating temperature. The radiator fans may engage as needed, and the temperature gauge should settle in the expected range.
When the engine warms, the thermostat should open; you’ll see steady cooling and normal gauge readings.
Is thermostat replacement difficult for a DIYer?
The task is doable for many DIYers with basic mechanical skills, but it can be challenging on tight engine bays. If you’re unsure, consult a service manual or a professional.
It’s doable for many DIYers, but some cars have tight spaces—check your manual first.
Watch Video
What to Remember
- Prepare the workspace and safety steps first.
- Replace with the correct thermostat and gasket.
- Orient the thermostat correctly to ensure proper opening.
- Bleed the cooling system to remove air pockets.
- Test drive to confirm no leaks and proper temperature control.