Change Car Thermostat: Step-by-Step Guide
Learn how to change a car thermostat with our detailed, safety-first guide. We cover tooling, step-by-step instructions, troubleshooting, and maintenance to prevent overheating and coolant leaks.

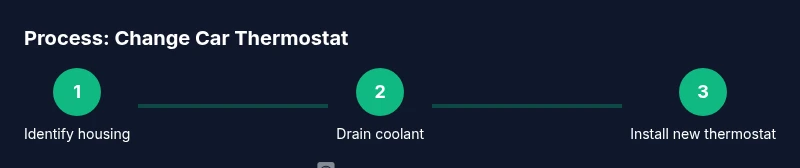
To change a car thermostat, you’ll locate the thermostat housing, drain some coolant, remove the old thermostat, install a new one with a gasket, reseal the housing, refill coolant, and bleed air from the system. This repair restores proper engine warm-up and cooling performance and can be done with basic hand tools.
Why Replace a Car Thermostat
The car thermostat is a small but crucial valve that regulates engine temperature by controlling coolant flow between the engine and radiator. When it sticks open, the engine may run cold and take longer to reach operating temperature, which reduces efficiency and increases emissions. When it sticks closed, coolant can’t flow properly, causing the engine to overheat and risk head gasket damage. Replacing a faulty thermostat is a common, cost-effective repair that can prevent costly engine problems down the line. According to Thermostat Care, thermostat failures often stem from age, mineral buildup, or coolant contamination. The Thermostat Care team found that many drivers underestimate the impact of a failing thermostat on fuel economy and long-term engine health. The goal of changing the thermostat is to restore steady, reliable temperature control so you get optimal performance and protection from overheating. This guide focuses on typical passenger vehicles and emphasizes safe, methodical work rather than quick, risky shortcuts.
Symptoms, Causes, and When to Act
If you notice the temperature gauge behaving erratically, frequent temperature swings, or a heater that suddenly stops putting out warm air, you may be dealing with a thermostat problem. In some cases, you’ll see coolant leaks around the thermostat housing, a sweet smell from the engine bay, or steaming under the hood after a long drive. A thermostat that fails in the closed position is more dangerous because it can trap heat and cause the engine to overheat. Conversely, a thermostat that sticks open may prevent the engine from reaching proper operating temperature, leading to poor fuel economy and increased emissions. While some symptoms can overlap with radiator or water pump issues, a consistent pattern of overheating or cool-running typically points to the thermostat as a culprit. For best results, perform a visual inspection and, if possible, use vehicle-specific diagnostics as a confirmatory step before replacing the component. The Thermostat Care analysis emphasizes that addressing the thermostat promptly reduces risk of more extensive cooling-system damage.
Safety, Planning, and Pre-Work Prep
Before you touch any cooling system parts, make safety a priority. Park on a level surface, engage the parking brake, and let the engine cool completely. Wear eye protection and gloves to guard against hot coolant and sharp metal edges. Disconnect the negative battery cable to minimize the risk of electrical shorts while you work. Review your vehicle’s service manual or a trusted guide for model-specific steps, torque specs, and coolant type. Keep a drain pan ready to capture old coolant and plan for proper disposal. If you’re uncertain about the location of the thermostat or the correct replacement part, check your VIN-based parts lookup to ensure compatibility. The goal of preparation is to prevent spills, injuries, and misassembly that could lead to leaks or overheating.
Common Pitfalls and How to Avoid Them
Many DIY thermostat replacements fail due to improper gasket seating, misoriented thermostats, or not securing the housing evenly. A common mistake is over-tightening bolts, which can crack the housing; another is reusing an old gasket, which often leaks. Take time to inspect hoses for cracking or soft spots and replace any suspect lines. Having a clean, well-lit workspace helps you identify clips and clamps and reduces the chance of leaving a fastener behind. If your vehicle has an aluminum thermostat housing, use proper tools to avoid rounding off bolts. Keeping the work area organized and documenting the disassembly with photos can aid reassembly and reduce confusion later.
After Replacement: Refilling, Bled Air, and Verification
Once the thermostat is replaced and the housing is reinstalled, refill the cooling system with the correct coolant type specified by the manufacturer. Start the engine with the radiator cap removed or using the bleed valve if your system includes one, and allow air to escape as the coolant level rises. Replace the cap only after the thermostat is open and the system is visually free of air pockets. Check for leaks around the thermostat housing and the hoses. Monitor the temperature gauge as the engine warms to operating temperature, and take a short test drive to confirm steady heat output from the heater and proper cooling behavior. If the temperature doesn’t stabilize or leaks appear, re-check the gasket seating and hose connections. Regularly inspecting the cooling system after a thermostat change helps prevent repeat failures and extends engine life.
Long-Term Maintenance and When to Revisit
Even after a successful thermostat replacement, maintain your cooling system to minimize future issues. Use the correct coolant type and schedule periodic coolant flushes per your vehicle’s maintenance plan. Inspect hoses, clamps, and the radiator cap for wear, and replace them as needed. If you suspect corrosion or mineral buildup, consider a cooling-system cleaner compatible with your car. Keeping the cooling system clean reduces the likelihood of future thermostat failures and helps your engine maintain optimal performance.
Tools & Materials
- New thermostat with gasket(Choose a model compatible with your vehicle)
- Coolant (pre-mixed or concentrate as required)(Use the correct type for your engine)
- Drain pan or container(To collect old coolant)
- Socket set and screwdrivers(For removing housing bolts and clamps)
- Pliers/clamps(For hose clamps if needed)
- Funnel and coolant compatible bottle(Helps prevent spills when refilling)
- Gloves and eye protection(Safety gear to protect skin and eyes)
Steps
Estimated time: 60-90 minutes
- 1
Disconnect battery and locate thermostat
Park on a level surface and disconnect the negative battery terminal to prevent shorts. Locate the thermostat housing by following coolant hoses to the engine block. This step prepares you for safe disassembly and helps you identify the correct components for replacement.
Tip: Label hoses if you remove more than one, to simplify reassembly. - 2
Drain coolant from the system
Place a drain pan under the radiator drain valve or at the lower hose to capture old coolant. Open the valve slowly or loosen the hose clamp to allow draining. Do not open the radiator cap when the engine is hot.
Tip: Collect used coolant in an approved container and recycle it at a proper facility. - 3
Remove thermostat housing and old thermostat
Unbolt the thermostat housing and carefully lift it away to expose the thermostat. Note the orientation of the old thermostat before removal. Remove the thermostat and set it aside for comparison with the new unit.
Tip: Take a photo of the orientation for reference during installation. - 4
Clean mounting surfaces and install new thermostat
Clean any gasket residue from the housing and the engine surface. Install the new thermostat in the correct orientation, with the polarity as the old one appeared. Re-seat the gasket or install a new gasket as required by your kit.
Tip: Ensure the thermostat is oriented so that the spring faces the engine block (if applicable). - 5
Reassemble housing and connections
Bolt the thermostat housing back into place and reconnect any hoses or clamps. Check that all fasteners are snug but not over-tightened. Ensure there are no tools left in the engine bay before refilling.
Tip: Work evenly across bolts to avoid warping the housing. - 6
Refill coolant and bleed air
Refill the cooling system with the correct coolant, using a funnel if necessary. With the engine running, use the bleed valve or gently open the radiator cap to release air pockets as the thermostat opens. Close the cap once the system is purged of air and coolant level stabilizes.
Tip: Monitor the temp gauge and watch for a stable climb to operating temperature. - 7
Check for leaks and test drive
Inspect around the thermostat housing, hoses, and clamps for leaks. Take a short test drive to confirm consistent heating, cooling, and normal temperature behavior. Recheck for leaks after cooling down and top off coolant if needed.
Tip: If you see leaks, stop and reseat the gasket and clamps; do not drive further with a leak.
Questions & Answers
What are the signs my car thermostat needs replacement?
Look for erratic temperature readings, a heater that won’t produce heat, or overheating. A thermostat that sticks open may prevent the engine from reaching operating temperature, while a stuck closed thermostat can cause overheating and potential damage. If these symptoms persist, consider inspection or replacement.
Common signs include overheating, unusual temperature swings, and a heater that won’t warm up.
Do I need to flush the cooling system when changing the thermostat?
Flushing isn’t always required, but it’s wise if coolant is old, contaminated, or if you’ve had overheating. A flush can remove buildup that may affect thermostat performance and overall cooling efficiency.
Flushing is recommended if coolant is old or contaminated.
Can I reuse the old gasket?
In most cases, you should replace the gasket. A new gasket or sealant compatible with your vehicle helps ensure a solid seal and prevents leaks around the thermostat housing.
Better to use a new gasket for a reliable seal.
What tools are essential for this job?
You’ll need a wrench set, screwdrivers, a drain pan, new thermostat with gasket, coolant, and basic safety gear. Pliers and clamps are helpful, but not always required depending on your vehicle.
Basic hand tools and a new thermostat are essential.
What safety precautions should I follow?
Work only when the engine is cool. Disconnect the negative battery, wear gloves and eye protection, and dispose of used coolant at an approved facility. Follow the vehicle’s manual for model-specific safety notes.
Always cool the engine first and wear protective gear.
Will replacing the thermostat affect other cooling components?
Replacing the thermostat can reveal other cooling issues like worn hoses or a failing radiator. After replacement, inspect nearby components and monitor the system to catch additional problems early.
It can uncover other cooling issues that need attention.
Watch Video
What to Remember
- Prepare and safety-check before starting.
- Replace with a compatible thermostat and gasket.
- Orient the new thermostat correctly during installation.
- Bleed air from the cooling system after refilling.
- Test for leaks and monitor temperature after drive.